This Sysdig cheatsheet is a great guide of command-lines linux admins can use to get insights into their servers. Whether you've been an admin for one month or 20 years you've definitely used one if not all of these tools to troubleshoot an issue. Because we love Sysdig (naturally!) we also included a translation for each of these common operations into the sysdig command line or csysdig.Rather than attempt covering all options from manpages (which would have made for boring coverage of many esoteric, rarely-used switches), we've started from examples referenced at the most popular web pages you'd find when you search for terms like "strace examples", "htop examples", and so forth.Do you have favorites that aren't listed here? Let us know and we'll include them in future articles.
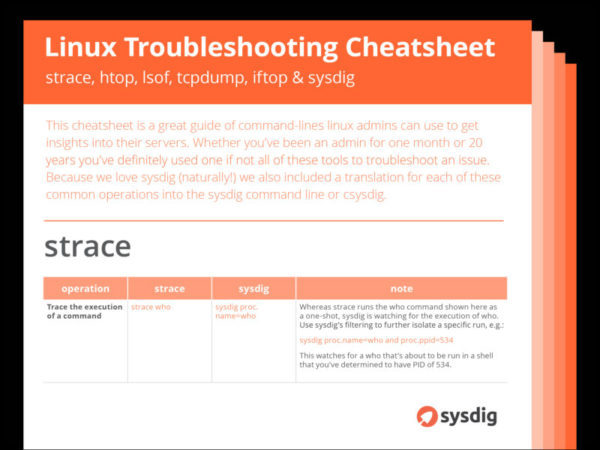
strace
There's one subtle difference between strace and sysdig that will be apparent in many of these side-by-side comparisons: Many of the simplest strace examples include command-lines that are executed and traced as a "one-shot" operation. On the other hand, Sysdig has a somewhat different philosophy, in that it either watches live events from afar as they happen, or analyzes capture data previously saved to a file. Thankfully, Sysdig's rich filtering options provide the knobs to watch for specific one-shot executions, as you'll soon see.
| Operation | strace | sysdig | Note |
|---|
| Trace the execution of a command | strace who | sysdig proc.name=who | Whereas strace runs the who command shown here as a one-shot, Sysdig is watching for the execution of who. Use Sysdig's filtering to further isolate a specific run, e.g.:sysdig proc.name=who and proc.ppid=534This watches for a who that's about to be run in a shell that you've determined to have PID of 534. |
| Trace only when certain/specific system calls are made | strace -e open whostrace -e trace=open,read who | sysdig evt.type=open and proc.name=whosysdig "evt.type in (open,read) and proc.name=who" | |
| Save a trace to a file | strace -o output.txt who | sysdig -w output.scap proc.name=who | With strace, the file produced contains the same text you'd have viewed on the screen if run interactively. With Sysdig, you get a raw, re-usable capture file, such that you can view the text output with:sysdig -r output.scapYou could also use this as the basis to apply filters or any other Sysdig functionality you want to apply as you revisit the original events. |
| Watch a running process with PID=1363 | strace -p 1363 | sysdig proc.pid=1363 | |
| Print a timestamp for each output line of the trace | strace -t who | sysdig proc.name=who | Sysdig prints timestamps by default. |
| Print relative time for system calls | strace -r who | sysdig -tD proc.name=who | Sysdig offers several more ways to represent timestamps via the -t option. |
| Generate batch statistics reports of system calls | strace -c who | sysdig -w output.scap proc.name=who
# Now run the "who" separatelyFor one-shot batch text reports:sysdig -r output.scap -c topscalls -c topscalls_timeOr for an interactive report that allows for further drill-down:csysdig -r output.scap -v syscalls | Sysdig's default behavior is more optimized for the case of presenting event data as it happens rather than "batch" reporting. This is why the Sysdig equivalent is done in two steps here. |
| Generate live, per-second statistics reports of system calls for running process with PID=1363 | N/A | csysdig -v syscalls proc.pid=1363 | While strace can show individual events as they happen live, or provide a single batch report for the execution of a command, csysdig's views provide a unique ability to show live, periodic reports |
htop
Since htop is a live, interactive, curses-style tool, we'll compare it to the live, interactive, curses-style csysdig.For starters, both tools use the same approach of navigating the live table via Up/Down/Left/Right arrows and also PgUp/PgDn. For operations that affect a single process (killing, renicing, etc.) it is assumed you've used these controls to first highlight a particular process.
| Operation | htop | csysdig | Note |
|---|
| Change sort order based on a column of the table | Press F6, <, or > and then select a column by name, orPress M, P, or Tto sort by Memory, Processor Usage, or TimePress I to invert the sort order | Press F9 or > and then select a column by name, orPress shift<1-9> to sort by any columnn, and press repeatedly to invert sort order, orMouse-click on a column header | |
| Kill a process | PressF9 or k | Pressk | |
| Renice a process | Press F7 or ] to reduce the nice value by 1Press F8 or [ to increase the nice value by 1 | Press ] to reduce the nice value by 1Press [ to increase the nice value by 1 | This illustrates how easy it is to customize Sysdig. I noticed when first writing this article that csysdig was missing a couple minor features like this, so I used the opportunity to learn how easy it is to write/modify Chisels, then put up my improvements as a Pull Request. You can do the same! |
| Display only processes started by a user named "phil" | Press u, thenSelect the user name phil from the list | Launch as:csysdig user.name=philOr mouse-click Filter: from within csysdig at the top of the default Processes view, then append and user.name=phil to the current filter text | |
| Change the output refresh interval to once every 5 seconds | Launch as:htop -d 50 | Launch as:csysdig -d 5000 | As you can see, htop works in units of tenths-of-a-second, while csysdig works in milliseconds. |
| Start a system call trace on a process | Press s to start an strace | Press F6 to start a sysdig | |
| List open files for a process | Press l to run a one-time lsof | Press f to run a one-time lsof Or to see real-time, updating reports of files/directories used by a process, drill down to a specific process by pressing Enter, then press F2 and select a View such as Files, File Opens List, or Directories. | See the Note above for "Renice a process" about how the one-time lsof was recently added as an enhancement. |
| Follow a process, such that it remains highlighted even as its order in the list changes | Press F | Default behavior is to always follow the highlighted process | |
lsof
| Operation | lsof | csysdig | Note |
|---|
| List all open files belonging to all active processes | lsof | sysdig -c lsof | |
| List processes that have opened the specific file /var/log/syslog | lsof /var/log/syslog | sysdig -c lsof "fd.name=/var/log/syslog" | |
| List processes that have opened files under the directory /var/log | lsof +d /var/log | sysdig -c lsof "fd.directory=/var/log" | |
| List files opened by processes named "sshd" | lsof -c sshd | sysdig -c lsof "proc.name=sshd" | |
| List files opened by a specific user named "phil" | lsof -u phil | sysdig -c lsof "user.name=phil" | |
| List files opened by everyone except for the user named "phil" | lsof -u ^phil | sysdig -c lsof "user.name!=phil" | |
| List all open files for a specific process with PID=1081 | lsof -p 1081 | sysdig -c lsof "proc.pid=1081" | |
| List all files opened by user "phil" or a process named "sshd" (OR logic) | lsof -u phil -c sshd | sysdig -c lsof "'user.name=phil or proc.name=sshd'" | Note the use of two layers of quotes with the Sysdig filter. |
| List all files opened by an "sshd" process for user "phil" (AND logic) | lsof -u phil -c sshd -a | sysdig -c lsof "'user.name=phil and proc.name=sshd'" | Note the use of two layers of quotes with the Sysdig filter. |
| Observe repeating reports of open files based on live activity | Enable repeat mode with one of:lsof -rlsof +r | Similar live data can be obtained with a live/interactive csysdig view, launched like so:csysdig -v filescsysdig -v file_opens | |
| List all network connections | lsof -i | sysdig -c lsof "fd.type=ipv4" | |
| List network connections in use by a specific process with PID=1014 | lsof -i -a -p 1014 | sysdig -c lsof "'fd.type=ipv4 and proc.pid=1014'" | Note the use of two layers of quotes with the Sysdig filter. |
| List processes that are listening on port 22 | lsof -i :22 | sysdig -c lsof "'fd.port=22 and fd.is_server=true'" | Note the use of two layers of quotes with the Sysdig filter. |
| List all TCP or UDP connections | lsof -i tcplsof -i udp | sysdig -c lsof "fd.l4proto=tcp"sysdig -c lsof "fd.l4proto=udp" | |
tcpdump
tcpdump is focused entirely on network traffic, while network traffic is only a subset of what Sysdig covers. Many tcpdump use cases involve filtering, and tcpdump uses network-specific BPF filters, whereas Sysdig uses its own broader Sysdig filtering. The two approaches look similar in many ways, but you'll want to look at the docs for each side-by-side as you progress to more advanced filtering needs. Also, since in Linux everything is a file, you'll notice the Sysdig filtering examples below all leverage a "network-connections-via-file-descriptors" approach.
| Operation | tcpdump | csysdig | Note |
|---|
| Capture packets from a particular interface eth0 (192.168.10.119) | tcpdump -i eth0 | sysdig fd.ip=192.168.10.119 | Sysdig does not currently have filtering based on named interfaces, but the equivalent via IP address is shown here. |
| Capture only 100 packets | tcpdump -c 100 | sysdig -n 100 fd.type=ipv4 | |
| Display captured packets in ASCII | tcpdump -A | sysdig -A fd.type=ipv4 | |
| Display captured packets in HEX and ASCII | tcpdump -XX | sysdig -X fd.type=ipv4 | |
| Capture packet data, writing it into into a file | tcpdump -w saved.pcap | sysdig -w saved.scap fd.type=ipv4 | The Sysdig file format is capable of holding event data for much more than just network packets (e.g. system calls). |
| Read back saved packet data from a file | tcpdump -r saved.pcap | sysdig -r saved.scap | |
| Capture only packets longer/smaller than 1024 bytes | tcpdump greater 1024tcpdump less 1024 | sysdig "fd.type=ipv4 and evt.buflen > 1024"sysdig "fd.type=ipv4 and evt.buflen < 1024" | The greater/less options in tcpdump reference overall packet length whereas evt.buflen in Sysdig is relative to payload size. |
| Capture only UDP or TCP packets | tcpdump udptcpdump tcp | sysdig fd.l4proto=udpsysdig fd.l4proto=tcp | Note that we don't need to explicitly include fd.type=ipv4 since we're using other network-only filters here. |
| Capture only packets going to/from a particular port | tcpdump port 22 | sysdig fd.port=22 | Note that we don't need to explicitly include fd.type=ipv4 since we're using other network-only filters here. |
| Capture packets for a particular destination IP and port | tcpdump dst 54.165.81.189 and port 6666 | sysdig fd.rip=54.165.81.189 and fd.port=6666 | Note that we don't need to explicitly include fd.type=ipv4 since we're using other network-only filters here. |
iftop
Since iftop is a live, interactive, curses-style tool, we'll compare it to the live, interactive, curses-style csysdig. Also, like tcpdump, iftop uses BPF filters. See the previous intro to the section on tcpdump for more detail about filtering differences.
| Operation | iftop | csysdig | Note |
|---|
| Display a table of current bandwidth usage between pairs of hosts | iftop | Launch as:csysdig -v connectionsOr press F2 from within csysdig to change the View, then up-arrow to select Connections | By default iftop watches just the first interface it finds, whereas by default csysdig watches traffic across the entire host. |
| Turn on display of network ports | Launch as:iftop -POr press p from within iftop | Default behavior is to always display ports | |
| Observe traffic for just the eth0 interface (192.168.10.119) | Launch as:iftop -i eth0 | Launch as:csysdig -v connections fd.ip=192.168.10.119Or mouse-click on Filter: from within csysdig, then append and fd.ip=192.168.10.119 to the existing filter text | sysdig/csysdig do not currently have filtering based on named interfaces, but the equivalent via IP address is shown here. |
| Resolve DNS names | Press n from within iftop to toggle resolution for all hosts shown | Press n from within csysdig to run nslookup on the currently-highlighted remote host | |
| Change sort order based on a column of the table | Press to sort by destination | Press F9 or > and then select a column by name, orPress shift <1-9> to sort by any columnn, and press repeatedly to invert sort order, orMouse-click on a column header | |
| Filter to show only traffic going to/from IP address 54.84.222.1 | Launch as:iftop -f "host 54.84.222.1" | Launch as:csysdig -v connections fd.ip=54.84.222.1Or mouse-click on Filter: from within csysdig, then append and fd.ip=54.84.22.1 to the existing filter text | |
| Pause the display | Press P | Press p | |
| Scroll the display | Press j to scroll upPress k to scroll down | Press Up/Down/Left/Right arrows or PgUp/PgDn to scroll through the table | sysdig/csysdig go well beyond scrolling through a single-table, since you can drill down into the Connections View to see data in other groupings such as per-container or per-thread. |
A linux troubleshooting cheatsheet: strace, htop, lsof, tcpdump, iftop & sysdig https://t.co/XeIeAwwj9i
— Sysdig (@sysdig)April 14, 2016
Sysdig CheatSheet Acknowledgements
The author would like to acknowledge thegeekstuff.com, as most of the example-filled articles used for the table above were found at their site.Would you like a downloadable PDF version of this cheatsheet?Grab it here.