


Falco Feeds extends the power of Falco by giving open source-focused companies access to expert-written rules that are continuously updated as new threats are discovered.

This article will show you how to leverage the Sysdig Terraform provider to follow Secure GitOps principles and use security as code in your infrastructure to define Alerts, Rules, and Policies.Messing up a configuration can have terrible consequences. Néstor is a security engineer, setting up all the image scanning policies for his company. In one of those policies he selected the wrong options by mistake and vulnerable images started getting deployed in the production cluster. This error goes unnoticed until one day security events start flooding Néstor dashboard, someone is exploiting those vulnerabilities! How can Néstor find the source of the problem now? How can he know when the mistake was made, and by who? What can he do to avoid this issue in the future?If Néstor had followed GitOps principles all that configuration would have been done as code, committed into a git repository (the single source of truth), and reviewed by the whole team. In case his error passed the reviews, a quick investigation would have revealed who and when changed the messed configuration, and fixing the issue would be as easy as reverting the configuration changes.
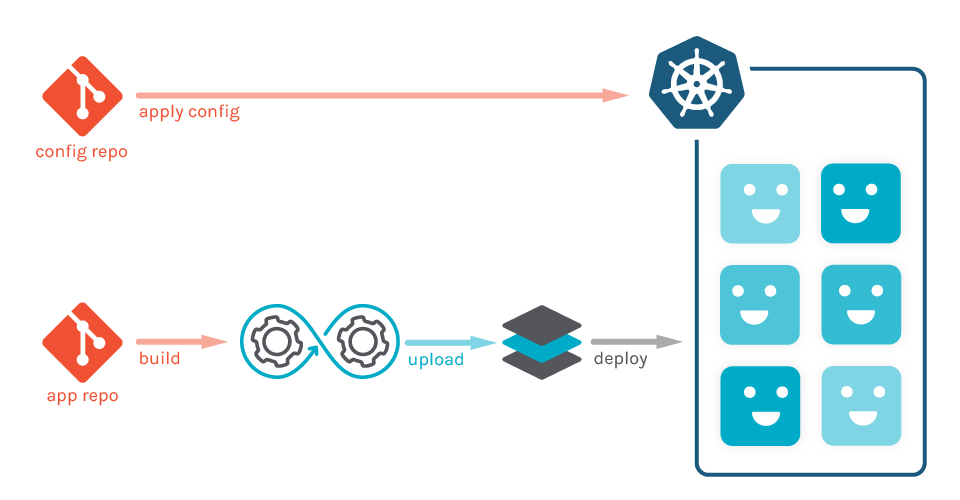
Terraform is a wonderful tool to define infrastructure as code, and is commonly used to implement GitOps. The Sysdig's Terraform provider expands on it, and enables you to define some of Sysdig elements as Terraform resources, including alerts from Sysdig Monitor and rules and policies from Sysdig Secure.
With the Sysdig Terraform provider you can include secure into your GitOps workflows, and this article will guide you to succeed on it. Are you still manually managing your security? Embrace GitOps and use Sysdig's Terraform provider to define security as code, describing some of Sysdig elements as Terraform resources, including alerts, rules and policies. Click to tweet
Sysdig Terraform provider installation
You can install the Sysdig Terraform Provider by cloning the repository and building it yourself or download a precompiled version.If you want to build it you will need to have the Go Programming Language >= 1.12 installed in your system.Then manually move the terraform-provider-sysdig executable into the user plugins directory, located at %APPDATA% erraform.dplugins on Windows and ~/.terraform.d/plugins on other systems.
Sysdig Terraform provider usage
First of all, you need to tell Terraform that we are going to use the Sysdig provider and that all the following configuration will be handled by this module, to do so, write a file called provider.tf:provider "sysdig" { }Now Terraform will use the provider to handle all the resource definitions in the file. You need the Sysdig Monitor and Sysdig Secure API token so Terraform can execute all the required actions against the Sysdig backend, so write this information in the provider.tf file:provider "sysdig" {
sysdig_monitor_api_token = ""
sysdig_secure_api_token = ""
}If you don't want to put the secrets on a plain text file, you can use the SYSDIG_MONITOR_API_TOKEN and SYSDIG_SECURE_API_TOKEN environment variables to provide the tokens. If you don't provide those tokens in any of those two ways, Terraform will prompt you to input them when executed interactively.In this example we will create a pair of rules able to detect SSH connections and shells spawned in containers.We start by defining a couple of rules in the rules.tf file. One rule will detect inbound and outbound connections made to the port 22, and the other will detect a shell process being spawned.resource "sysdig_secure_rule_network" "disallowed_ssh_connection" {
name = "Disallowed SSH Connection detected" // ID
description = "Detect any new ssh connection to a host"
tags = ["network"]
block_inbound = true
block_outbound = true
tcp {
matching = true
ports = [22]
}
}
resource "sysdig_secure_rule_process" "terminal_shell" {
name = "Terminal shell detected" // ID
description = "A shell was used as the entrypoint/exec point"
tags = ["shell"]
processes = ["ash", "bash", "csh", "ksh", "sh", "tcsh", "zsh", "dash"]
}Now we are going to create a policy in a file called policy.tf to define how these rules are applied. The policy will stop the affected container and trigger a capture for further troubleshooting.resource "sysdig_secure_policy" "terminal_shell_or_ssh_in_container" {
name = "Terminal shell or SSH detected in container"
description = "Detects a terminal shell or a ssh spawned in a container"
enabled = true
severity = 0 // HIGH
scope = "container.id != \"\""
rule_names = [sysdig_secure_rule_network.disallowed_ssh_connection.name,
sysdig_secure_rule_process.terminal_shell.name]
actions {
container = "stop"
capture {
seconds_before_event = 5
seconds_after_event = 10
}
}
}With the given scope, the policy will only be applied to processes being executed inside containers:scope = "container.id != \"\""
Let's do a terraform apply to apply these resources in the backend:
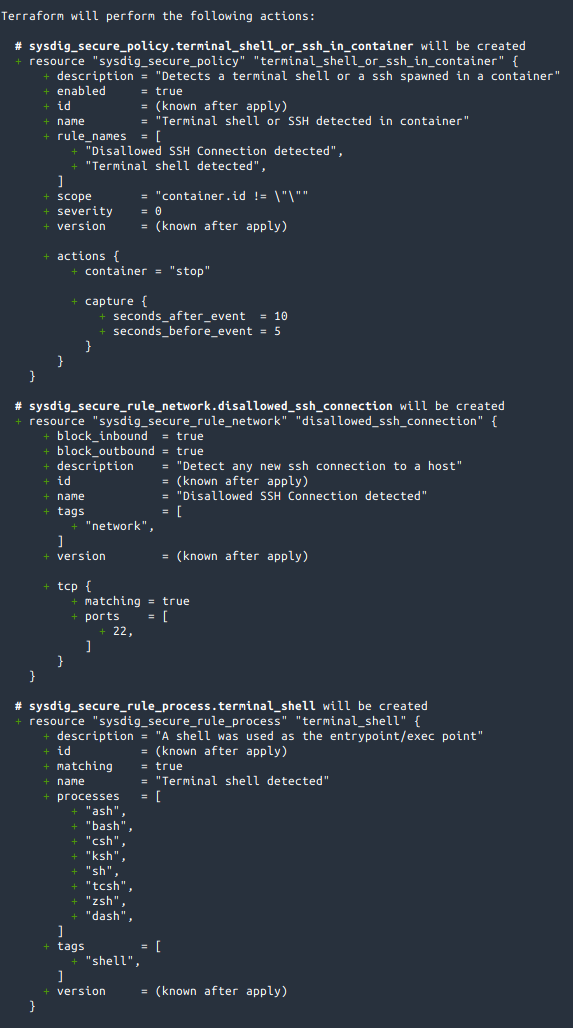
Terraform tells us that is going to create 3 resources, which matches what we defined in rules.tf and policy.tf.
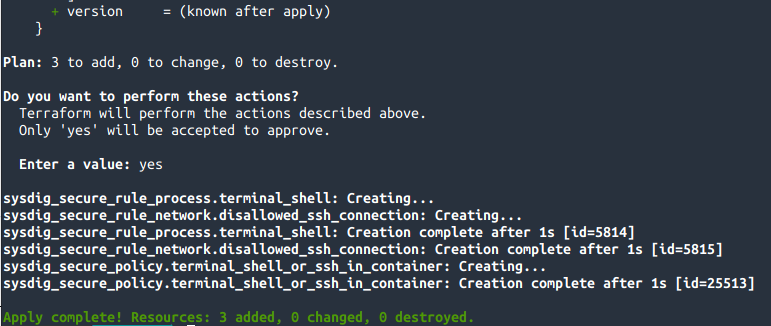
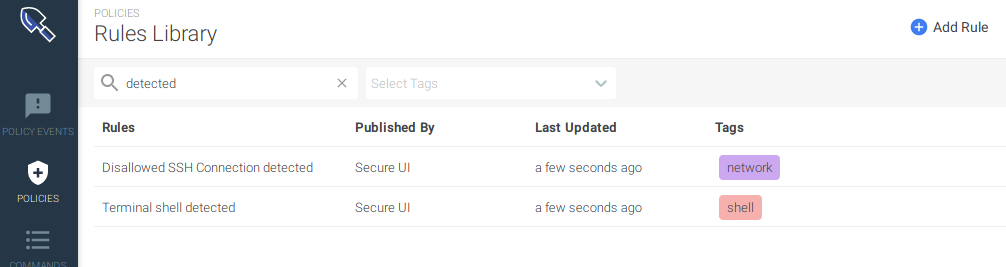
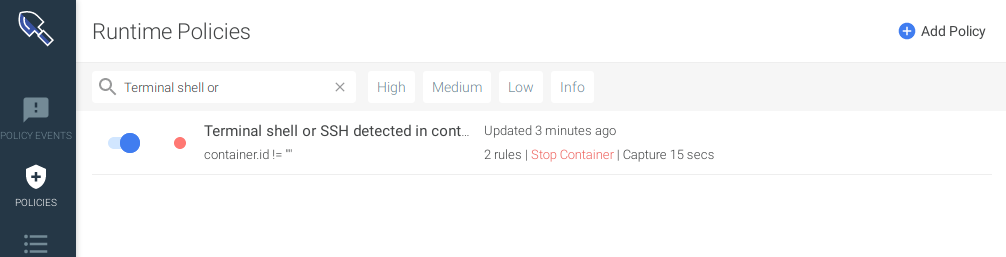
After applying the plan, Terraform reports that the 3 resources have been successfully created. The policy uses the rules created before, that's why it's the last one being created.The resources have been created, let's see how they look in Sysdig Secure:
Now we are protected against terminal shells or SSH connections in our container infrastructure using security as code. But wait, if this policy triggers we won't notice unless we define a notification channel. Let's create two notification channels, one for the email and another one for slack in a file called notification.tf:resource "sysdig_secure_notification_channel_email" "devops-email" {
name = "DevOps e-mail"
enabled = true
recipients = "devops@example.com"
notify_when_ok = false
notify_when_resolved = false
}
resource "sysdig_secure_notification_channel_slack" "devops-slack" {
name = "DevOps Slack"
enabled = true
url = "https://hooks.slack.com/services/32klj54h2/34hjkhhsd/wjkkrjwlqpfdirej4jrlwkjx"
channel = "#devops"
notify_when_ok = false
notify_when_resolved = false
}
Let's bind them to the policy as well modifying the file policy.tf, note the notification_channels property:resource "sysdig_secure_policy" "terminal_shell_or_ssh_in_container" {
name = "Terminal shell or SSH detected in container"
description = "Detects a terminal shell or a ssh spawned in a container"
enabled = true
severity = 0 // HIGH
scope = "container.id != \"\""
rule_names = [sysdig_secure_rule_network.disallowed_ssh_connection.name,
sysdig_secure_rule_process.terminal_shell.name]
actions {
container = "stop"
capture {
seconds_before_event = 5
seconds_after_event = 10
}
}
notification_channels = [sysdig_secure_notification_channel_email.devops-email.id,
sysdig_secure_notification_channel_slack.devops-slack.id]
}
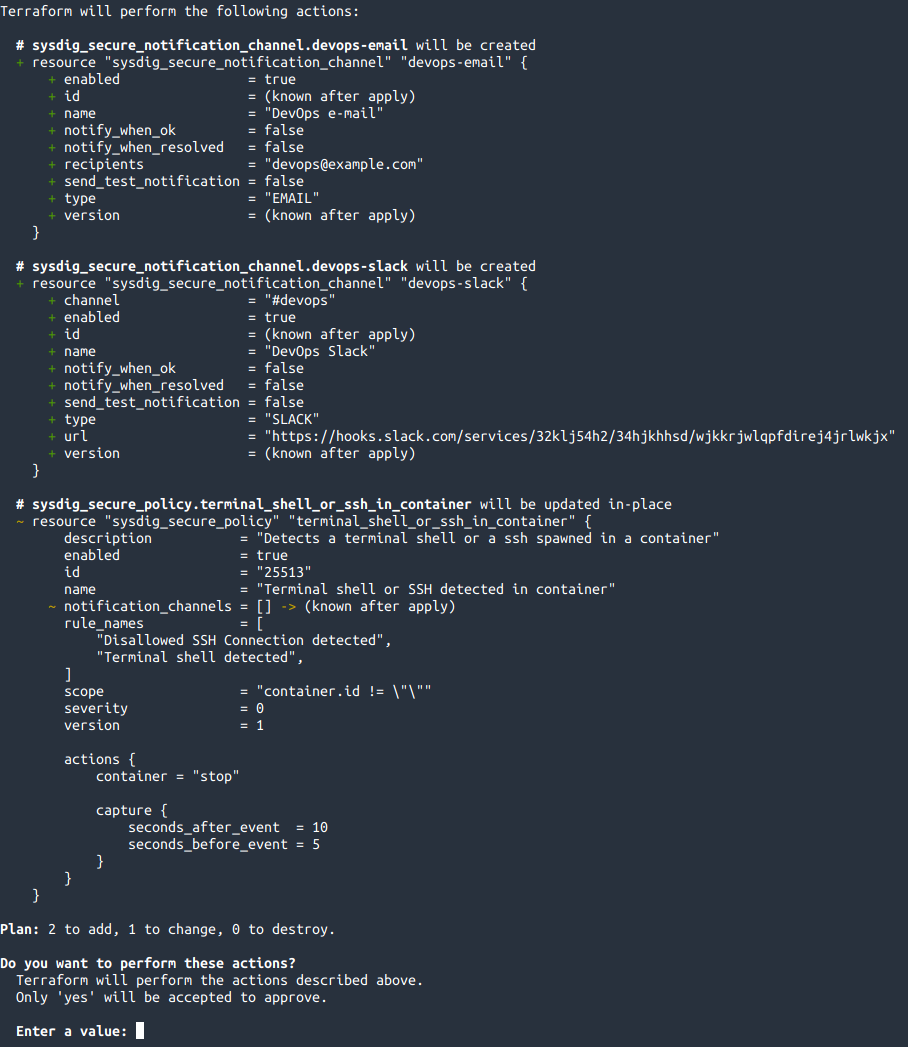
If we do a terraform apply, it will tell us that it will create 2 new resources and modify the existing policy:
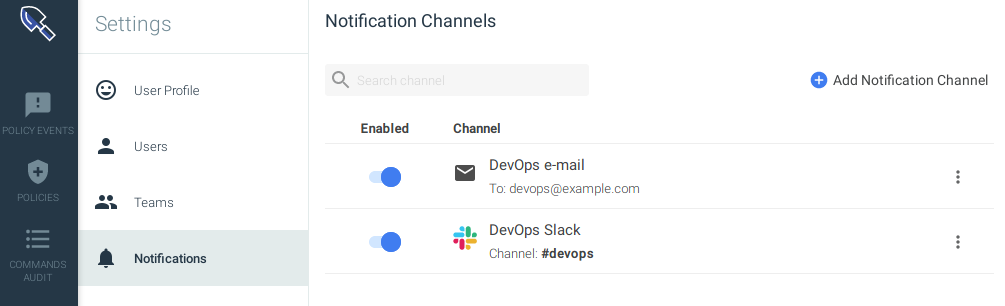
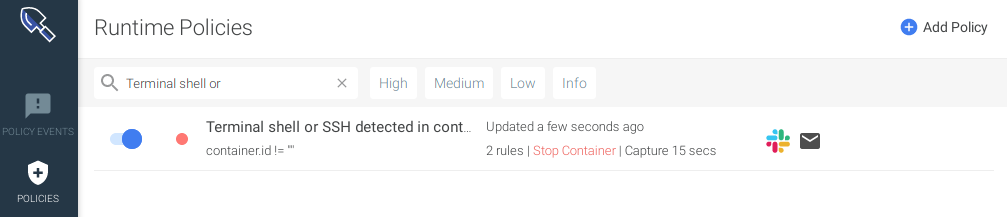
After inputting "yes", Terraform will create the notification channels and bind them to the policy, ensuring that the state in Monitor and Secure matches our state defined in the code.We can see those new resources appearing on Sysdig UI:
Cleaning up resources created with Sysdig Terraform provider
Do you want to destroy everything that was created? Sure thing, Terraform will handle it seamlessly with terraform destroy:
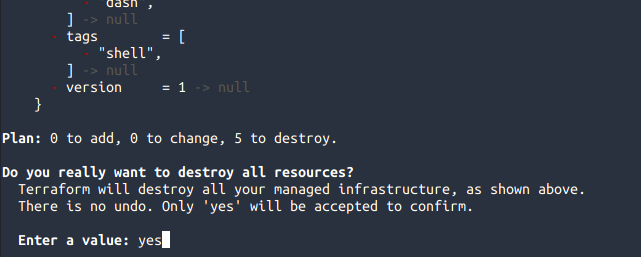
We input "yes" and everything will be destroyed:
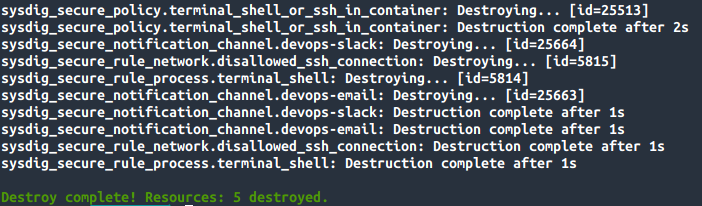
Be aware that Terraform will only keep track of the resources it created, and that it's not aware of other resources manually created in the infrastructure.
Conclusion
As you can see, creating, modifying and removing resources using Terraform is really easy, as is keeping track of the changes and reverse them. That's the real power of Security as Code in the GitOps world.Try out our open source Terraform provider for Sysdig today, and feel free to contribute! Also, take a look at the full list of Sysdig's ecosystem integrations.