


Falco Feeds extends the power of Falco by giving open source-focused companies access to expert-written rules that are continuously updated as new threats are discovered.

Implementing AWS threat detection with Sysdig Secure takes just a few minutes. Discover how to improve the security of your cloud infrastructure using AWS CloudTrail and Sysdig Cloud Connector.
With the rise of microservices and DevOps practices, a new level of dangerous actors threatens the cloud environment that governs all of your infrastructure. A malicious or inattentive cloud API request could have a sizable impact on availability, performance, and last but not least, billing.
GitOps practices help mitigate this problem by treating infrastructure changes as code, with the same level of peer-review processes. But then again, shadow ops shortcuts, or manual changes not recorded in the GitOps repository, are still a possibility that can't be neglected. It might be a malicious agent using compromised credentials, or a developer in good faith that urgently needs a temporary infra resource, and that resource ends up living too long without proper security inspection.
Imagine a scenario where one of your critical services has suddenly stopped working. One of your DevOps engineers starts investigating and, after a few hours of work, she finally discovers that someone manually changed a firewall rule critical for the failing service. But, even worse, that wasn't the only change. She just discovered that many other firewall rules have been manually added and edited over time. It was only luck that one of those modifications blocked a critical service and triggered the investigation.
How can you keep track of the growing number of AWS services constantly being added to your infrastructure? And also, how do you keep up with several AWS accounts in the organization, while being aware of all best practices for detecting cloud exploits?
This is called threat detection via operational security, and in this article we will explain how to audit those events with AWS CloudTrail, how to detect which ones are a threat using the Sysdig Cloud Connector, and how to raise a notification so you can address those security events at the earliest.
AWS CloudTrail as the source of truth for operational audit
AWS CloudTrail is a service that enables governance, compliance, operational auditing, and risk auditing for your AWS account. With it, you can log, monitor, and retain account activity related to actions (configuration changes, events created/deleted/modified) across your entire AWS infrastructure.
Every action you take over your infrastructure resources will result in a CloudTrail registry. It includes all AWS account activity, actions taken through the AWS Management Console, AWS SDKs, command line tools, and other AWS services.
This event history is useful for security analysis, resource change tracking, troubleshooting, and in general, detecting unwanted or unexpected activity involving your AWS resources.
As your infrastructure grows, the amount of events and operational trails can become so huge that analyzing them is not tractable anymore. In addition, failing to react to a threat in a short time could potentially have major consequences.
Solving this challenge is precisely the goal of the Sysdig Cloud Connector. Once it is deployed in your infrastructure, the Connector is capable of analyzing every CloudTrail entry in real time, and then provides AWS threat detection by evaluating those events against a flexible set of security rules.
Sysdig Cloud Connector: AWS threat detection made easy and flexible
Let's discuss on a more technical level how the Sysdig Cloud Connector integrates with AWS CloudTrail to provide AWS threat detection.
The recommended Cloud Connector deployment follows an ECS Fargate serverless approach:
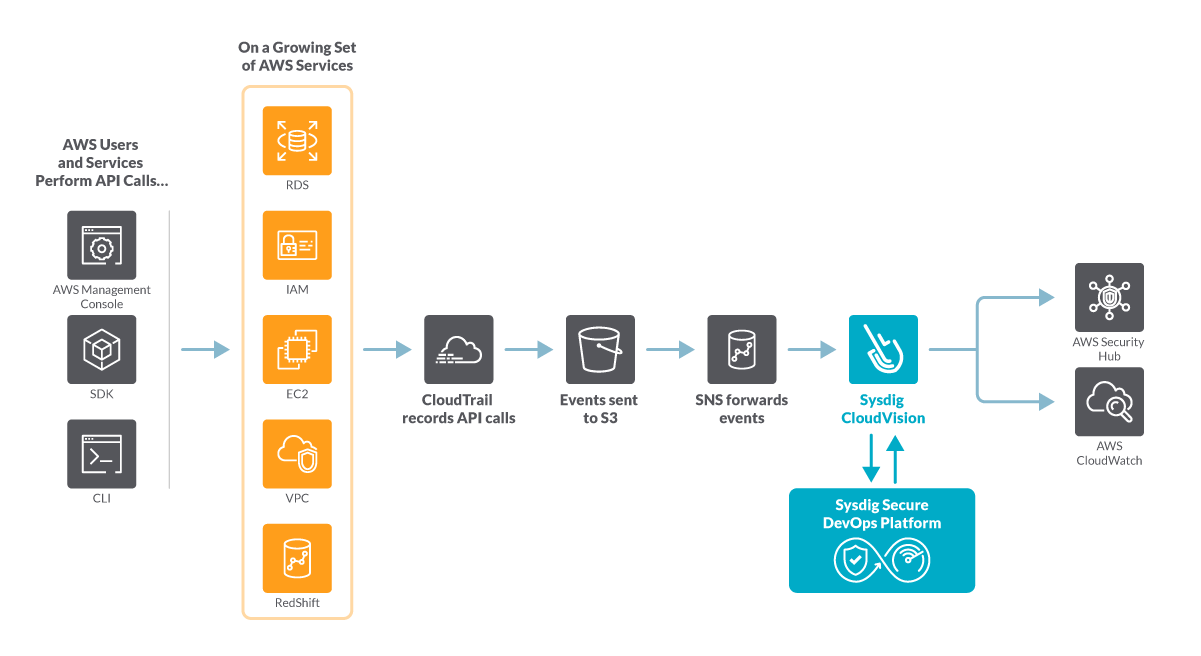
CloudTrail events are fetched via a AWS Simple Notification Service (SNS) topic. The incoming events will be stored in an S3 bucket that are periodically pushed to the SNS topic.
A subscription in the SNS topic will then forward the events to the Cloud Connector endpoint. The Cloud Connector will then analyze each event against a configured set of Falco rules.

Falco, the open-source cloud-native runtime security project, detects unexpected application behavior and alerts on runtime threats. The Falco rule language has become the standard to define abnormal behavior in the cloud, and its flexibility allows for fine-grained customization to your operational needs.
A new set of out-of-the-box Falco rules for CloudTrail is available in the Sysdig Cloud Connector. They will save you a lot of time getting started, and you can complement this library with your own custom rules to detect any cloud command.
The included out-of-the-box CloudTrail rules can detect events like:
- Add an AWS user to a group.
- Allocate a New Elastic IP Address to AWS Account.
- Associate an Elastic IP Address to an AWS Network Interface.
- Attach an Administrator Policy.
- CloudTrail logging disabled.
- Create an HTTP Target Group without SSL.
- Create an AWS user.
- Create an Internet-facing AWS Public Facing Load Balancer.
- Deactivate MFA for user access.
- Delete bucket encryption.
- Put inline policy in a group to allow access to all resources.
These rules are also mapped against NIST 800-190 security standard controls. Although this standard is centered towards container security, many of these cloud commands can also compromise containerized workloads. More compliance mapping for additional security standards like PCI or CIS will be provided in the future.
Sysdig Cloud Connector provides several notification options, including sending security findings to AWS Security Hub, so you can review the security events without leaving your AWS console.
The Cloud Connector can be deployed in a matter of minutes with a CloudFormation template. Let's drill into this deployment process.
Setting up AWS threat detection with Sysdig Secure
The installation process for Sysdig Cloud Connector is fairly simple thanks to the power of the CloudFormation templates. However, before you apply the template, you'll need to enable AWS Security Hub for your account.
Enabling AWS Security Hub
First, make sure you are logged into your AWS account with your browser. Then, visit this link to AWS Security Hub.
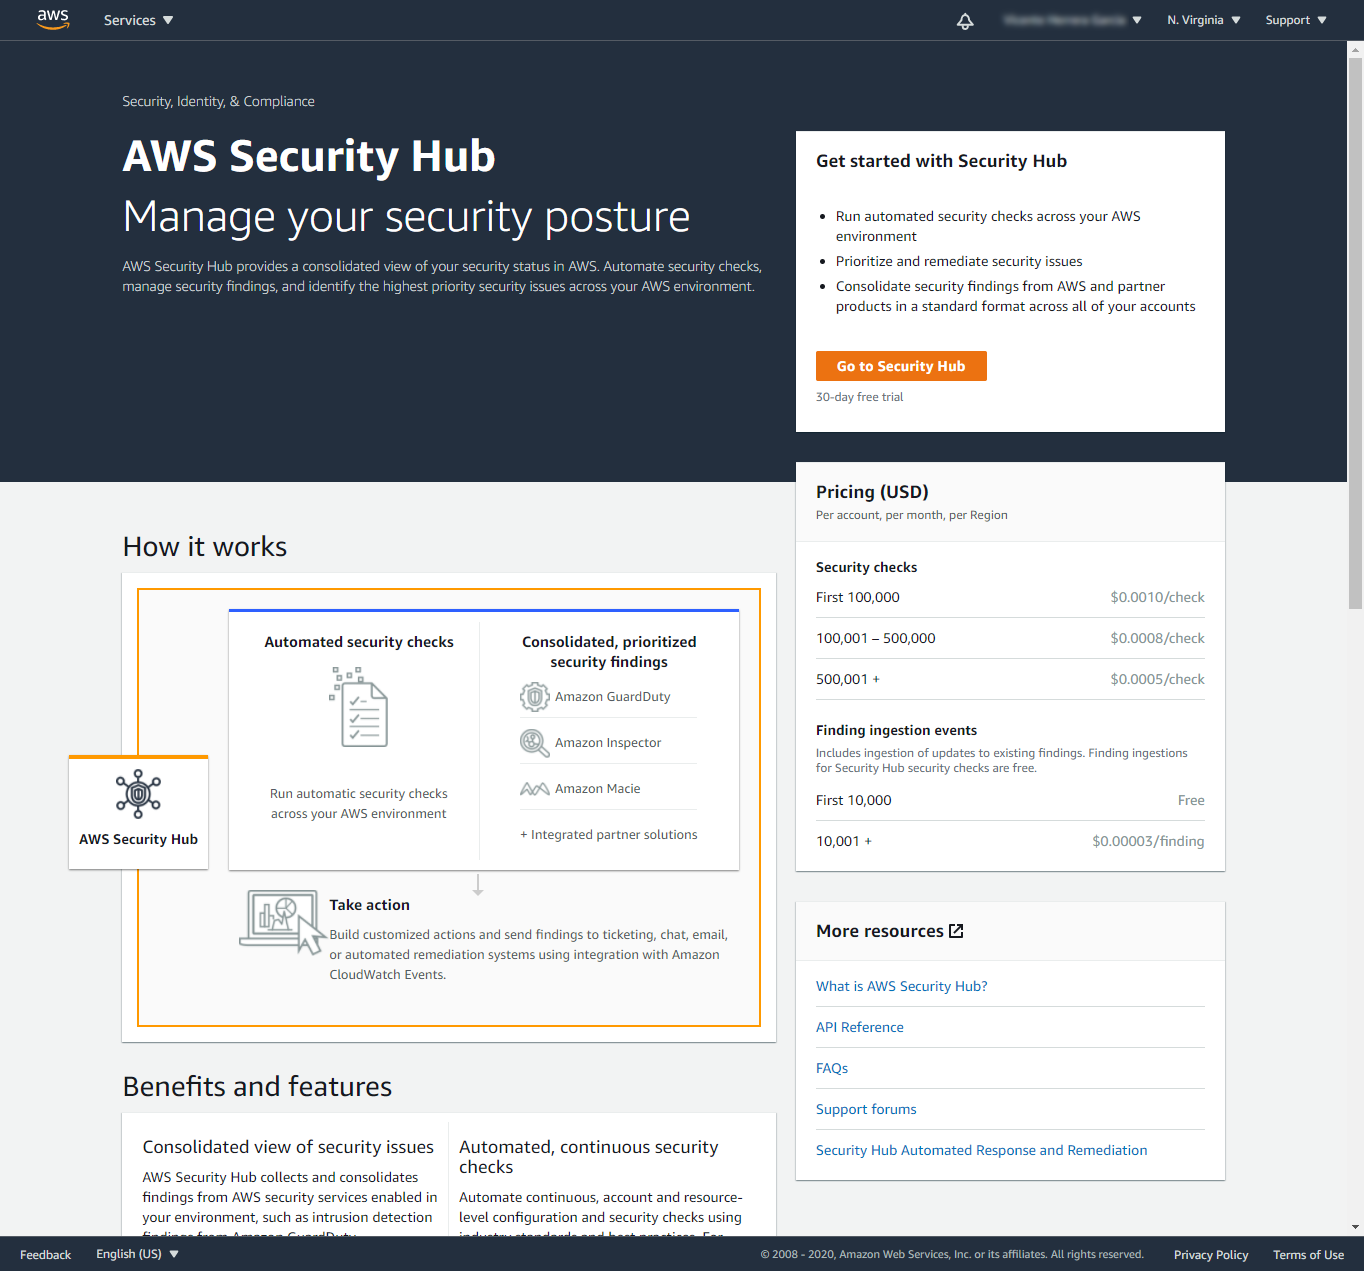
If you see this "Get started with Security Hub" page with a button to Go to Security Hub, press it.
On the other hand, if you see the Summary web page (shown later here), you can skip to the Installing the CloudFormation template section.
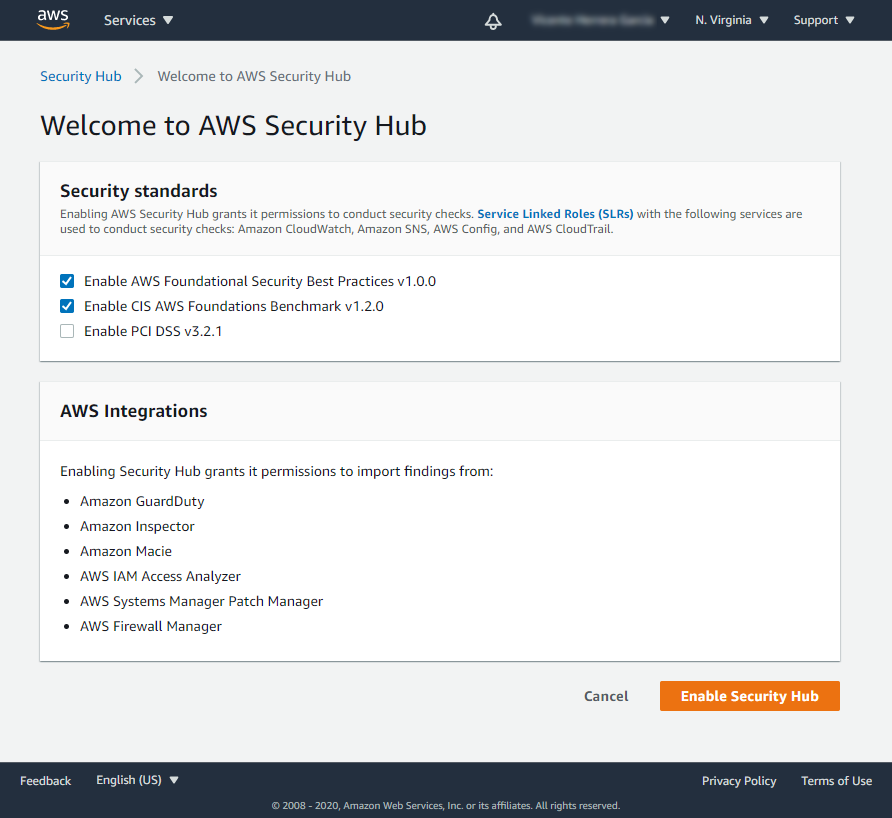
In the "Welcome to AWS Security Hub" page, you can indicate which security standard controls you want to enable. These controls are part of the default AWS Security Hub mechanism for gathering findings, and they are not related to the detections that Sysdig Cloud Connector is going to find for you.
Select the controls you want to use (you can change your mind later), and press on the Enable Security Hub button.
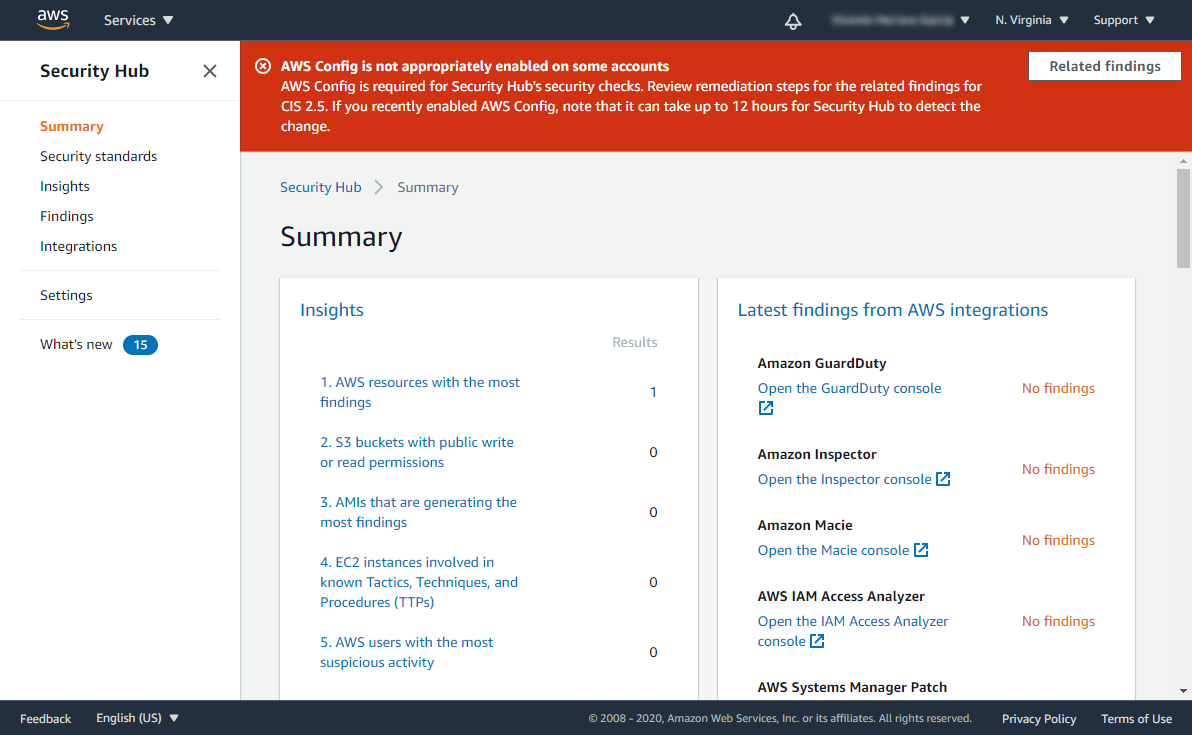
The "Summary" page for Security Hub will be shown. You may see a temporary red warning about AWS Config not being appropriately enabled, but it will disappear on its own once the Security Hub detects that the activation has been made. It has no relation to the use of Sysdig Cloud Connector.
Installing the CloudFormation template.
To install the Sysdig Cloud Connector, navigate to the "CloudFormation template for Sysdig Cloud Connector deployment" template. It will preview the CloudFormation template.
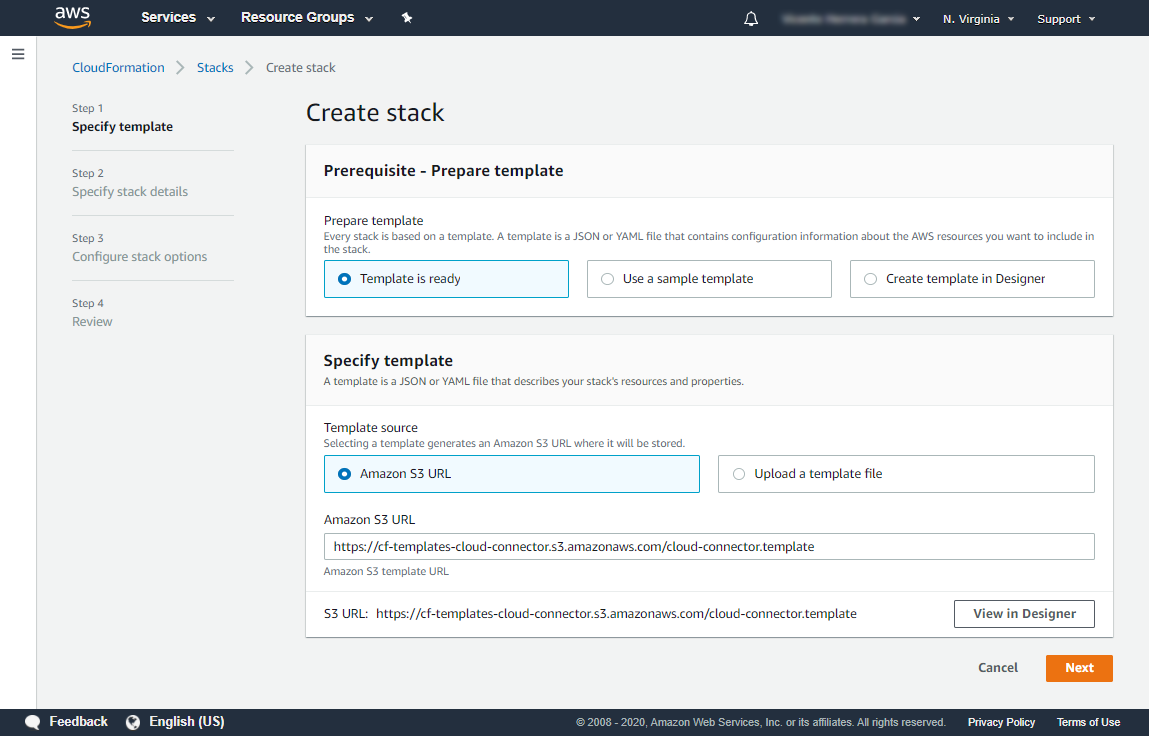
On the "Create stack" section, click the Next button to start setting up the template.
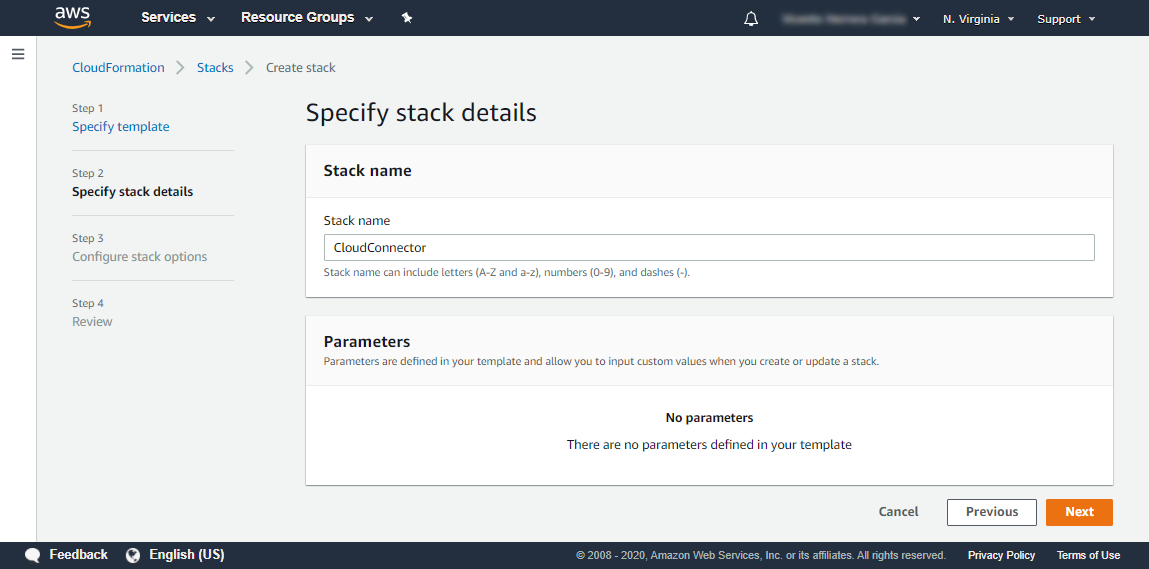
The "Specify stack details" section has no parameters for you to configure, so you can just press the Next button.
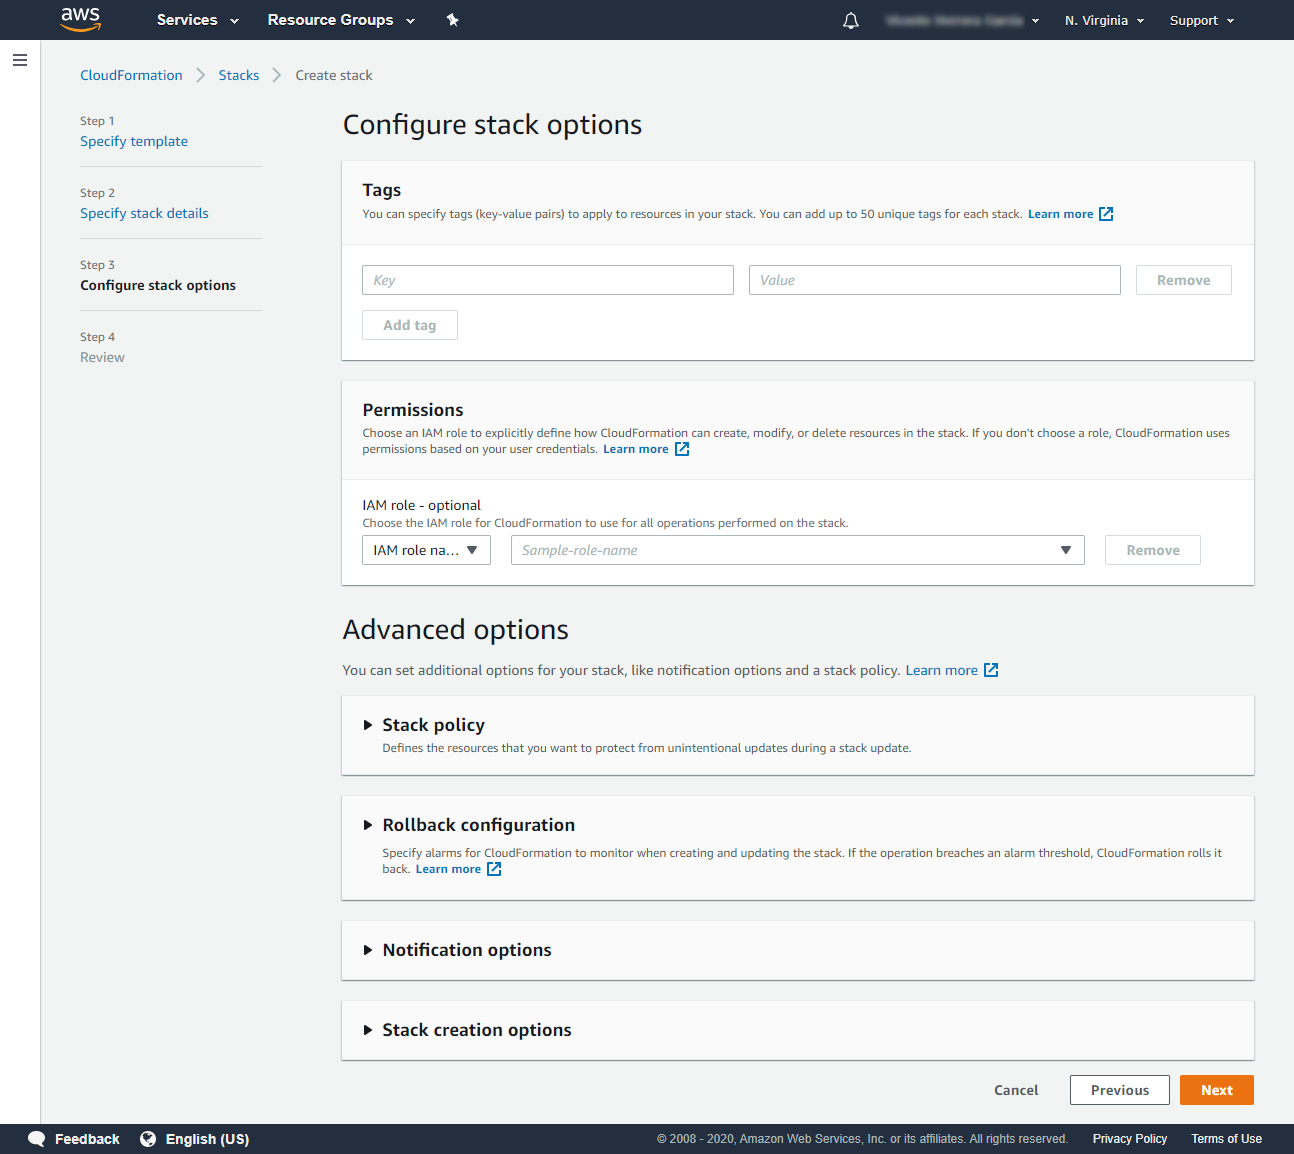
On "Configure stack options," you can optionally add tag keys and values to the deployment, but no further configuration is required.
When ready, press the Next button.

The last step will present a summary of all the parameters you previously introduced.
Check that everything is correct.
Notice that dedicated IAM roles will be created to perform the scanning. They are required for this deployment to work. We know IAM is a delicate service, so we designed those roles following the "least privilege principle" to enforce maximum security.
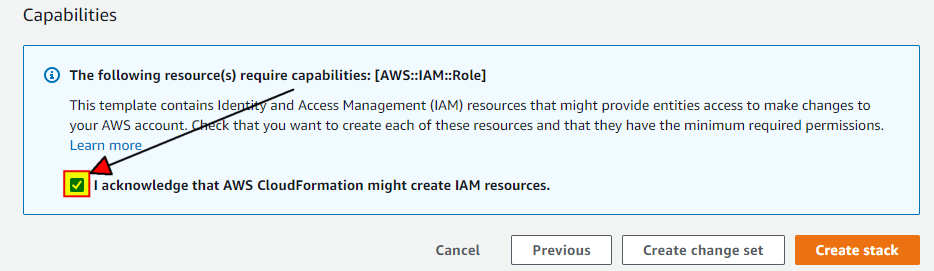
Once you are happy with the plan, acknowledge it by marking the checkbox, and then press the Create stack button.
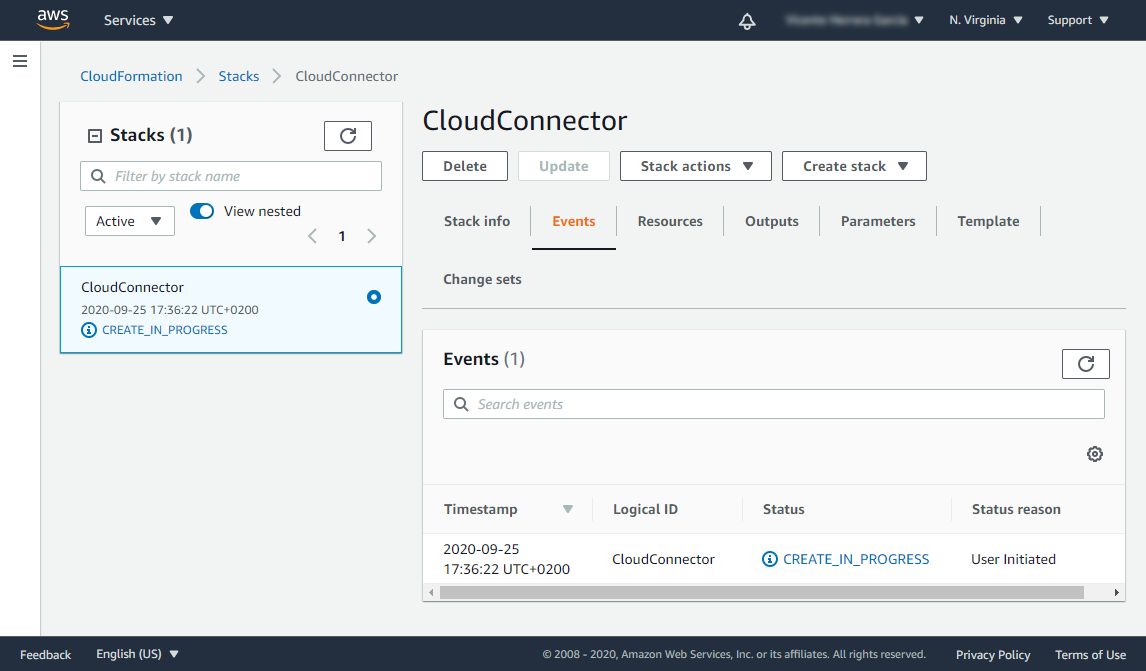
On the CloudFormation dashboard, you should see the template in CREATE_IN_PROGRESS state. The creation process may take some time.
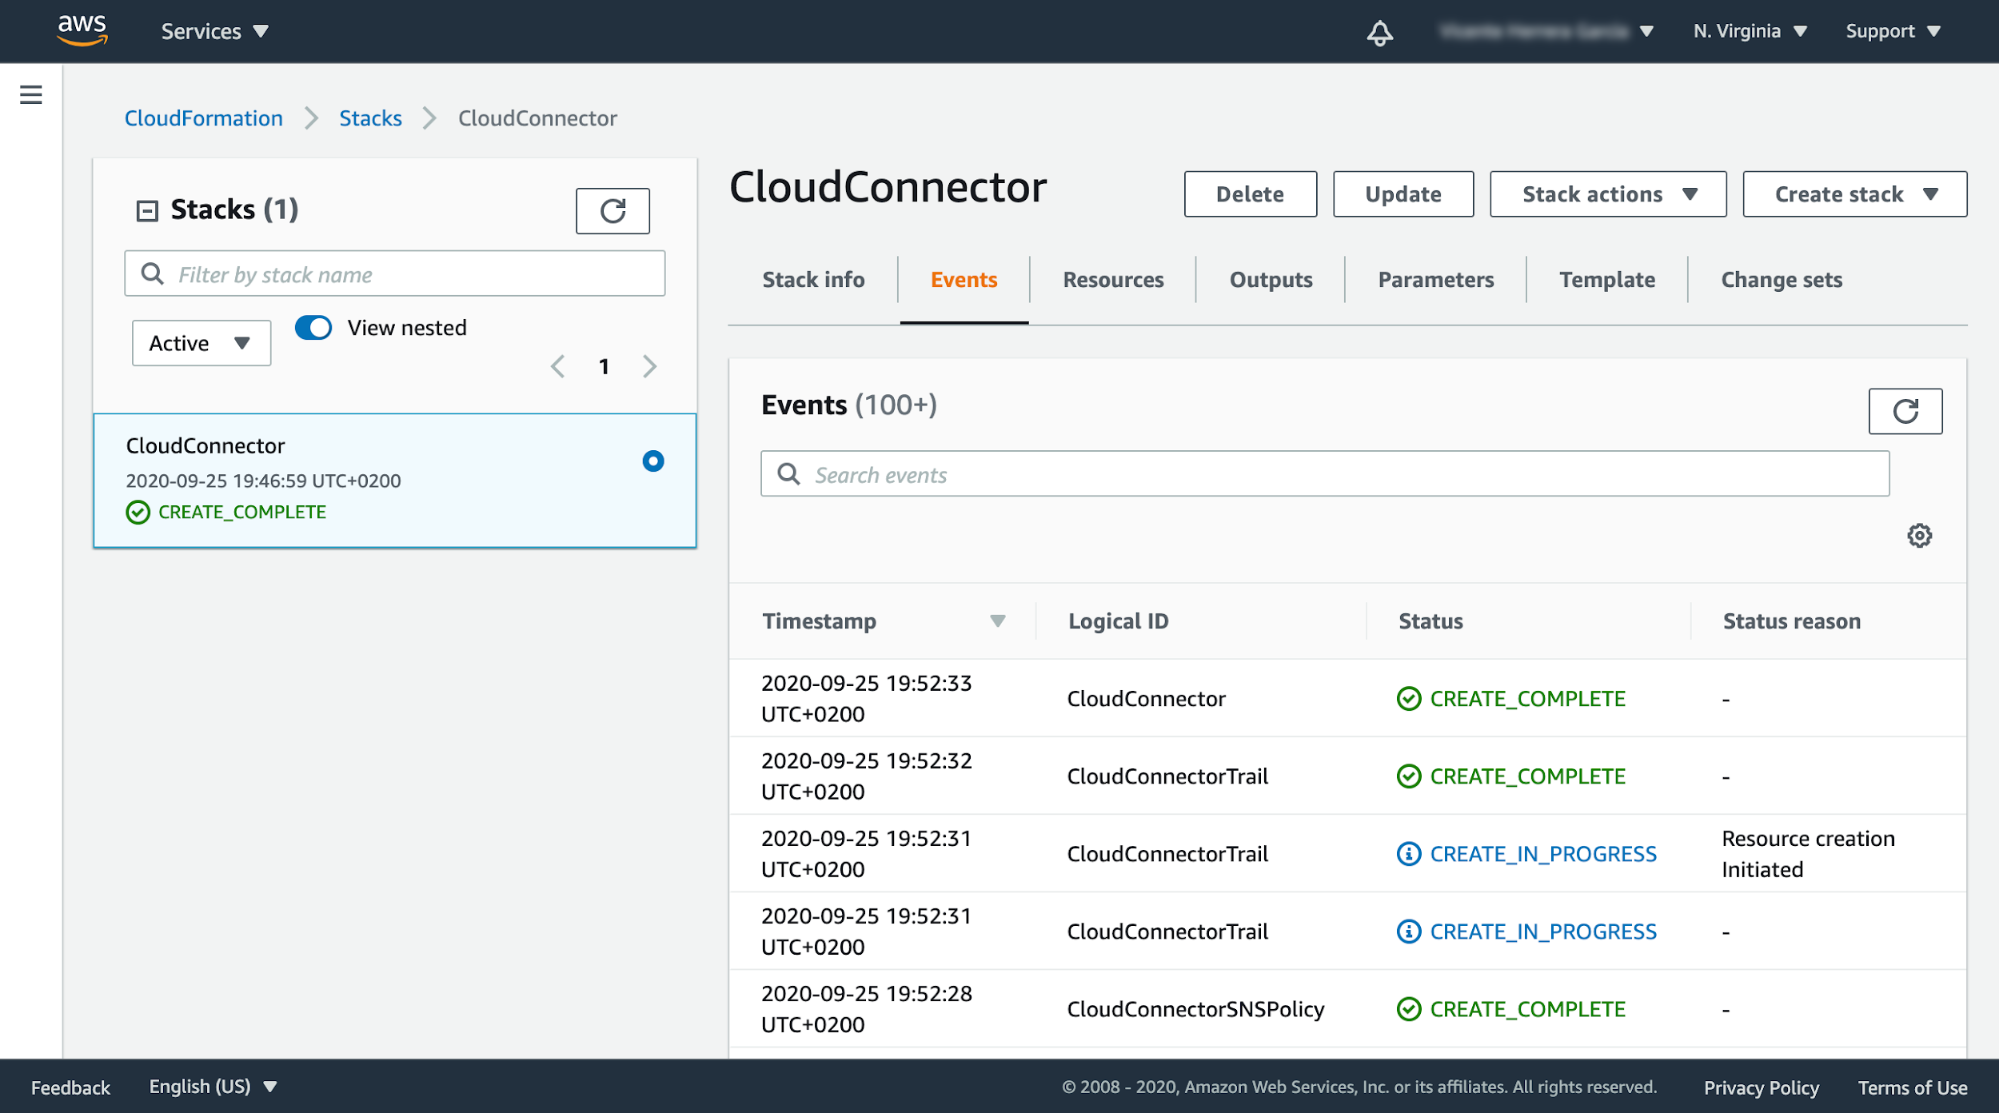
You can later revisit the CloudFormation section in AWS to check the status of the deployment. It will show as "CREATE_COMPLETE" after a few minutes.
Detecting a configuration change with CloudTrail
Let's see an example of AWS threat detection in action with CloudTrail and the Sysdig Cloud Connector.
A new CloudTrail event is created, and it looks like this in JSON format:
All CloudTrail events have the following key fields:
userIdentity: The user who sent the request.eventName: Specifies the type of event.requestParameters: Contains all of the parameters related to the request.
If a request has an errorCode field, it means that it could not be processed because of an error. For example, the requester may not have had permission to perform a change.
In this case, we can see how a policy has just been attached (AttachUserPolicy) to a user (admin_test) with administrator access (arn:aws:iam::aws:policy/AdministratorAccess).
A Falco rule to detect this elevation of privileges would look like this:
This particular rule is already included out-of-the-box in Sysdig Cloud Connector.
The jevt.value contains the JSON content of the event, and we are using it in the condition. Using the jsonpath format, we can indicate what parts of the event we want to evaluate.
The output is going to provide context information, including the requester username and IP address. This is what will be sent through all of the enabled notification channels.
As you can see, this is a regular Falco rule. CloudTrail compatibility is achieved by handling its events as JSON objects, and referring to the event information using JSONPath.
When the Falco engine implemented by the Cloud Connector detects this event, a notification will be sent to all the configured notification channels. For example:
- Creating a security event in your Sysdig Secure account.
- Creating a security finding in your AWS Security Hub.
- Adding an entry to a AWS CloudWatch log stream.
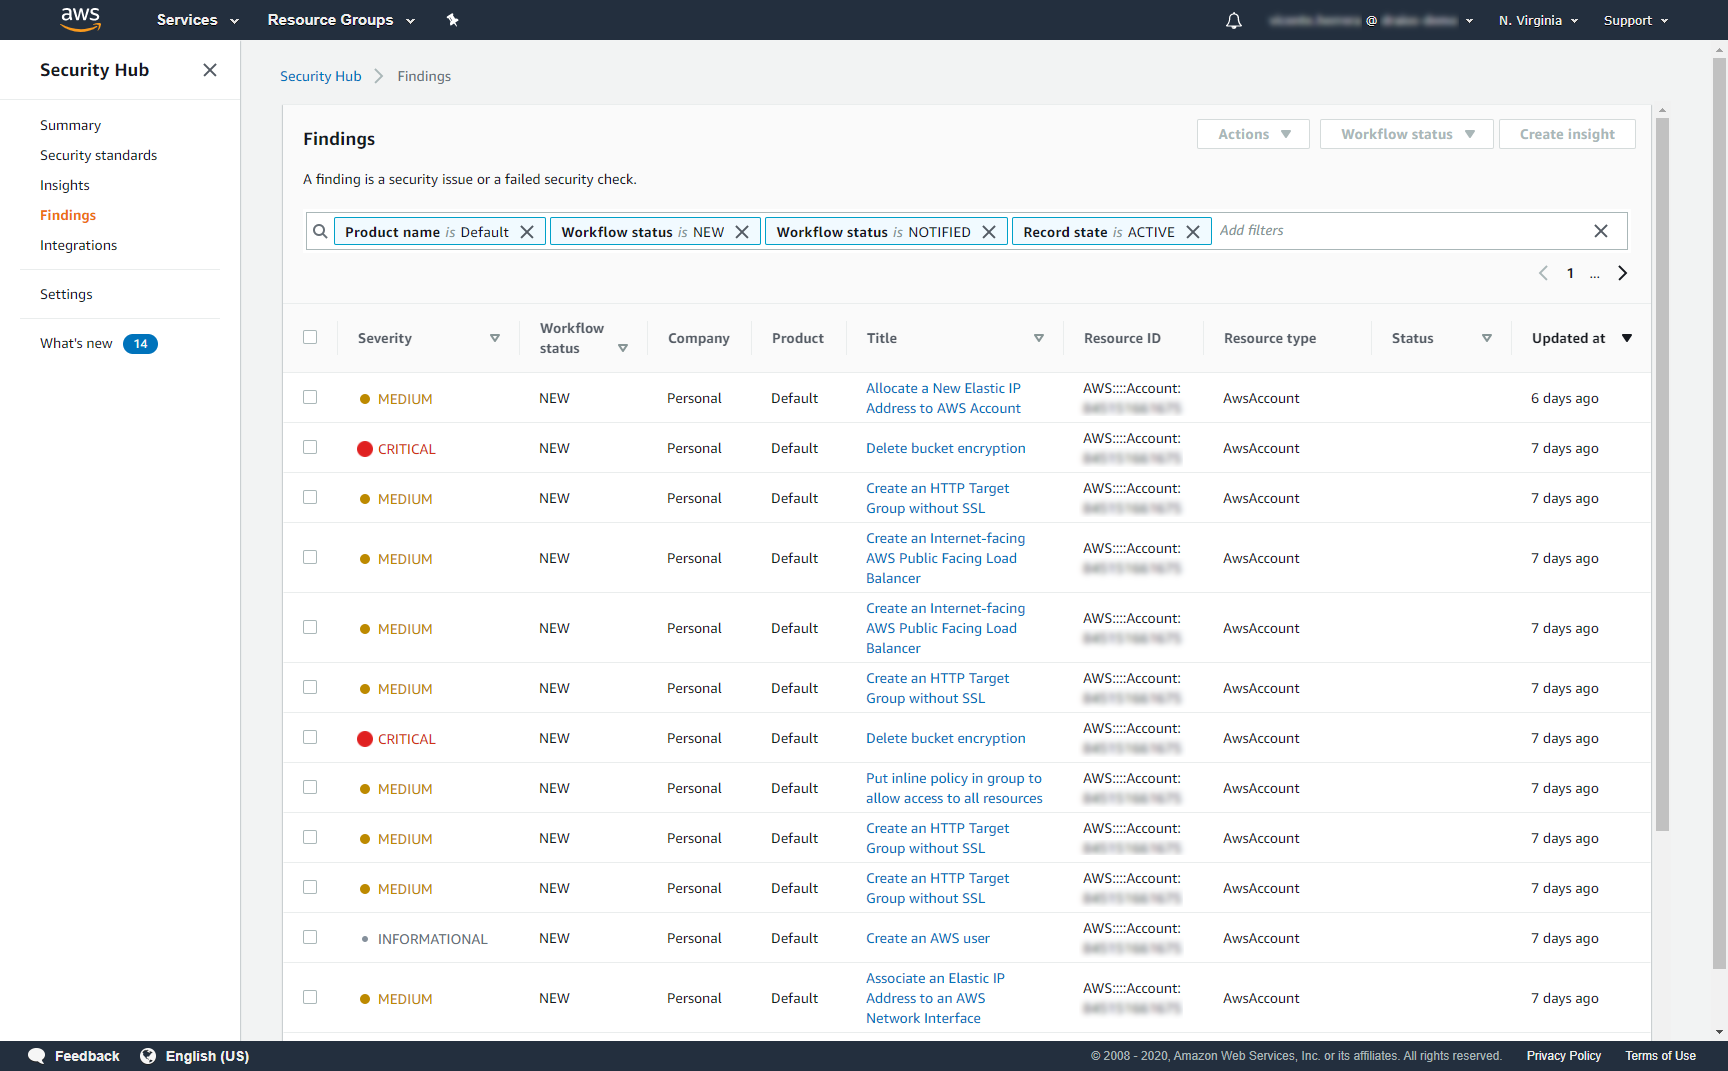
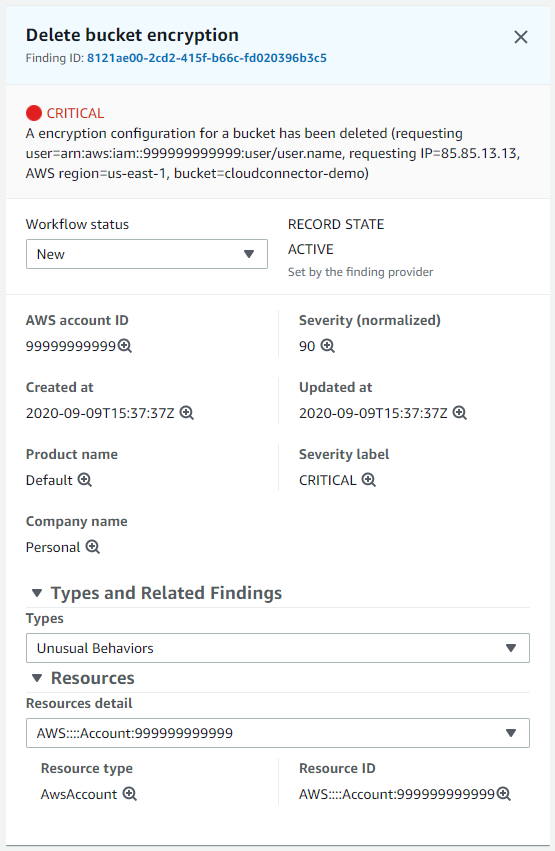
You can check these events without leaving the AWS console. This is how findings reported by Sysdig Cloud Connector look in the AWS Security Hub:
The details of one of these findings provide all the information you need to take immediate action:
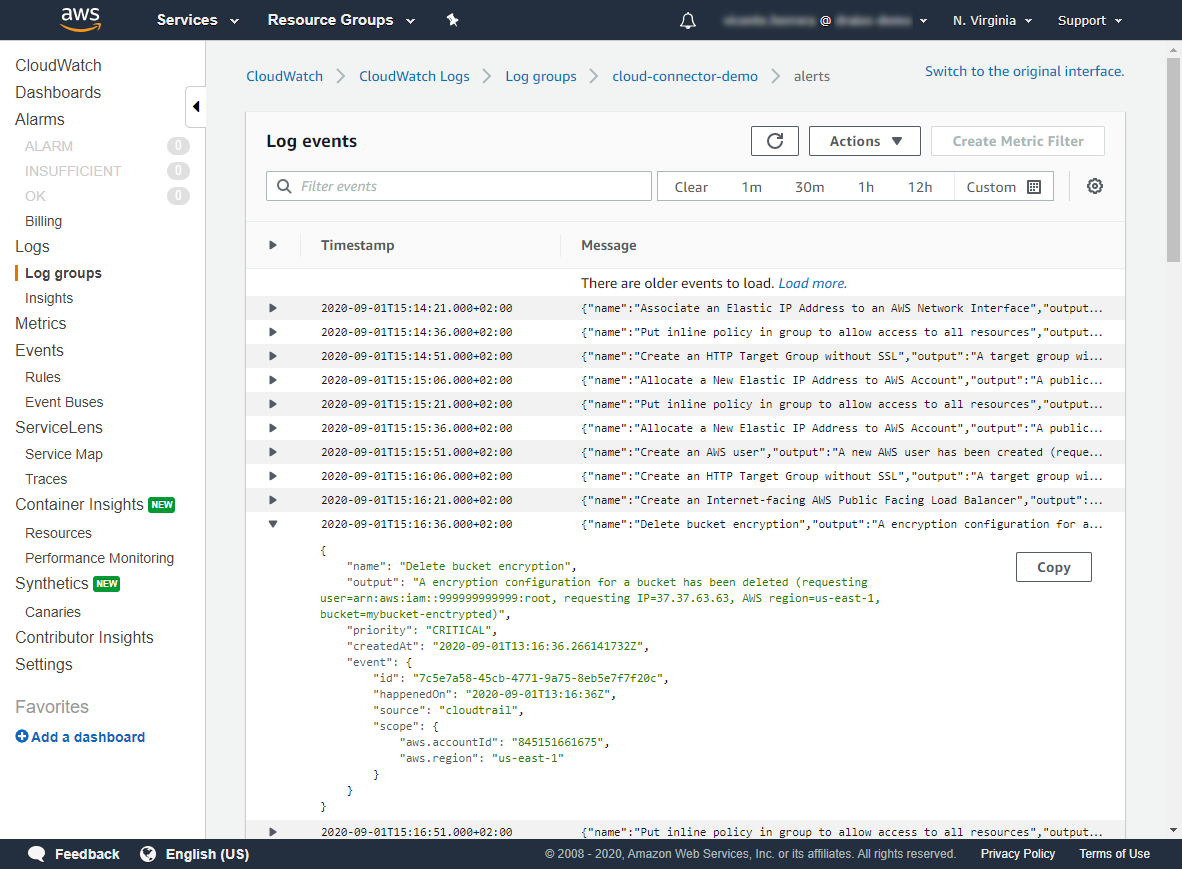
And they appear in JSON format in AWS CloudWatch log streams:
Conclusions
AWS security can save your infrastructure from failing at its worst moment. It will protect you and your customer data against misconfigurations, a security compromise, or your wallet from unexpected fees.
CloudTrail is a great source of truth, as it can see everything that is happening in your AWS accounts.
Leverage Sysdig Secure by deploying Sysdig Cloud Connector for CloudTrail and obtaining the runtime visibility you need to implement AWS threat detection. Its out-of-the-box set of Falco rules for CloudTrail minimizes the setup effort, response time, and resources needed for investigating security events.
If you do not have a Sysdig account, you can register today for a trial. Deploy Sysdig Cloud Connector in less than 10 minutes by following instructions in this article, and start having a secured AWS account today.
You can also find Sysdig on the AWS Marketplace.