


Falco Feeds extends the power of Falco by giving open source-focused companies access to expert-written rules that are continuously updated as new threats are discovered.

In the context of cloud security posture management (CSPM), custom controls are policies or rules that give security teams the flexibility to create and enforce policies. These are needed to manage posture, tailor compliance measures, and detect misconfigurations across infrastructures like Kubernetes, containers, and the cloud.
Introducing Sysdig Custom Control
Sysdig posture controls are built on the Open Policy Agent (OPA) engine, using the OPA policy language Rego. The platform exposes the code used to create these controls and the inputs they evaluate.
These controls are available in Sysdig's Posture Controls library. They have basic attributes such as severity and policies predefined. Previously, you could only duplicate existing controls and customize specific labels.
Sysdig's new custom control feature is available across major cloud service providers, including AWS, Azure, GCP, and IBM. Enterprises can use this feature to:
- Define and enforce internal guideline controls that are closely aligned with their architecture and business requirements
- Meet regulatory compliance standards, such as PCI and HIPAA
- Prevent security misconfigurations across Kubernetes, containers, and cloud environments
Keep reading to learn how to:
- Create a custom control with Rego.
- Manage and deploy it with Sysdig's Terraform Provider
- Use the new Sysdig API endpoint
- Verify the Rego code using The Rego Playground
Create a custom control with Rego
Sysdig Secure's Terraform provider allows you to define, manage, and deploy custom controls as part of your infrastructure automation. This ensures that your security policies are version-controlled, easily maintainable, and consistent across environments.
Before you get started
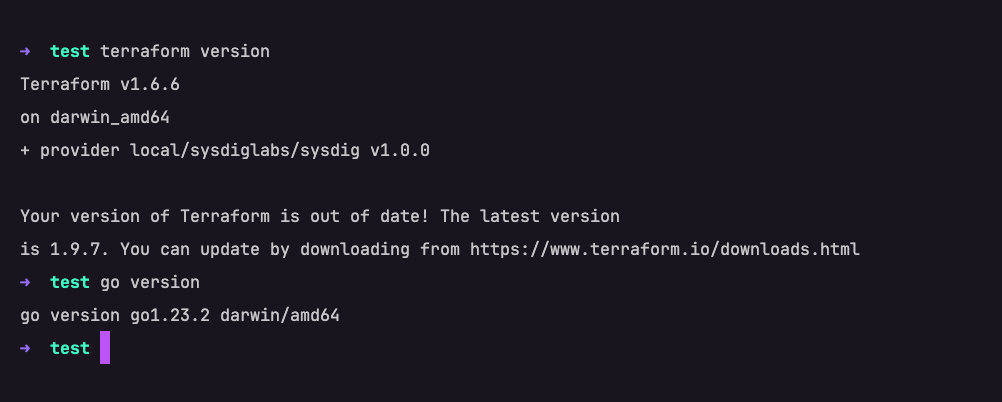
Ensure you have both Terraform and Go installed in your environment:
- Terraform version higher than 0.12.x
- Go version higher than the one specified in go.mod (Set up $GOPATH as per the instructions here)
- Terraform Provider for Sysdig (use instructions here to install and configure the provider)
- Your Sysdig API tokens and Agent keys (replace these values in the code snippet below)
terraform {

  required_providers {

    sysdig = {

      source = "local/sysdiglabs/sysdig"

      version = "~> 1.0.0"

    }

  }

}

provider "sysdig" {

  sysdig_secure_url="https://secure.sysdigv5.wpenginepowered.com"

  sysdig_secure_api_token = "XXXXXXXX-XXXX-XXXX-XXXX-XXXXXXXXXXXXX"

  extra_headers = {

    "Proxy-Authorization": "Basic XXXXXXXX-XXXX-XXXX-XXXX-XXXXXXXXXXXX"

  }

}
Terraform Resource for Custom Controls
Sysdig Secure's Terraform Provider uses the sysdig_secure_posture_control resource to define custom controls. Resource attributes include:
- name: The name of the custom control
- description: A detailed explanation of what the control does
- resource_kind: The type of resource the control applies to (e.g., AWS S3 buckets, Kubernetes pods)
- severity: The severity level (e.g., High, Medium, Low) that defines the control's importance
- rego: The Rego policy code that defines the control logic
- remediation_details: Instructions for remediating any issues identified by the control
Next, we'll create a custom Sysdig Secure custom control using Rego and Terraform.
S3 Bucket without versioning
S3 bucket versioning is important for several reasons, especially data protection, recovery, and management. In this scenario, we'll create a custom control to ensure object versioning is enabled for your Amazon S3 buckets to preserve and recover overwritten and deleted objects.
- Download and unzip the git file from the repository here
- Inside the
terraform-provider-sysdig-masterfolder, create a new Terraform file using your favorite editor. Bonus points if you're using Visual Studio and have the VSCode extension installed - Copy the below code and paste it in your file. The Rego code is embedded within the Terraform script
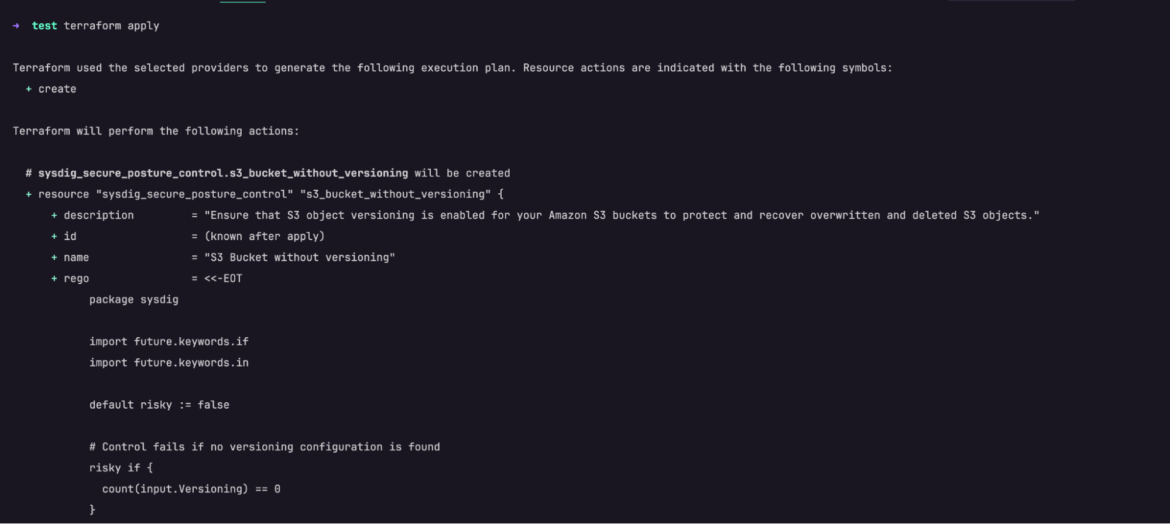
resource "sysdig_secure_posture_control" "s3_bucket_without_versioning" {
name = "S3 Bucket without versioning"
description = "Ensure that S3 object versioning is enabled for your Amazon S3 buckets to protect and recover overwritten and deleted S3 objects."
resource_kind = "AWS_S3_BUCKET"
severity = "High"
rego = <<-EOF
package sysdig
import future.keywords.if
import future.keywords.in
default risky := false
# Control fails if no versioning configuration is found
risky if {
count(input.Versioning) == 0
}
# Control fails if versioning is not enabled
risky if {
some version in input.Versioning
lower(version.Status) != "enabled"
}
EOF
remediation_details = <<-EOF
## Remediation Impact
Enabling versioning for S3 buckets helps preserve and recover previous versions of objects.
It allows recovery of deleted or overwritten data, and helps ensure data protection.
Archiving previous versions to Amazon S3 Glacier is also possible for long-term, low-cost storage.
<code>## Remediate Using Command Line</code>
Run the following command to enable versioning for the selected bucket:
```
aws s3api put-bucket-versioning --bucket <bucket-name> --versioning-configuration Status=Enabled
```
Repeat this command for other buckets in your AWS environment.
EOF
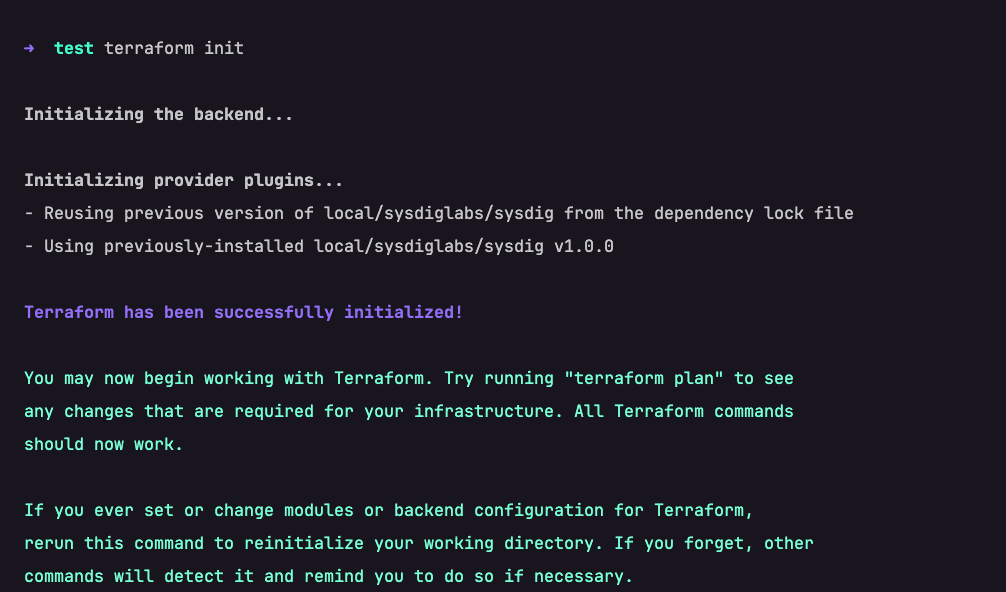
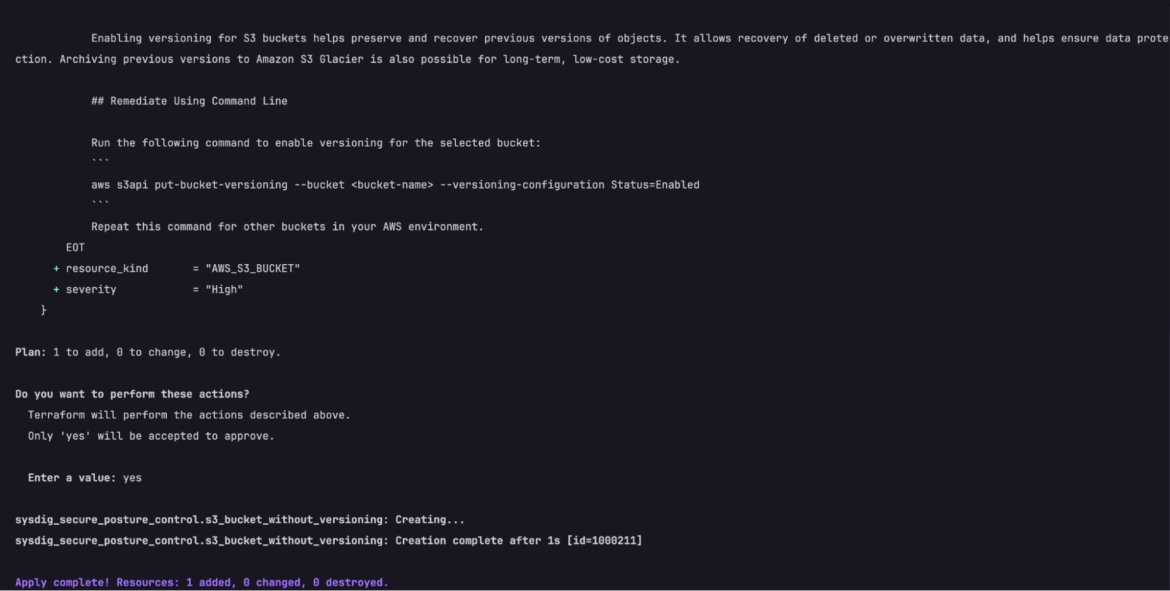
}- Next, from your terminal, initialize the Terraform environment. If the prerequisites are properly configured, you'll see a message similar to the below snapshot
After the environment is initialized, the next task is to deploy this Terraform script as a custom control in Sysdig Secure.
- Run
terraform applyfrom your terminal
Terraform generates an execution plan describing what it will do to deploy the code, and then executes it to build the described infrastructure or configuration.
- The prompt will pause for a user input. At this stage, type
yesand continue
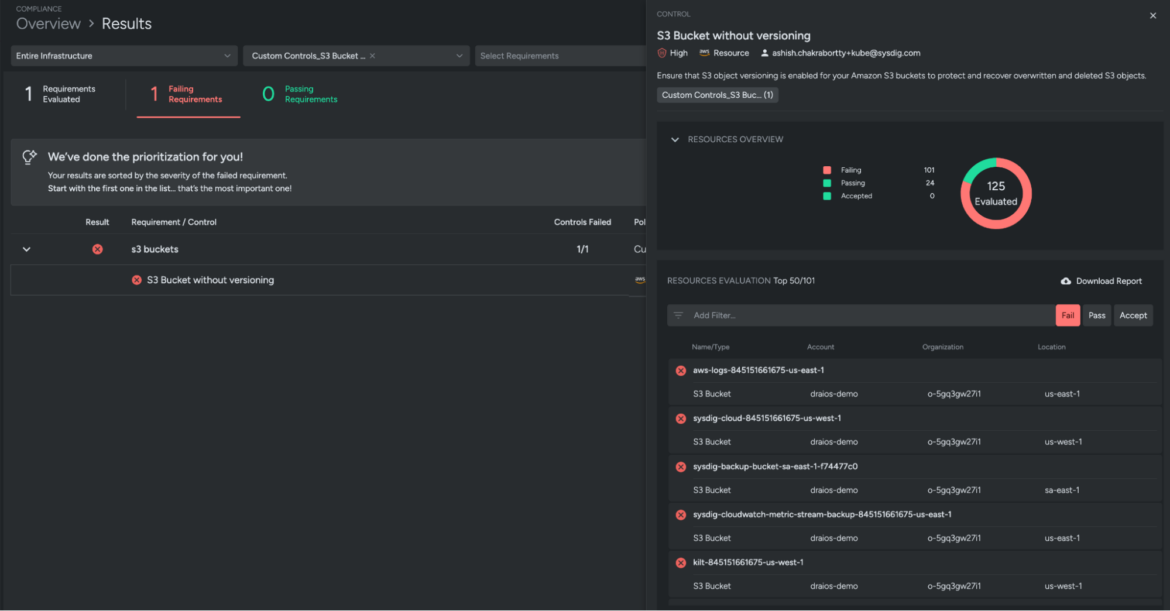
Our new custom control S3 Bucket without versioning will appear in the Posture Controls library and is ready to be used in custom policies. Verify it by navigating to your Sysdig Secure user interface.
- Navigate to Posture → Controls
- Search for S3 Bucket without versioning
Apply your Custom Control
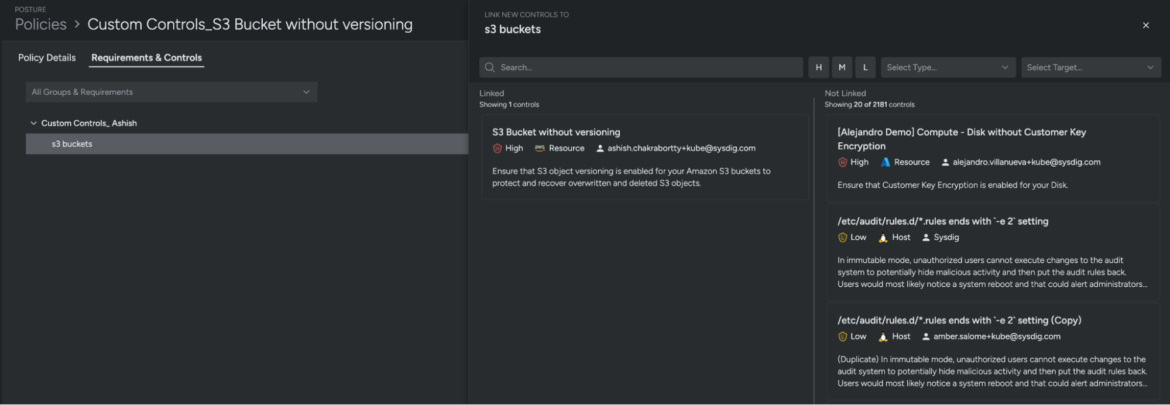
From here, you can assign the new custom control to a new or existing Sysdig Secure Posture Policy based on your enterprise needs. The example below was created by following these steps:
- Navigate to Posture → Policies and create a new policy Custom Controls_S3 Bucket without versioning
- Choose the infrastructure scope across which the new control must apply. This example uses Entire Infrastructure
- Link your custom control as shown in the image below to evaluate the posture compliance of your defined infrastructure
To rollback, simply delete the resource definitions from your Terraform file and reapply. This will update the Posture Controls library and detach the defined controls from the policies.
Now that we've warmed up a bit, let's look at a few tools you could use to streamline your development workflows.
Sysdig API Endpoint
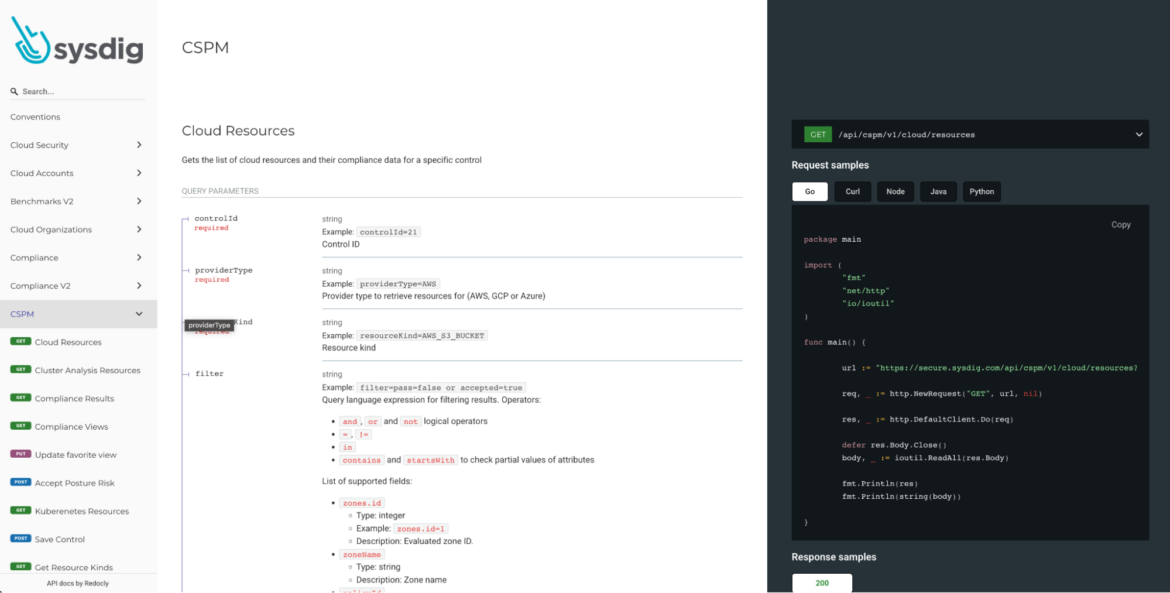
The Sysdig API Endpoint enables your developers to query and fetch values for Terraform attributes like resource_kind. The REST APIs enable them to programmatically access and manage Sysdig Monitor, Sysdig Secure, and Sysdig Platform.
On the Sysdig API endpoint, you'll find several category headers like Compliance, Cloud Organizations, CSPM, and more, along with details like the query parameters. For example, to fetch Cloud Resources, you'll need to query with the GET request and define parameters like providerType, resourceKind, and filter. The API endpoint also builds your custom queries in multiple formats, like Go, Curl, Node, Java, and Python.
In this exercise, you'll use Curl to query the API endpoint by using a GET request, and then fetch values for the Terraform attribute resource_kind.
- Export the Sysdig API token in your environment (mine is MacOS). To export it in Windows, read these instructions
- From the left panel, select CSPM, scroll down, and click Get Resource Kinds (you can use this link here)
- Next, switch to the Curl tab and copy the
GETrequest - After that, open up a terminal window and paste the
GETrequest. Provide additional details like your Sysdig API token
curl --request GET \

  --url https://secure.sysdigv5.wpenginepowered.com/api/cspm/v1/policy/controls/resource-template/kinds -H "Authorization: Bearer $SYSDIG_SECURE_API_TOKEN" | jq .resourceKinds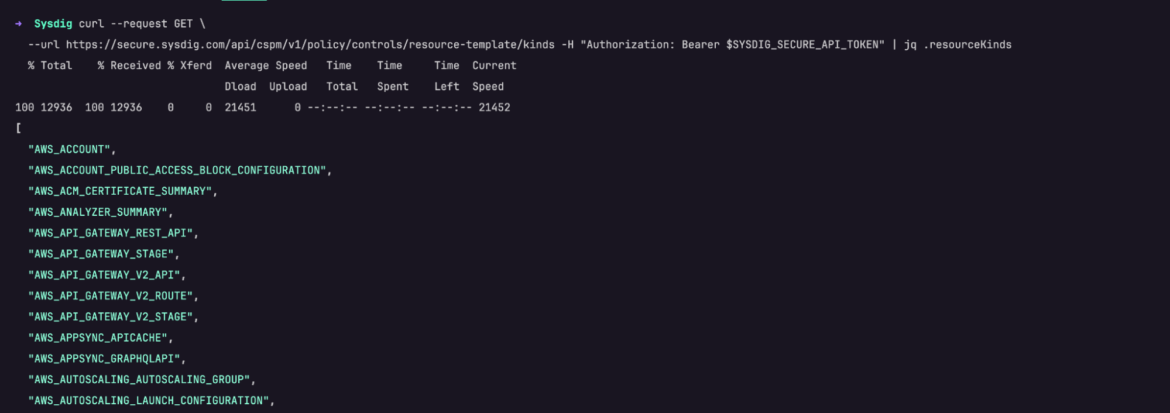
The JSON output provides a list of all legitimate resource kinds available to query within the Sysdig Secure platform.
If we look back at our Terraform script, we had defined resource_kind as AWS_S3_Bucket.
- On the Sysdig API endpoint, click Get Resource Example
- Like last time, choose
Curl, copy theGETrequest, and paste it in your terminal
The new request should look like the one below. It fetches all the values associated with AWS_S3_Bucket.
curl --request GET \

  --url https://secure.sysdigv5.wpenginepowered.com/api/cspm/v1/policy/controls/resource-template/view/AWS_S3_BUCKET -H "Authorization: Bearer $SYSDIG_SECURE_API_TOKEN" | jq -r .data | jq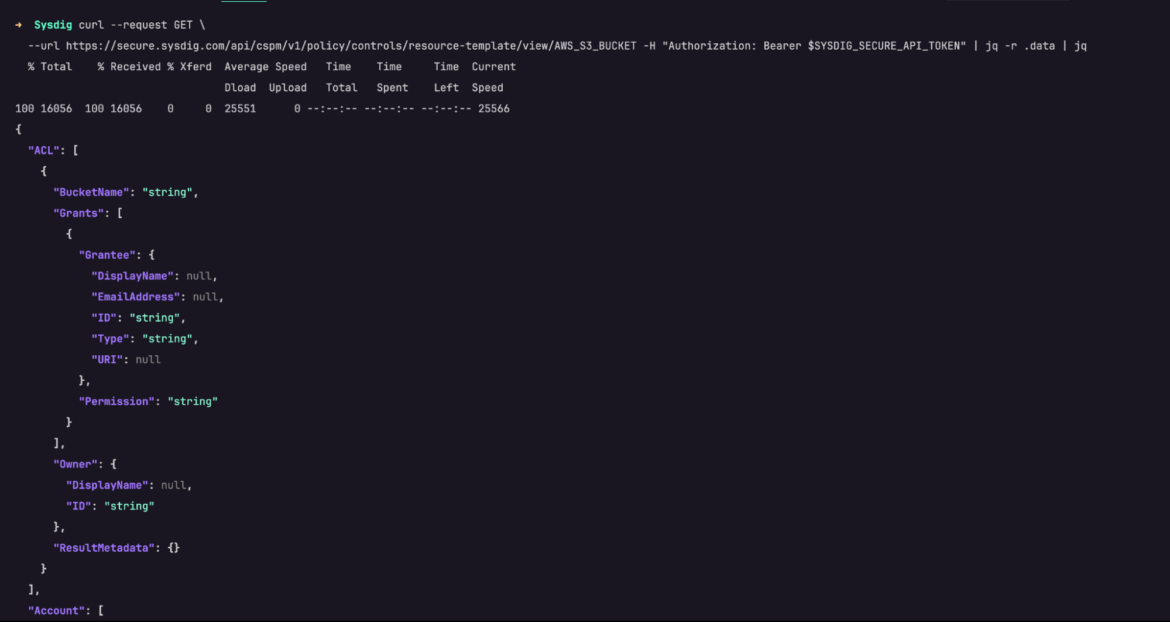
After this, copy and save the results. We'll need it for the last leg of our exercise where we verify our Rego code.
The Rego Playground
The Rego Playground is an online interactive environment that allows you to write, test, and debug Rego policies in a sandboxed, browser-based interface. It's ideal for those looking to explore policy-based control across various systems.
The browser-based interface provides features like real-time evaluation of Rego expressions, input/output simulation, and policy testing, making it an excellent tool for learning, developing, and even sharing policies without the need to set up a full Open Policy Agent (OPA) environment locally.
In this exercise, we'll use the platform to evaluate the Rego code logic previously defined in our Terraform script. The JSON output from the last exercise will be needed as input variables.
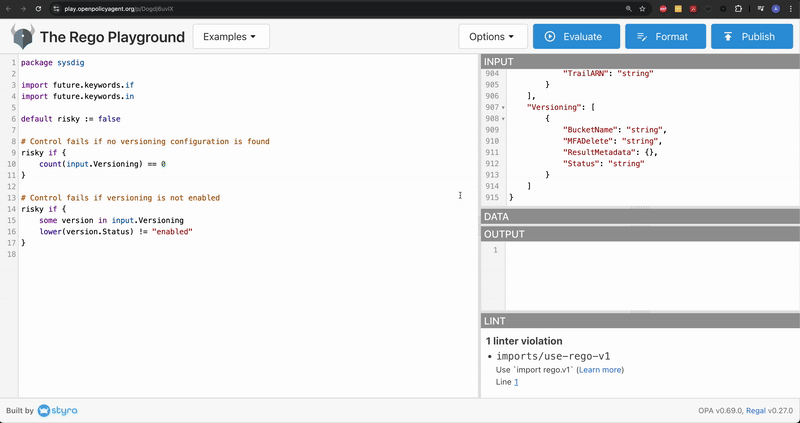
Copy the below code snippet and paste it in the editor section. If needed click Format to align the code
If you observe carefully, the logic here is to evaluate the object as risky based on a field value.
package sysdig

import future.keywords.if

import future.keywords.in

default risky := false

# Control fails if no versioning configuration is found

risky if {

count(input.Versioning) == 0

}

# Control fails if versioning is not enabled

risky if {

some version in input.Versioning

lower(version.Status) != "enabled"

}
Add the previously saved JSON output in the INPUT window
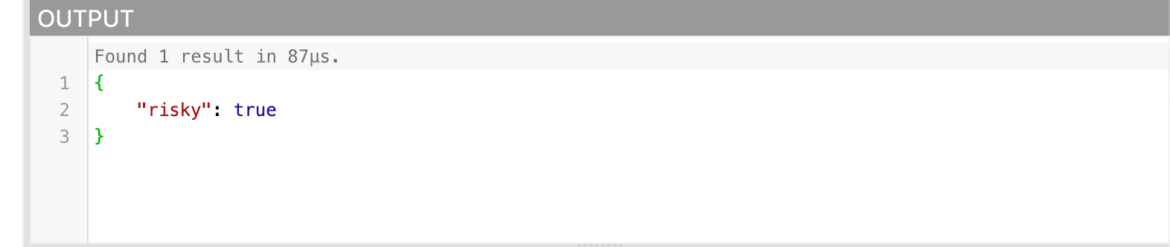
The Versioning.Status field is defined at the bottom of the JSON output. Notice that it's currently set to string.
Now, click Evaluate and test the Rego script
In the OUTPUT window, we notice the value of risky is set to true. We can infer that the AWS S3 Bucket will be tagged as a risk if the version status is not enabled in your cloud accounts.
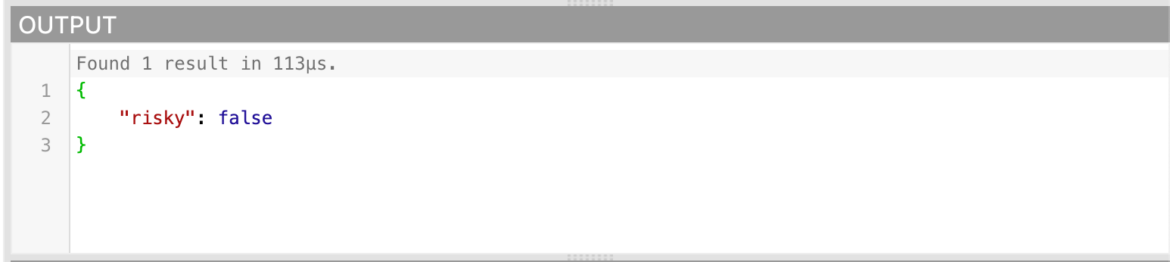
Next, modify the Status field to enabled
Evaluate the script again and notice that risky changes to false in the OUTPUT window. This proves that our Rego logic works properly.
Use this link here to run the above exercise.
Best Practices for Implementing Custom Controls
- Start with high-impact controls: Prioritize custom controls that address significant security risks, such as blocking privileged containers or ensuring S3 versioning.
- Use Terraform for automation: Terraform makes it easy to manage custom controls as code, ensuring consistency across environments and allowing you to automate the deployment and updates of controls.
- Test controls in a staging environment: Always test your custom controls in a non-production environment to ensure that they work as expected and do not produce false positives.
- Continuously review and update controls: As your infrastructure evolves, regularly review and update your custom controls to reflect new security challenges and compliance requirements.
Conclusion
Custom controls in Sysdig Secure provide the flexibility to enforce security policies that are unique to your organization's needs. By leveraging Rego for policy logic and Terraform for automation, you can implement robust security measures across cloud and Kubernetes environments. Whether it's ensuring S3 versioning or blocking privileged containers, these custom controls give you the power to enforce consistent security and compliance standards.
For more information and in-depth examples, refer to: