In a prior blog post, we discussed the basics of Kubernetes Limits and Requests: they serve an important role to manage resources in cloud environments.
In another article in the series, we discussed the Out of Memory kills and CPU throttling that can affect your cluster.
But, all in all, Limits and Requests are not silver bullets for CPU management and there are cases where other alternatives might be a better option.
In this blog post, you will learn:
- How CPU requests work.
- How CPU limits work.
- Current situation by programming language.
- Cases when Limits aren’t the best option.
- What alternatives you can use to Limits.
Kubernetes CPU Requests
Requests serve two purposes in Kubernetes:
Scheduling availability
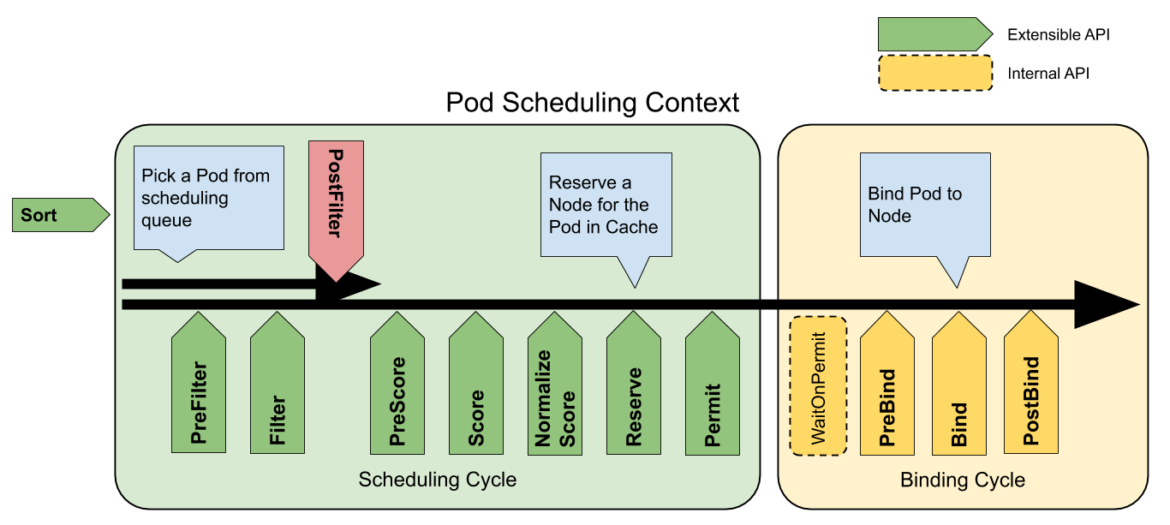
First, they tell Kubernetes how much CPU needs to be available (as in not already requested by other Pods/containers, not actually idle at that time on the given Node(s)). It then filters out any Nodes that do not have enough unrequested resources to fulfill the requests in the filter stage of scheduling.
If none have enough unrequested CPU/memory, the Pod is left unscheduled in a Pending state until there is.
Guaranteed CPU allocation
Once it has determined what Node to run it on (one that first survived the Filter and then had the highest Score), it sets up the Linux CPU shares to roughly align with the mCPU metrics. CPU shares (cpu_share) are a Linux Control Groups (cgroups) feature.
Usually, cpu_shares can be any number, and Linux uses the ratio between each cgroups’ shares number to the total of all the shares to prioritize what processes get scheduled on the CPU. For example, if a process has 1,000 shares and the sum of all the shares is 3,000, it will get a third of the total time. In the case of Kubernetes:
- It should be the only thing configuring Linux CPU shares on every Node – and it always aligns those shares to the mCPU metric.
- It only allows a maximum mCPU to be requested of the actual logical CPU cores available on the machine (as if it doesn’t have enough unrequested CPU available, it will get Filtered out by the scheduler).
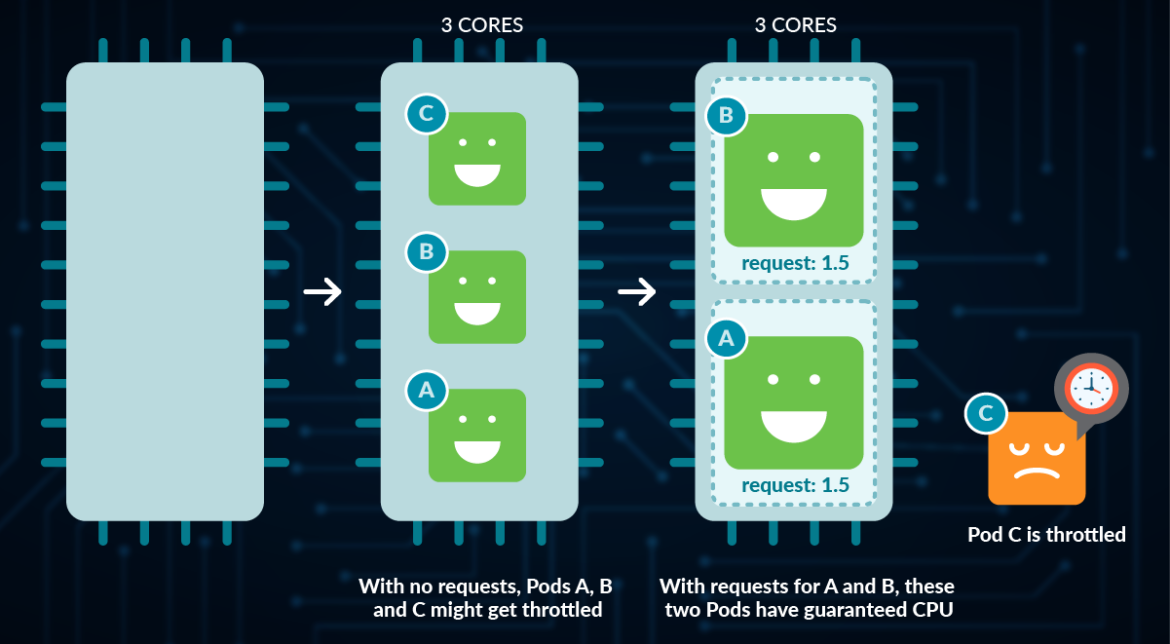
- So, it does turn the Linux cgroups CPU shares into nearly a ‘guarantee’ of minimum CPU cores for the container on the system – when it wouldn’t necessarily be used that way on Linux.
Since setting a CPU request is optional, what happens when you don’t put one?
- If you set a Limit on the Namespace via a LimitRange, that one will apply.
- If you didn’t set a request but did set a limit (either directly or via a Namespace LimitRange) then it will also set a Request equal to Limit.
- If there is no LimitRange on the Namespace and no limit, then there will be no request if you don’t specify one.
By not specifying a CPU Request:
- No Nodes will get filtered out in scheduling, so it can be scheduled on any Node even if it is ‘full’ (though it will get the Node with the best score, which should often be the least full). This means that you can overprovision your cluster from a CPU perspective.
- The resulting Pods/containers will be the lowest priority on the Node given that they have no CPU shares (whereas those who put Requests will have them).
Also note that if you don’t set a Request on your Pod, that puts it as a BestEffort Quality of Service (QoS) and makes it the most likely to be evicted from the Node should it need to take actions to preserve its availability.
So, setting a Request that is high enough to represent the minimum that your container needs to meet your requirements (availability, performance/latency, etc.) is very important.
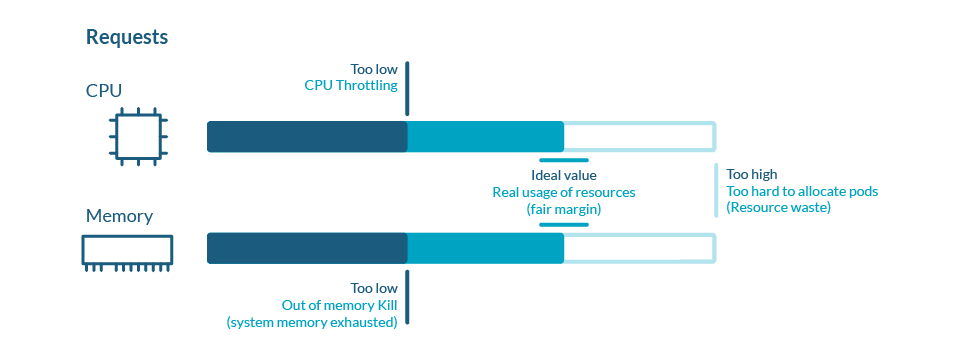
Also, assuming your application is stateless, scaling it out (across smaller Pods spread across more Nodes, each doing less of the work) instead of up (across fewer larger Pods, each doing more of the work) can often make sense from an availability perspective, as losing any particular Pod or Node will have less of an impact on the application as a whole. It also means that the smaller Pods are easier to fit onto your Nodes when scheduling, making more efficient use of our resources.
Kubernetes CPU Limits
In addition to requests, Kubernetes also has CPU limits. Limits are the maximum amount of resources that your application can use, but they aren’t guaranteed because they depend on the available resources.
While you can think of requests as ensuring that a container has at least that amount/proportion of CPU time, limits instead ensure that the container can have no more than that amount of CPU time.
While this protects the other workloads on the system from competing with the limited containers, it also can severely impact the performance of the container(s) being limited. The way that limits work is also not intuitive, and customers often misconfigure them.
While requests use Linux cgroup CPU shares, limits use cgroup CPU quotas instead.
These have two main components:
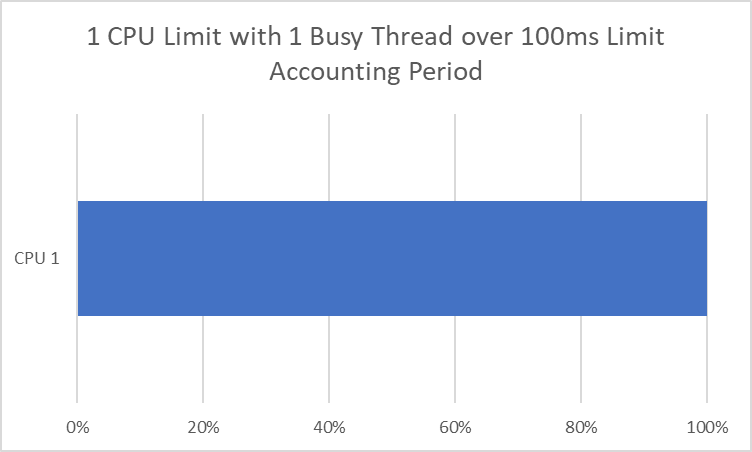
- Accounting Period: The amount of time before resetting the quota in microseconds. Kubernetes, by default, sets this to 100,000us (100 milliseconds).
- Quota Period: The amount of CPU time in microseconds that the cgroup (in this case, our container) can have during that accounting period. Kubernetes sets this one CPU == 1000m CPU == 100,000us == 100ms.
VS
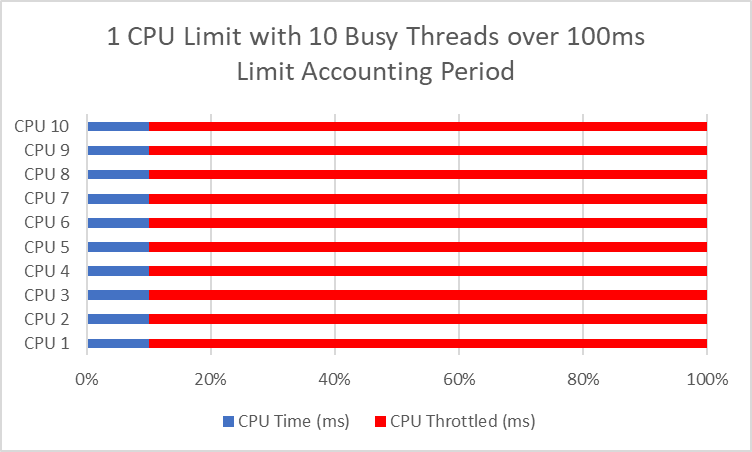
If this is a single-threaded app (which can only ever run on one CPU core at a time), then this makes intuitive sense. If you set a limit to 1 CPU, you get 100 ms of CPU time every 100 ms, or all of it. The issue is when we have a multithreaded app that can run across multiple CPUs at once.
If you have two threads, you can consume one CPU period (100ms) in as little as 50ms. And 10 threads can consume 1 CPU period in 10ms, leaving us throttled for 90ms every 100ms, or 90% of the time! That usually leads to worse performance than if you had a single thread that is unthrottled.
Another critical consideration is that some apps or languages/runtimes will see the number of cores in the Node and assume it can use all of them, regardless of its requests or limits. And suppose our Kubernetes Nodes/Clusters/Environments are inconsistent regarding how many cores we have. In that case, the same Limit can lead to different behaviors between Nodes, given they’ll be running different numbers of threads to correspond to the different quantities of Cores.
So, you either need to:
- Set the Limit to accommodate all of your threads.
- Lower the thread count to align with the Limit.
That is unless the language/runtime knows to look at our cgroups and adapt automatically to your Limit (which is becoming more common).
Current situation by programming language
Node.js
Node is single-threaded (unless you make use of worker_threads), so your code shouldn’t be able to use more than a single CPU core without those. This makes it a good candidate for scaling out across more Pods on Kubernetes rather than scaling up individual ones.
- The exception is that Node.js does run four threads by default for various operations (filesystem IO, DNS, crypto, and zlib), and the UV_THREADPOOL_SIZE environment variable can control that.
- If you do use worker_threads, then you need to ensure you don’t run more concurrent ones than your CPU limit if you want to prevent throttling. This is easier to do if you use them via a thread pooling package like piscina, in which case you need to ensure that the maxThreads is set to match your CPU limit rather than the physical CPUs in your Node (piscina defaults to the physical times 1.5 today – and doesn’t work out the limit automatically from the cgroup/container Limit).
Python
Like Node.js, interpreted Python is usually single-threaded and shouldn’t use more than one CPU with some exceptions (use of multiprocessing library, C/C++ extensions, etc.). This makes it a good candidate, like Node.js, for scaling out across more Pods on Kubernetes rather than scaling up individual ones.
- Note that if you use it, the multiprocessing library assumes that the physical number of cores of the Node is how many threads it should run by default. There doesn’t appear to be a way to influence this behavior today, other than setting it in your code rather than taking the default pool size. There is an open issue on GitHub currently.
Java
The Java Virtual Machine (JVM) now provides automatic container/cgroup detection support, which allows it to determine the amount of memory and number of processors available to a Java process running in Docker containers. It uses this information to allocate system resources. This support is only available on Linux x64 platforms. If supported, container support is enabled by default. If it isn’t supported, you can manually specify the number of cores of your CPU Limit with -XX:ActiveProcessorCount=X.
NET/C#
Like Java, this provides automatic container/cgroup detection support.
Golang
Set the GOMAXPROCS environment variable for your container(s) to match any CPU Limits. Or, use this package to set it automatically based on the container limit from Uber.
Do you even need Limits in the Cloud?
Maybe you can avoid all that and stick with just Requests, which make more sense conceptually as they talk about the proportion of total CPU, not CPU time like Limits.
Limits primarily aim to ensure that specific containers only get a particular share of your Nodes. If your Nodes are reasonably fixed in their quantity – perhaps because it is an on-premises data center with a fixed amount of bare metal Nodes to work with for the next few months/years – then they can be a necessary evil to preserve the stability and fairness of our whole multi-tenant system/environment for everyone.
Their other main use case is to ensure people don’t get used to having more resources available to them then they reserve – predictability of performance as well as not being in a situation where people complain when they are actually only given what they reserve.
However, in the Cloud, the number of Nodes that we have are practically unlimited other than by their cost. And they can be both provisioned and de-provisioned quickly and with no commitment. That elasticity and flexibility are a big part of why many customers run these workloads in the cloud in the first place!
Also, how many Nodes we need is directly dictated by how many Pods we need and their sizing, as Pods actually “do the work” and add value within our environment, not Nodes. And the number of Pods we need can be scaled automatically/dynamically in response to how much work there is to be done at any given time (the number of requests, the number of items in the queue, etc.).
We can do many things to save cost, but throttling workloads in a way that hurts their performance and maybe even availability should be our last resort.
Alternatives to Limits

Let’s assume the amount of work increases (this will vary from workload to workload – maybe it is requests/sec, the amount of work in a queue, the latency of the responses, etc.). First, the Horizontal Pod Autoscaler (HPA) automatically adds another Pod, but there isn’t enough Node capacity unrequested to schedule it. The Kubernetes Cluster Autoscaler sees this Pending Pod and then adds a Node.
Later, the business day ends, and the HPA scales down several Pods due to less work to be done. The Cluster Autoscaler sees enough spare capacity to scale down some Nodes and still fit everything running. So, it drains and then terminates some Nodes to rightsize the environment for the now lower number of Pods that are running.
In this situation, we don’t need Limits – just accurate Requests for/on everything (which ensures the minimum each one requires via CPU shares to function) and the Cluster Autoscaler. This will ensure that no workload is throttled unnecessarily and that we have the right amount of capacity at any given time.
Conclusion
Now that you better understand Kubernetes CPU Limits, it is time to go through your workloads and configure them appropriately. This means striking the right balance between ensuring they are not a noisy neighbor to other workloads with also not hurting their performance too much in the process.
Often this means ensuring that the number of concurrent threads running lines up with the limit (though some languages/runtimes like Java and C# now do this for you).
And, sometimes, it means not using them at all, instead relying on a combination of the Requests and the Horizontal Pod Autoscaler (HPA) to ensure you always have enough capacity in a more dynamic (and less throttle-y) way going forward.
Rightsize your Kubernetes Resources with Sysdig Monitor
With Sysdig Monitor’s Advisor tool you can quickly see where your current usage and allocation of CPU, featuring:
- CPU used VS requested
- CPU used VS limits
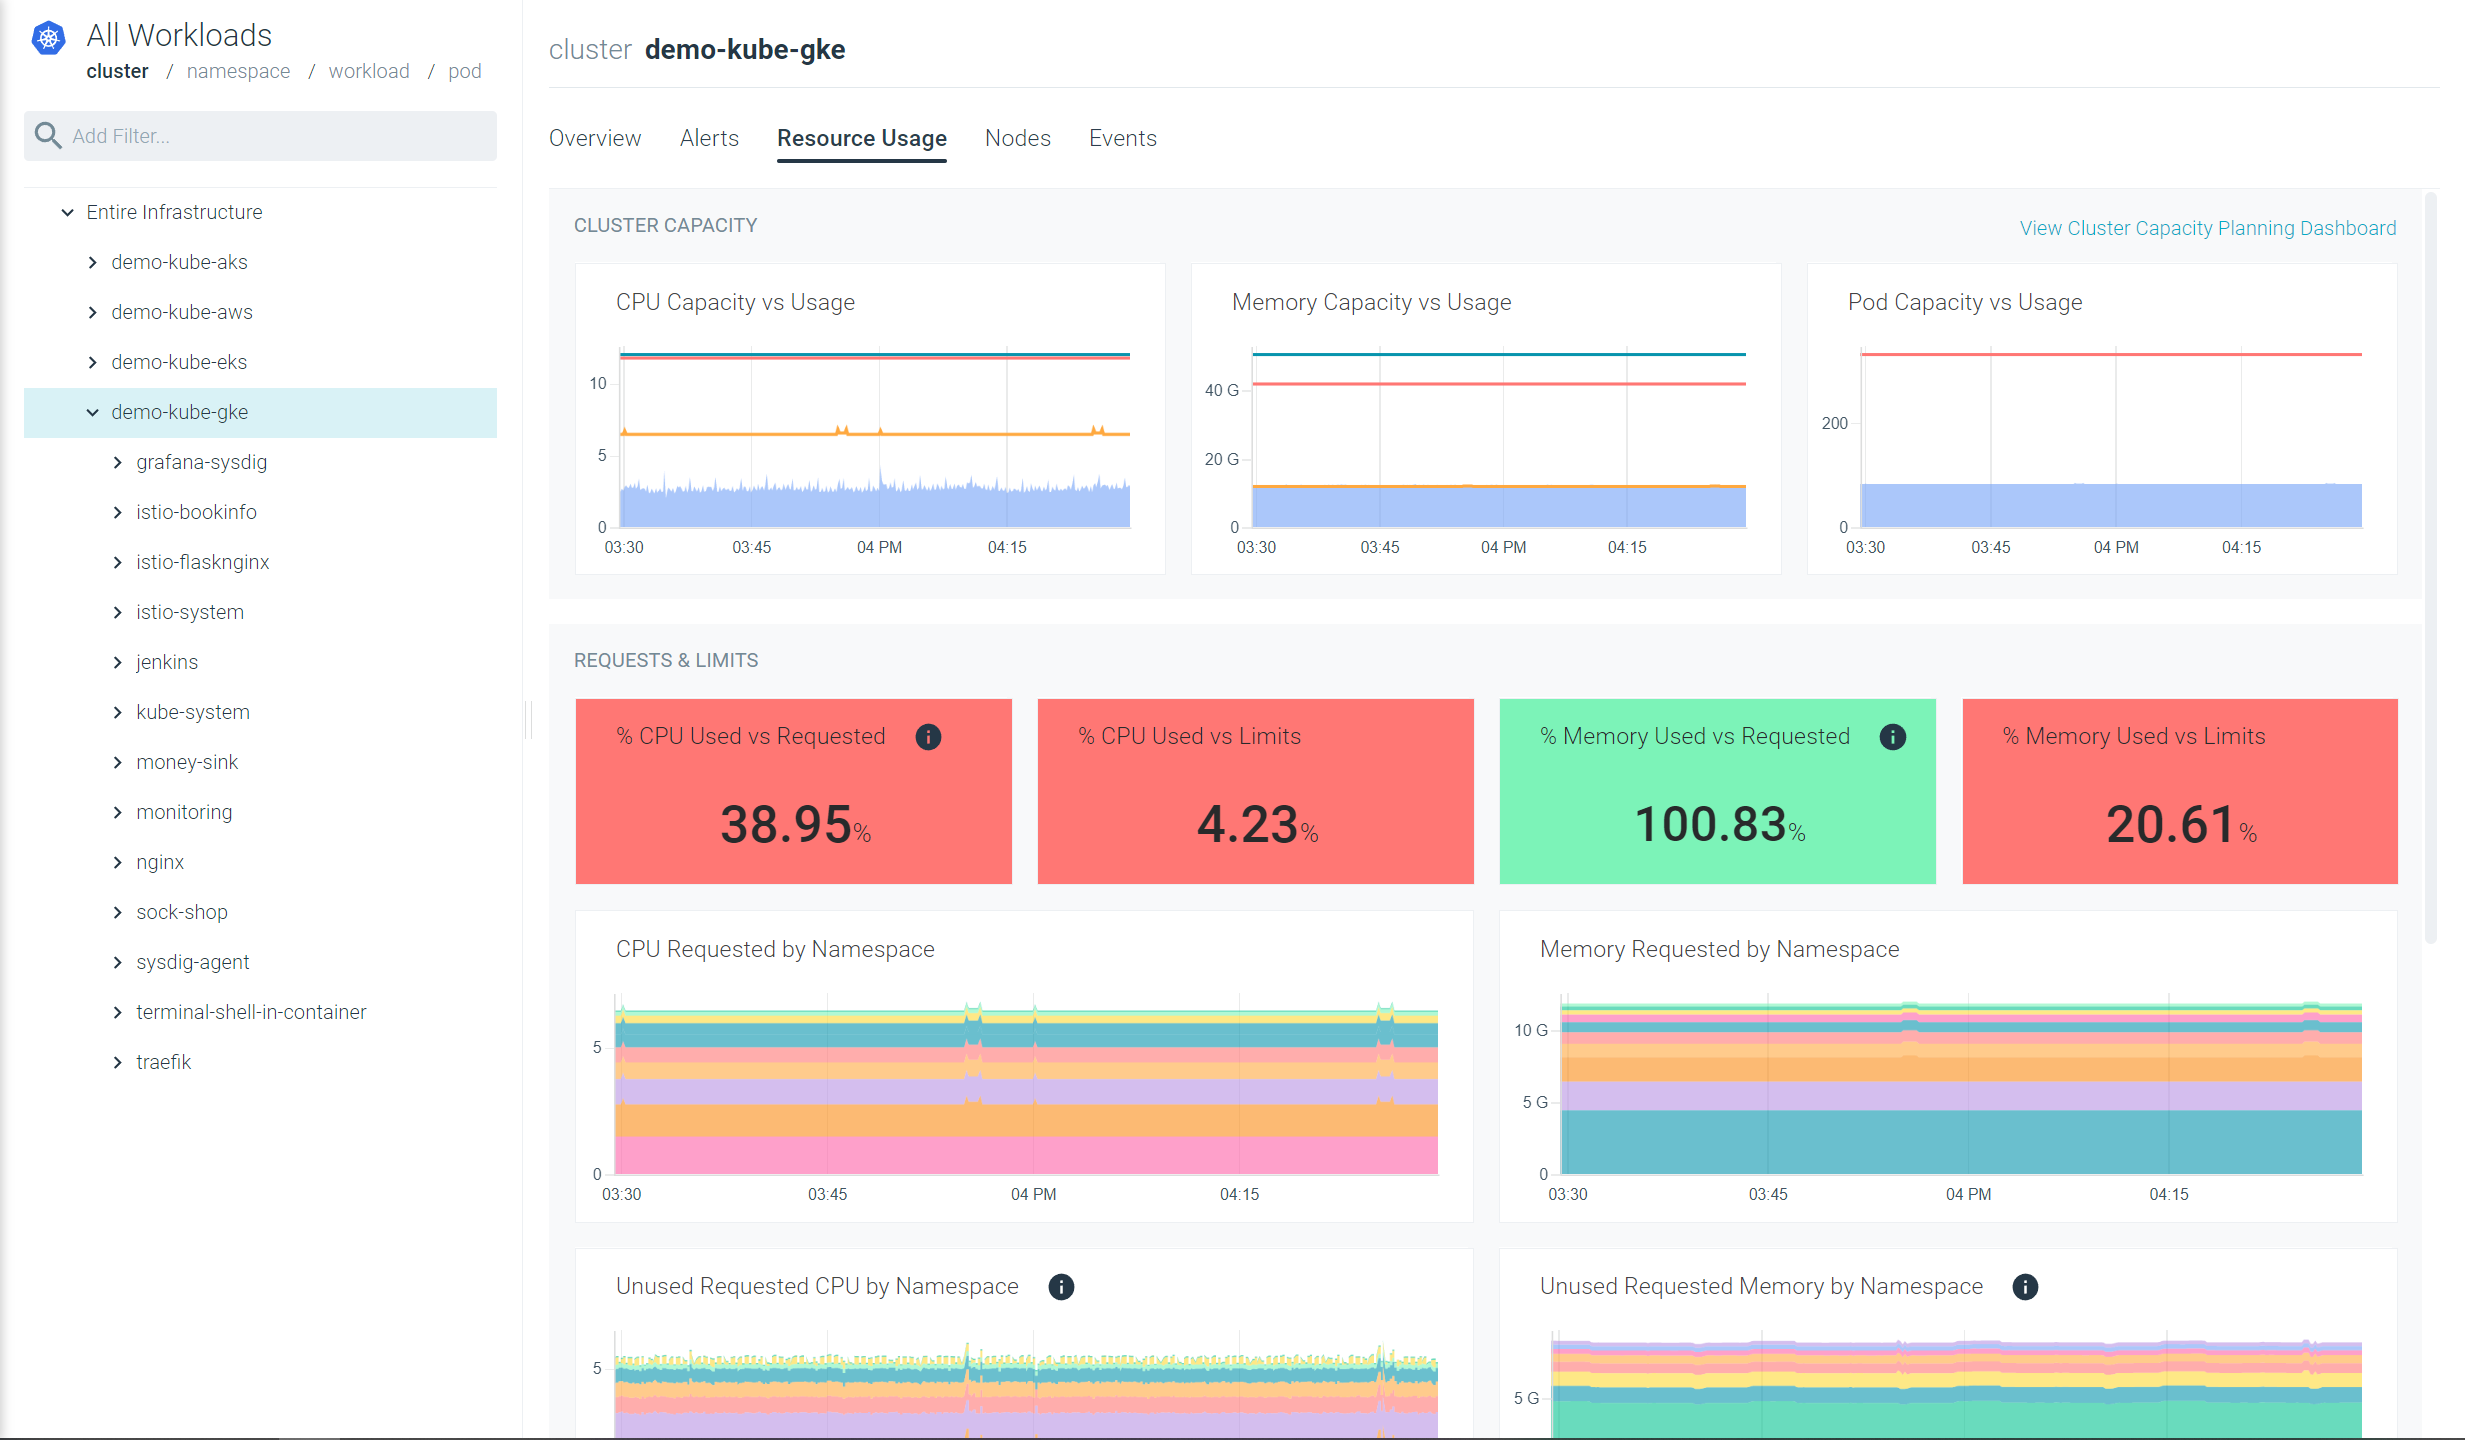
Also, with our out-of-the-box Kubernetes Dashboards, you can discover underutilized resources in a couple of clicks. Get insights easily that will help you rightsize your workloads and reduce your spendings.
Try it free for 30 days!


