Kubernetes API Overview
SHARE:

Kubernetes was built around the Kubernetes API. The Kubernetes API is what allows you to interact, explore and manage your Kubernetes cluster. Even if you’re using tools like kubectl or kubeadm, each of these interacts with the Kubernetes API to effect changes. Because the Kubernetes API is such a critical component for cluster management, it’s essential that you become familiar with what it is, and how it works. This article will introduce you to the API and help you understand how it works.
We’ll start by looking at what the Kubernetes API is and what role it plays in your overall Kubernetes strategy. In addition to explaining what the Kubernetes API can do, we’ll get specific about how to use it to deploy and manage your applications. We’ll also discuss different API commands and give examples that you can use with your Kubernetes environment. Let’s get started.
What Is Kubernetes API Used For?
The Kubernetes API is foundational to the Kubernetes control plane. We can create, modify, and delete primitive elements within our Kubernetes clusters through the API. The API also enables different components within our clusters to communicate, and it facilitates interactions with external components. If you’ve used kubectl or kubeadm, you’ve indirectly invoked the API through those command-line tools. You can also access the API directly through REST calls.
The documentation for the Kubernetes API is easily accessible on the Kubernetes website. You can also find more specific information by exploring the latest version of the API. (At the time of writing, the latest version of the API is version 1.23.0). If you want to go even deeper, you can also view and download the newest API specification directly from the Kubernetes GitHub repository in Swagger/OpenAPI format.
A Kubernetes cluster can support multiple API versions responding at a different API path. You can determine which API versions your cluster supports with the following kubectl command:
$ kubectl api-versionsAs we mentioned above, the Kubernetes API server (or kube-apiserver) resides in the control plane, along with etcd, kube-scheduler, kube-controller-manager, and cloud-controller-manager. The control plane usually resides in a Kubernetes nodes where no other containers are deployed. Kubernetes designed the kube-apiserver to scale horizontally, deploying more instances as required by the cluster. Requests to the API server change the desired state of the cluster, and the control plane manages the changes needed to bring the actual state of the cluster in line with the desired state.
Interacting with the Kubernetes API
Most Kubernetes users interact with their clusters with tools like kubectl. After installing and configuring this command-line tool, you can run commands to experiment and execute actions on your cluster. The tool accepts a command followed by a TYPE and includes a NAME and various flags (as needed). Let’s look at some common commands to see what we can find out about our cluster.
$ kubectl get nodes
NAME           STATUS   ROLES                  AGE    VERSION
kube-master    Ready    control-plane,master   22h    v1.23.4
kube-worker1   Ready    <none>                 151m   v1.23.4
kube-worker2   Ready    <none>                 136m   v1.23.4
kube-worker3   Ready    <none>                 67m    v1.23.4Code language: HTML, XML (xml)
This command performs a get action against the nodes type. You can use other actions with kubectl, including create, describe, and delete. As you can see on the output above, we have a cluster consisting of a master node running our control plane. We also have three worker nodes that are ready to go. You can examine a single node by including its name. Let’s explore the master node using the get action and type of node:
$ kubectl get node kube-master
NAME           STATUS   ROLES                  AGE    VERSION
kube-master    Ready    control-plane,master   22h    v1.23.4Code language: JavaScript (javascript)
Other resources for which we can execute commands include services, pods, and deployments. For a complete list of all resources available within the cluster, you can run kubectl api-resources. While kubectl is valuable (and it is one way of interacting with the API), chances are you aren’t reading this article to learn about kubectl – although if you are, the Kubernetes documentation is an excellent resource that can help you get started and up to speed.
We can interact directly with the Kubernetes API in two different ways. The first approach is by using the kubectl proxy and the second is by generating an authentication token and passing that as a header with each of your requests. Let’s examine how you would go about each approach, as well as reasons why you might choose one approach over the other.
The proxy uses the apiserver location and self-signed certificate that are stored within the kubectl tool. This makes the process of connecting to your cluster incredibly easy. Kubernetes recommends using proxy access to access your clusters as it prevents man-in-the-middle attacks. We can set up proxy access using the following kubectl command:
$ kubectl proxy --port=8080 &
[1] 747

$ Starting to serve on 127.0.0.1:8080
You can see that the proxy is running on your local workstation. With the proxy running, you can now access and explore the API using tools such as your browser, curl, and wget. You execute these commands against the local proxy address, eg. 127.0.0.1:8080 in the above example, and kubectl securely manages the interactions with the cluster.
For the second approach, we can access the API directly by passing an authentication token. This method is vulnerable to man-in-the-middle attacks and considerably less secure, but it’s still worth exploring.
The first step is to generate a token that we can pass as a header with our request. We’ll set up a series of environment variables along the way to make our requests more manageable. The first step is to identify the name of the cluster we want to access. You can find this in the config file used by kubectl or query the list from kubectl directly with the following command:
$ kubectl config view -o jsonpath='{"Cluster name\tServer\n"}{range .clusters[*]}{.name}{"\t"}{.cluster.server}{"\n"}{end}'

Cluster name    Server
kubernetes      https://kube-master:6443Code language: JavaScript (javascript)
Let’s save the name of the cluster in a variable called K8S_NAME.
$ export K8S_NAME=”kubernetes”Code language: JavaScript (javascript)Next, we’ll create a variable with the address of that cluster’s API server (called K8S_API). We can get that information from our initial request or copy and paste the following command to create it using the K8S_NAME:
$ K8S_API=$(kubectl config view -o
jsonpath="{.clusters[?(@.name==\"$K8S_NAME\")].cluster.server}")Code language: JavaScript (javascript)
The next step is to create a secret to hold a token. Again, we’ll use a kubectl command to accomplish this:
$ kubectl apply -f - <<EOF
> apiVersion: v1
> kind: Secret
> metadata:
>   name: default-token
>   annotations:
>     kubernetes.io/service-account.name: default
> type: kubernetes.io/service-account-token
> EOF

secret/default-token createdCode language: JavaScript (javascript)
We need a little routine to wait until the token controller populates the secret with a token.
$ while ! kubectl describe secret default-token | grep -E '^token' >/dev/null; do
>   echo "waiting for token..." >&2
>   sleep 1
> doneCode language: JavaScript (javascript)
And finally, we’ll get the token value and put it into a variable called K8S_TOKEN. If you’re curious, the token is a standard Javascript Web Token (JWT) commonly used by web applications.
$ K8S_TOKEN=$(kubectl get secret default-token -o
jsonpath='{.data.token}' | base64 --decode)Code language: JavaScript (javascript)
With our token, we can now make an API call directly to the kubeapi-server on our master node, using the –insecure flag to bypass SSL certificate validation:
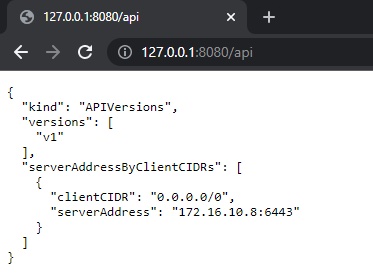
$ curl -X GET $K8S_API/api --header "Authorization: Bearer $K8S_TOKEN" --insecure

  % Total    % Received % Xferd  Average Speed   Time    Time     Time  Current
                                 Dload  Upload   Total   Spent    Left  Speed
100   183  100   183    0     0   5382      0 --:--:-- --:--:-- --:--:--  5545

{
  "kind": "APIVersions",
  "versions": [
    "v1"
  ],
  "serverAddressByClientCIDRs": [
    {
      "clientCIDR": "0.0.0.0/0",
      "serverAddress": "172.16.10.8:6443"
    }
  ]
}Code language: PHP (php)
As we said at the beginning, the Kubernetes API is central to learning more about your clusters and managing them by adding and manipulating deployments, adding services, and scaling your applications up and down. The true value of the API lies in the ability to interact with it programmatically, and to help with this, Kubernetes provides and supports client libraries for common languages, such as Go, Python, Java, dotnet, Javascript, and Haskell.
Understanding Kubernetes API Watch
One use of the API is to determine the current state of an application or resource running on your cluster. If you are troubleshooting instability or some other problem, you can execute API requests to observe what is happening. However, continually running API commands and looking for changes in the response isn’t fun, practical, or valuable.
The Kubernetes API also supports the concept of watches, which you can set up on an API call to monitor changes to the state of the specified resources over time.
Let’s explore watches through kubectl and also directly in the API itself. We’ll create a deployment on our cluster and scale it up. We’ll use v1 of the nginx image for this deployment.
$ kubectl create deployment nginx --image=nginx:1

deployment.apps/nginx created

$ kubectl autoscale deployment nginx --min=5 --max=10

horizontalpodautoscaler.autoscaling/nginx autoscaled
Our cluster should now have five pods running the nginx application. Now, we’ll update the image used by that deployment to v1.21. After we’ve done that, we can use the get pods action and resource to see the status of our pods as they’re updating.
$ kubectl set image deployment/nginx nginx=nginx:1.21

deployment.apps/nginx image updated

$ kubectl get pods
NAME                     READY   STATUS              RESTARTS   AGE
nginx-65895c4c4f-8x7z2   1/1     Terminating         0          6m39s
nginx-65895c4c4f-fqmhp   1/1     Running             0          6m30s
nginx-65895c4c4f-n8kf6   1/1     Running             0          6m30s
nginx-65895c4c4f-nbgng   1/1     Running             0          6m29s
nginx-65895c4c4f-qc4fh   1/1     Running             0          6m30s
nginx-f594cdf46-49k7d    0/1     ContainerCreating   0          3s
nginx-f594cdf46-7rtw4    0/1     ContainerCreating   0          2s
nginx-f594cdf46-lv2kk    0/1     ContainerCreating   0          3sCode language: JavaScript (javascript)
You’ll observe pods in various states of running, terminating, and creation. Kubernetes ensures that the application remains accessible while the update takes place. However, if we want to see how the deployment is going, we’ll have to keep executing the kubectl get pods command to see how it changes over time. Let’s roll back that latest deployment and then set up a watch so we can watch it happen in real-time without having to keep running the same command. First, let’s take a peek at the rollout history for this deployment:
$ kubectl rollout history deployment/nginx

deployment.apps/nginx
REVISION  CHANGE-CAUSE
1         <none>
2         <none>Code language: HTML, XML (xml)
Let’s roll the deployment back to the previous version and then set up a watch so we can watch as it happens. We’ll use the watch flag -w after the status parameter to monitor the deployment in real-time until it completes.
$ kubectl rollout undo deployment/nginx --to-revision=1

deployment.apps/nginx rolled back

$ kubectl rollout status -w deployment/nginx
Waiting for deployment "nginx" rollout to finish: 3 out of 5 new replicas have been updated...
Waiting for deployment "nginx" rollout to finish: 3 out of 5 new replicas have been updated...
Waiting for deployment "nginx" rollout to finish: 3 out of 5 new replicas have been updated...
Waiting for deployment "nginx" rollout to finish: 3 out of 5 new replicas have been updated...
Waiting for deployment "nginx" rollout to finish: 3 out of 5 new replicas have been updated...
Waiting for deployment "nginx" rollout to finish: 4 out of 5 new replicas have been updated...
Waiting for deployment "nginx" rollout to finish: 4 out of 5 new replicas have been updated...
Waiting for deployment "nginx" rollout to finish: 2 old replicas are pending termination...
Waiting for deployment "nginx" rollout to finish: 1 old replicas are pending termination...
Waiting for deployment "nginx" rollout to finish: 1 old replicas are pending termination...
Waiting for deployment "nginx" rollout to finish: 1 old replicas are pending termination...
Waiting for deployment "nginx" rollout to finish: 4 of 5 updated replicas are available...
deployment "nginx" successfully rolled outCode language: JavaScript (javascript)
Observing a rollout through kubectl provides some insights. However, if the kubectl output doesn’t provide enough information, or we want to display this information in another tool, we can get the raw information through the API.
Using the proxy that we set up earlier, we can gather a plethora of data about each pod as it is added or terminated. Another benefit of using the API is that the watch serves as a continuous feed of information based on parameters you pass in. For this application, we can curl http://localhost:8080/api/v1/namespaces/default/pods?watch=1&app=nginx from a separate terminal and view changes as they occur, or we can feed them into another tool for deeper analysis.
$ curl http: //localhost:8080/api/v1/namespaces/default/pods?watch=1&app=nginx
  [1] 1236
  % Total % Received % Xferd Average Speed Time Time Time Current
Dload Upload Total Spent Left Speed
0 0 0 0 0 0 0 0--: --: -- --: --: -- --: --: --0

$ {
  "type": "ADDED",
  "object": {
    "kind": "Pod",
    "apiVersion": "v1",
    "metadata": {
      "name": "nginx-f594cdf46-b8rmz",
      "generateName": "nginx-f594cdf46-",
      "namespace": "default",
      "uid": "a2315438-4e70-485b-8de1-12d9a2f4cee0",
      "resourceVersion": "115953",
      "creationTimestamp": "2022-03-16T08:44:34Z",
      "labels": {
        "app": "nginx",
        "pod-template-hash": "f594cdf46"
      },
      "annotations": {
        "cni.projectcalico.org/containerID": "ad6ec053a52ede11a94e832afbc9f0dc4a3e2f801cdf28393b8ac70fd54cfb3e",
        "cni.projectcalico.org/podIP": "10.10.130.137/32",
        "cni.projectcalico.org/podIPs": "10.10.130.137/32"
      },
      "ownerReferences": [{
        "apiVersion": "apps/v1",
        "kind": "ReplicaSet",
        "name": "nginx-f594cdf46",
        "uid": "661d57f3-75ce-494a-8b16-001ccbae090f",
        "controller": true,
        "blockOwnerDeletion": true
      }],
      "managedFields": [{
            "manager": "kube-controller-manager",
            "operation": "Update",
            "apiVersion": "v1",
            "time": "2022-03-16T08:44:34Z",
            "fieldsType": "FieldsV1",
            "fieldsV1": {
              "f:metadata": {
                "f:generateName": {},
                "f:labels": {
                  ".": {},
                  "f:app": {},
                  "f:pod-tem…Code language: JavaScript (javascript)
Learning More
As the name suggests, the Kubernetes API is the interface through which you manage, control, and observe everything in your cluster. The Kubernetes website describes it as “the fundamental fabric of Kubernetes.” While tools like kubectl provide a simplified and user-friendly way to manage and view your cluster, you can gain even greater control as well as access to more profound and more detailed information through direct access to the API.
If this sounds like something you’d like to learn more about and experiment with, the Kubernetes documentation is an excellent place to start. It walks you through everything from basic concepts to ways to get the most out of the API.