

Security is a fundamental pillar of the AWS Foundational Security Best Practices. To minimize security risks and protect your environment, it’s essential to follow AWS security best practices, organized by service. This structured approach helps you proactively address potential vulnerabilities and maintain a robust, secure cloud architecture.
- AWS IAM
- (1) IAM policies should not allow full “*” administrative privileges
- (2) IAM users should not have IAM policies attached
- (3) IAM users’ access keys should be rotated every 90 days or less
- (4) IAM root user access key should not exist
- (5) MFA should be enabled for all IAM users that have a console password
- (6) Hardware MFA should be enabled for the root user
- (7) Password policies for IAM users should have strong configurations
- (8) Unused IAM user credentials should be removed
- Amazon S3
- (9) S3 Block Public Access setting should be enabled
- (10) S3 buckets should have server-side encryption enabled
- (11) S3 Block Public Access setting should be enabled at the bucket level
- AWS CloudTrail
- (12) CloudTrail should be enabled and configured with at least one multi-Region trail
- AWS Config
- (15) AWS Config should be enabled
- Amazon EC2
- AWS DMS
- (20) AWS Database Migration Service replication instances should not be public
- Amazon EBS
- (21) Amazon EBS snapshots should not be public, determined by the ability to be restorable by anyone
- Amazon OpenSearch Service
- (22) Elasticsearch domains should have encryption at rest enabled
- Amazon SageMaker
- (23) SageMaker notebook instances should not have direct internet access
- AWS Lambda
- (24) Lambda functions should use supported runtimes
- AWS KMS
- (25) AWS KMS keys should not be unintentionally deleted
- Amazon GuardDuty
- (26) GuardDuty should be enabled
So, you’ve got a problem to solve and AWS is your choice to build and host your solution. You’ve set up your account and are ready to dive in—architecting, coding, building, and deploying. But not so fast.
To ensure your solution is truly operational, secure, reliable, performant, and cost-effective, there are essential configurations to tackle first. The ideal time to address these is now—right at the start, before you begin designing and engineering. Setting up these foundations from the beginning will pay off significantly in the long run.
Initial AWS setup
First and foremost, never use your root account for everyday activities. Instead, go to Identity and Access Management (IAM) and create an administrator user. Store your root credentials in a secure location (is your password strong enough?), and if any access keys are associated with your root account, now is the time to delete them.
It’s also crucial to enable Multi-Factor Authentication (MFA) for your root account. The result should be a root user with MFA enabled and no access keys—and this account should only be used when absolutely necessary.
For your newly created admin account, activating MFA is essential. In fact, it should be a requirement for every user in your account if you want to maintain a security-first mindset (and trust me, you do). This is especially critical for power users. Remember, this account should only be used for administrative purposes.
For daily use, head to the IAM panel to create users, groups, and roles. These identities should only have access to the resources you explicitly grant permissions to, following the principle of least privilege.
At this point, you should have:
- Root account: securely locked away, with no access keys.
- Admin account: reserved for administrative tasks.
- Users, groups, and roles: set up for everyday activities, each with only the permissions they need.
Make sure MFA is activated and strong passwords are enforced for all of these accounts.
You’re nearly set to implement AWS security best practices, but before you proceed, let’s take a moment to understand the AWS Shared Responsibility Model. This model clarifies what security tasks AWS handles and what you, as the customer, are responsible for. It’s crucial to know this distinction as you move forward with securing your AWS environment.
AWS shared responsibility model
Security and compliance are a shared responsibility between AWS and the customer. AWS manages and controls the infrastructure, including the host operating system, virtualization layer, and physical security of the data centers.
As the customer, you are responsible for managing the guest operating system (including updates and security patches), the associated application software, and the configuration of AWS security features, such as security groups and firewalls.
In other words, while AWS provides a secure foundation, the management and application of diligent security practices within your environment rest squarely on your shoulders.
AWS security best practices checklist
In this section, we will explore some of the most commonly used AWS services and highlight 26 security best practices you should adopt to ensure a secure and compliant cloud environment.
Sysdig Secure, part of Sysdig’s Cloud Native Application Protection Platform (CNAPP), helps ensure the security and compliance of your AWS environment. As a comprehensive CNAPP tool, Sysdig Secure assesses cloud configurations to detect potential misconfigurations and security risks. It also allows you to create custom posture controls tailored to your specific compliance requirements, enabling highly customized detection of configuration issues. Additionally, Sysdig Secure continuously monitors AWS CloudTrail logs, detecting suspicious activity, unauthorized configuration changes, and potential threats in real time.
In the rest of this article, we’ll leverage Sysdig Secure’s custom controls capability to strengthen the security of our AWS accounts. Notably, all the controls shown here are provided out of the box with Sysdig Secure. To learn more about creating custom controls, check out this detailed guide on the Sysdig blog on implementing tailored posture policies.
Please note that all the controls shown in this article are already provided out of the box with Sysdig Secure.
Now let’s walk through service by service.
1.- Do not allow full “*” administrative privileges on IAM policies 🟥
If you want to detect the use of full administrative privileges with Sysdig Secure, here is a Custom Control you can define using the Terraform Sysdig Provider:
terraform {
  required_providers {
    sysdig = {
      source = "sysdiglabs/sysdig"
      version = ">=0.5"
    }
  }
}

provider "sysdig" {
  sysdig_secure_url="https://secure.sysdig.com"
}

resource "sysdig_secure_posture_control" "no_full_administrative_privileges_policies" {
  name = "IAM - No Full Administrative Privileges Policies"
  description = "It's more secure to start with a minimum set of permissions and grant additional permissions as necessary, rather than starting with permissions that are too lenient and then trying to tighten them later. Providing full administrative privileges instead of restricting to the minimum set of permissions that the user is required to do exposes the resources to potentially unwanted actions. IAM policies that have a statement with "Effect": "Allow" with "Action": "\*" over "Resource": "\*" should be removed."
  resource_kind = "AWS_POLICY"
  severity = "High"
  rego = <<-EOF
    package sysdig

    import future.keywords.if
    import future.keywords.in

    default risky := false

    risky if {
	input.AttachmentCount > 0
	document := json.unmarshal(input.VersionDocument)
	some stmt in document.Statement
	stmt.Effect == "Allow"
	stmt.Resource == "*"
	stmt.Action == "*"
    }
  EOF
  remediation_details = <<-EOF
    **From Console**: Perform the following to detach the policy that has full administrative privileges:

    1. Sign in to the AWS Management Console and open the IAM console at https://console.aws.amazon.com/iam/.
    2. In the navigation pane, click Policies and then search for the policy name found in the audit step.
    3. Select the policy that needs to be deleted.
    4. In the policy action menu, select first Detach
    5. Select all Users, Groups, Roles that have this policy attached
    6. Click Detach Policy
    7. In the policy action menu, select Detach
    8. Select the newly detached policy and select Delete
  EOF
}

Code language: JavaScript (javascript)
2.- Do not attach IAM policies to users 🟩
By default, IAM users, groups, and roles have no access to AWS resources.
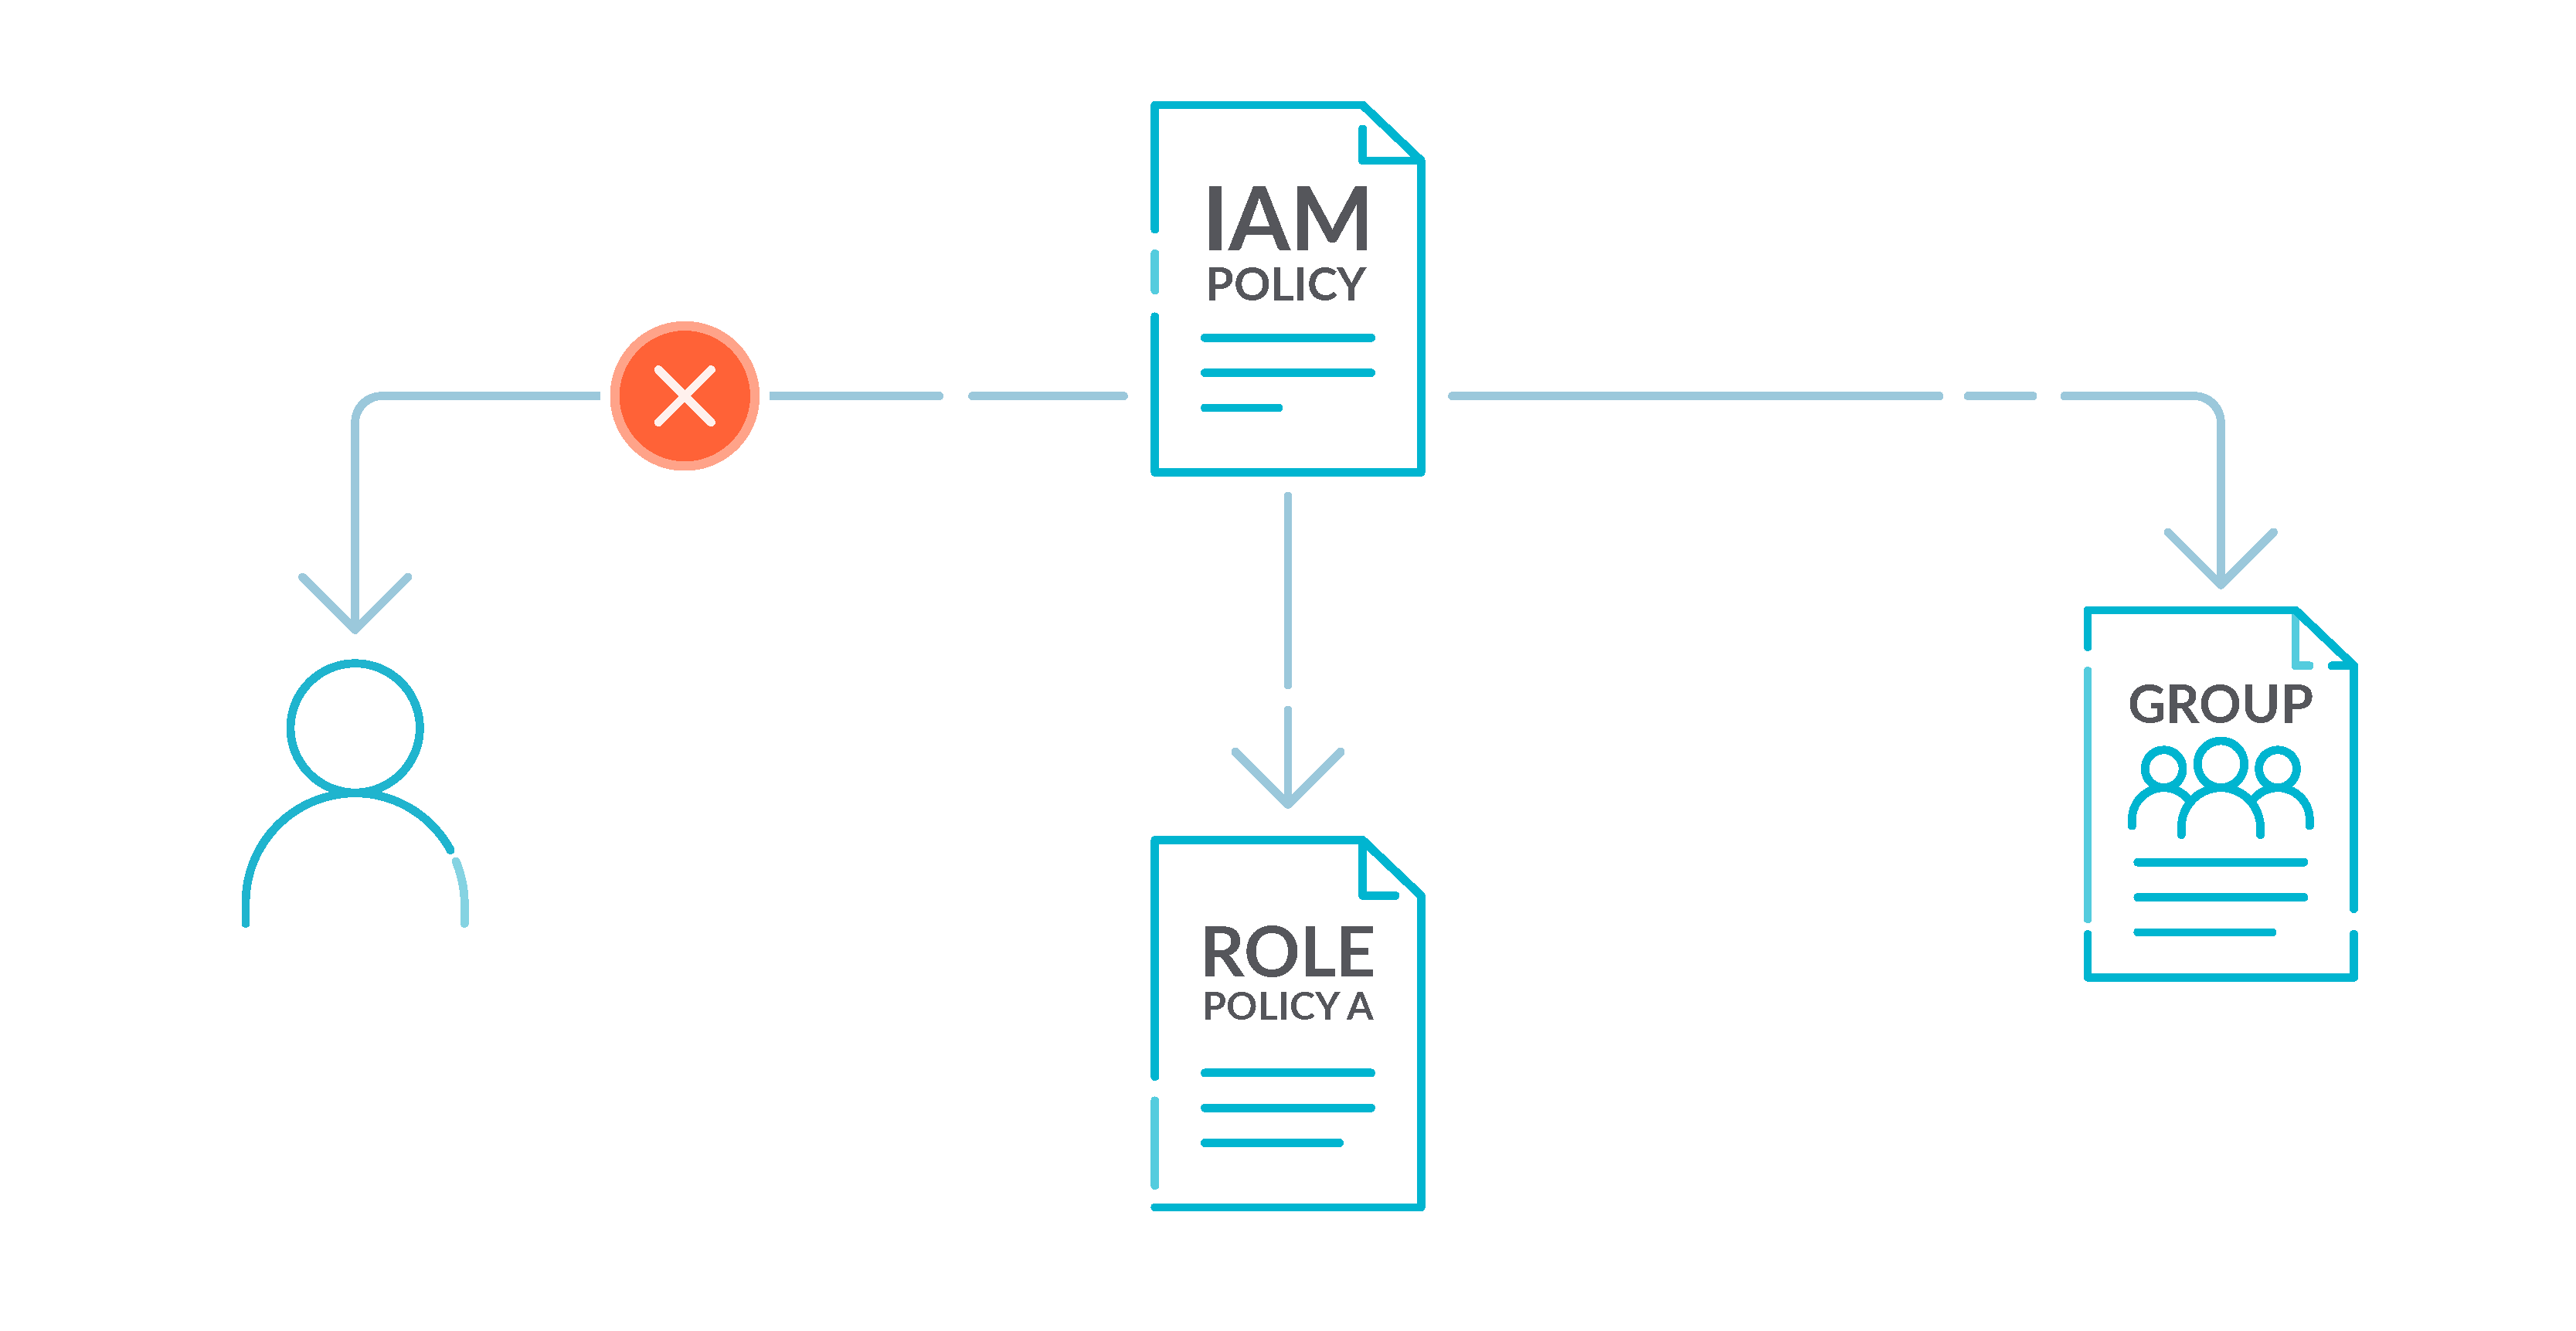
IAM policies grant privileges to users, groups, or roles. We recommend that you apply IAM policies directly to groups and roles but not to users. Assigning privileges at the group or role level reduces the complexity of access management as the number of users grows. Reducing access management complexity might in turn reduce the opportunity for a principal to inadvertently receive or retain excessive privileges.
3.- Rotate IAM users’ access keys every 90 days or less 🟨
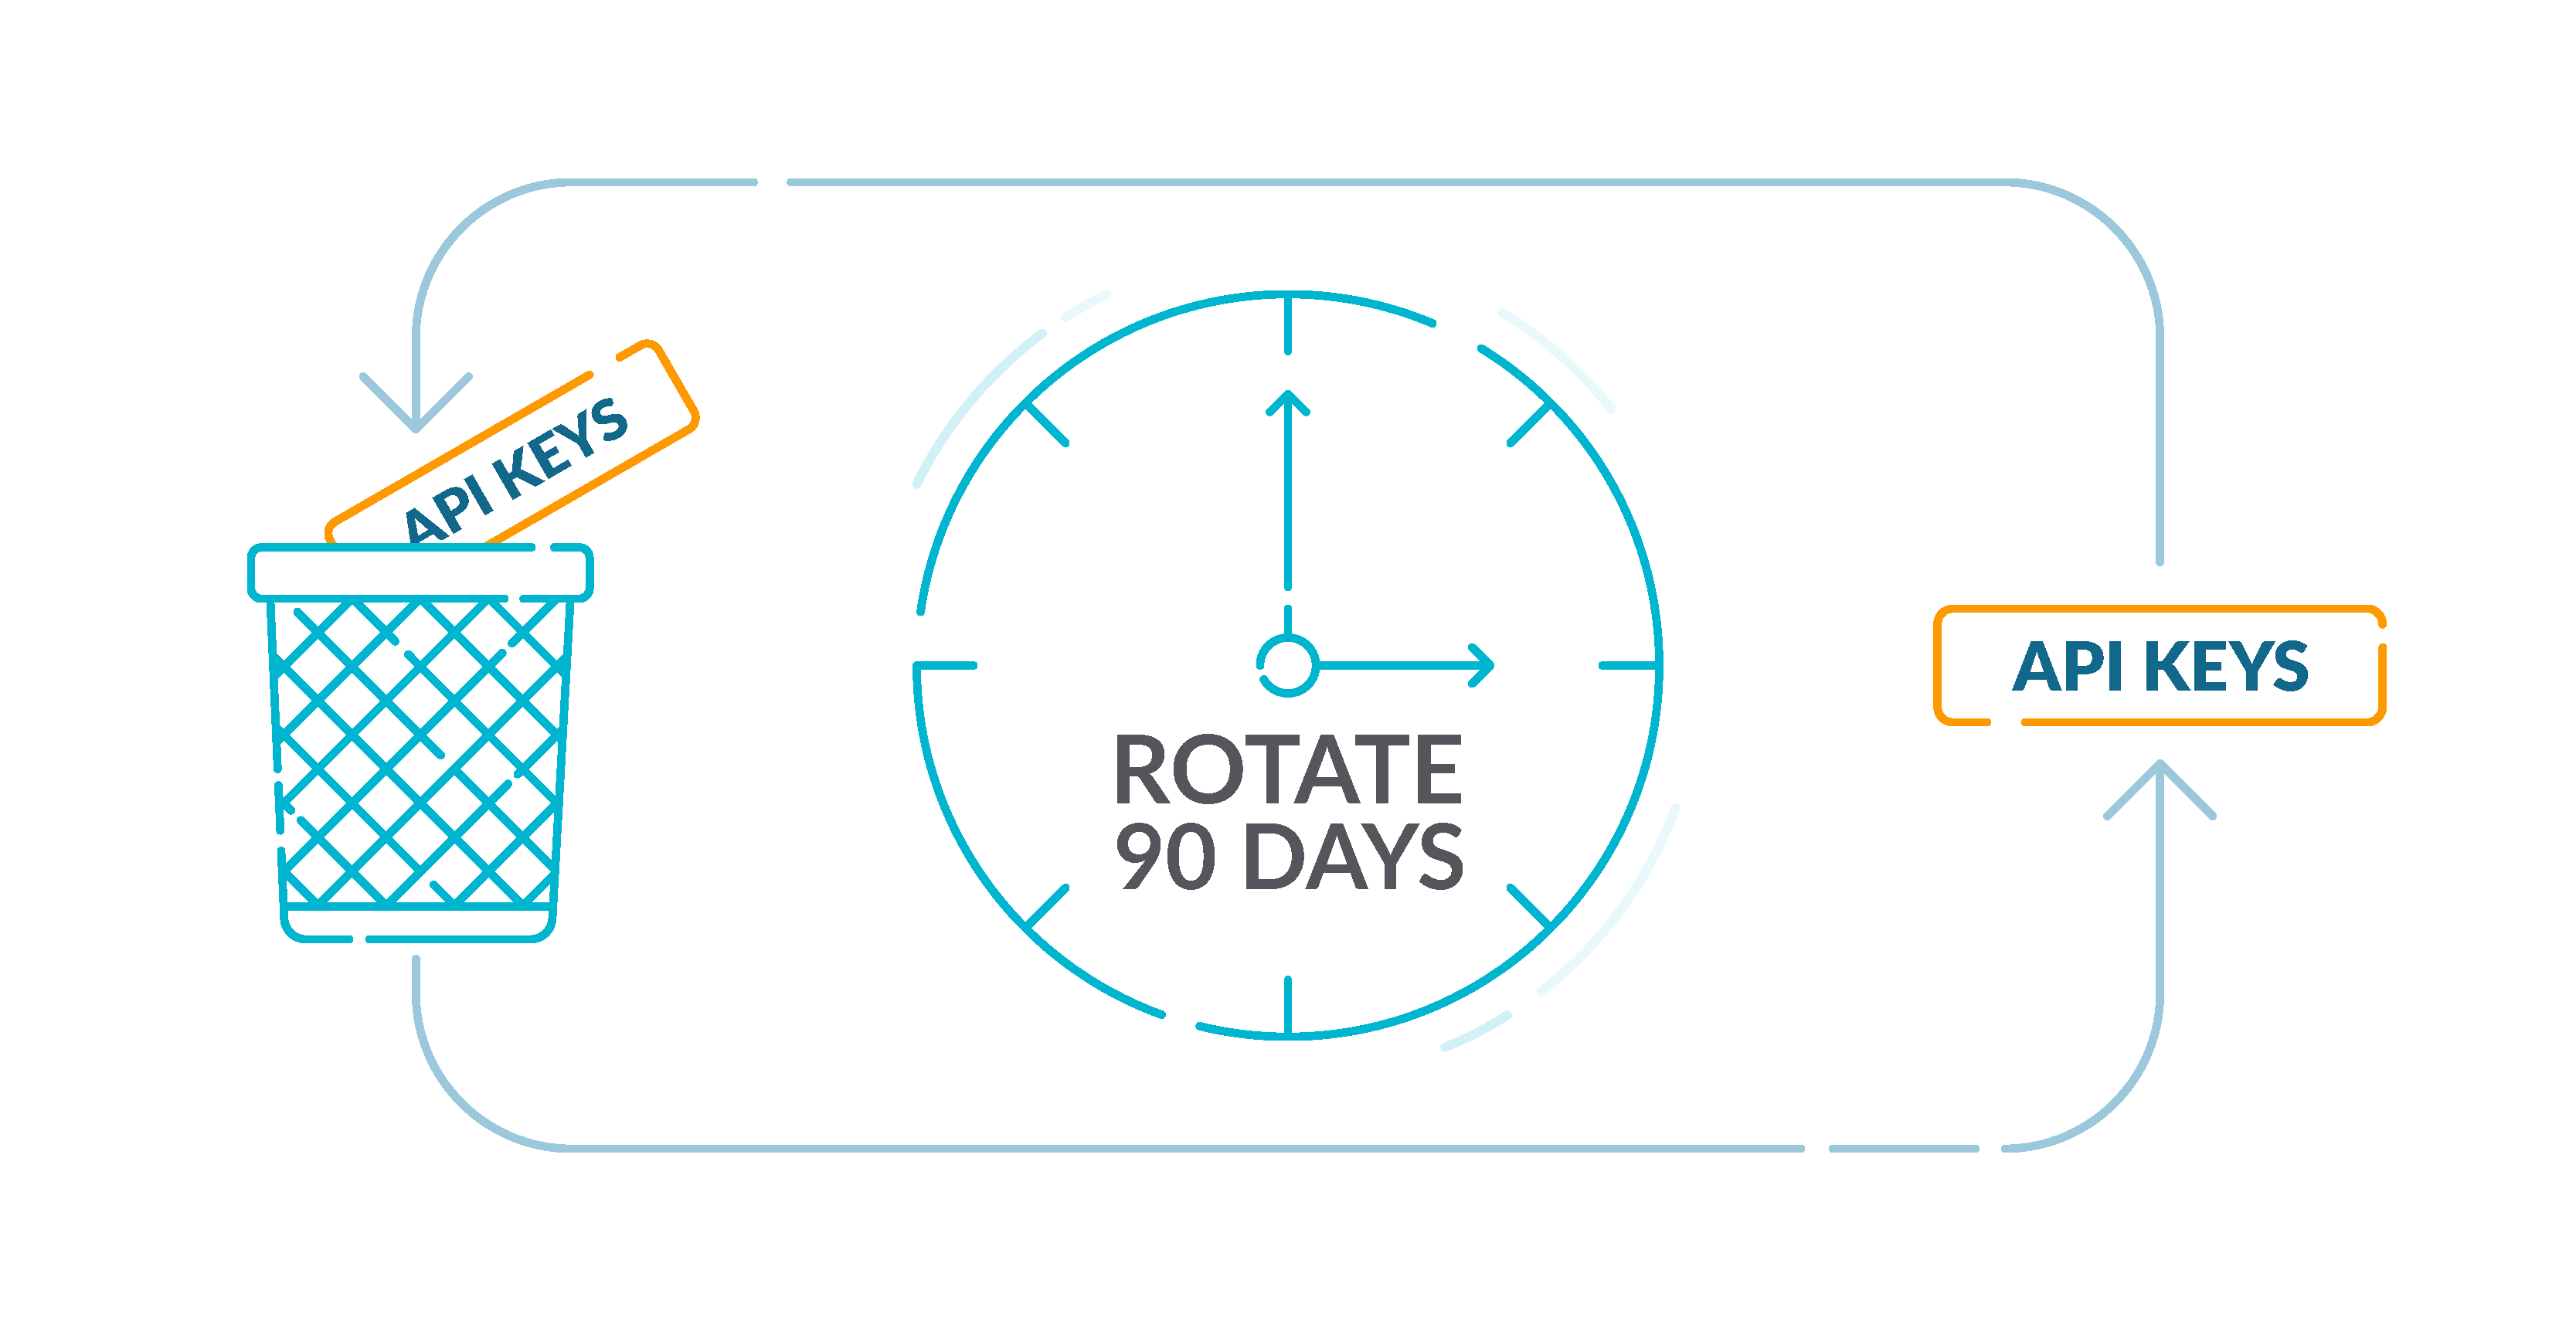
AWS recommends that you rotate the access keys every 90 days. Rotating access keys reduces the chance that an access key that is associated with a compromised or terminated account is used. It also ensures that data cannot be accessed with an old key that might have been lost, cracked, or stolen. Always update your applications after you rotate access keys.
First, list all IAM users available in your AWS account with:
aws iam list-users --query 'Users[*].UserName'Code language: JavaScript (javascript)For all the users returned by this command, determine each active access key lifetime by doing:
aws iam list-access-keys --user-name USER_NAMECode language: JavaScript (javascript)This should expose the metadata for each access key existing for the specified IAM user. The output will look like this:
{
    "AccessKeyMetadata": [
        {
            "UserName": "some-user",
            "Status": "Inactive",
            "CreateDate": "2022-05-18T13:43:23Z",
            "AccessKeyId": "AAAABBBBCCCCDDDDEEEE"
        },
        {
            "UserName": "some-user",
            "Status": "Active",
            "CreateDate": "2022-03-21T09:12:32Z",
            "AccessKeyId": "AAAABBBBCCCCDDDDEEEE"
        }
    ]
}Code language: JavaScript (javascript)
Check the CreateDate parameter value for each active key to determine its creation time. If an active access key has been created before the last 90 days, the key is outdated and must be rotated to secure the access to your AWS resources.
Repeat for each IAM user existing in your AWS account.
4.- Ensure that IAM root user access keys do not exist 🟥
The following Custom Control will check if root access keys have been used on your account:
terraform {
  required_providers {
    sysdig = {
      source = "sysdiglabs/sysdig"
      version = ">=0.5"
    }
  }
}

provider "sysdig" {
  sysdig_secure_url="https://secure.sysdig.com"
}

resource "sysdig_secure_posture_control" "disabled_root_access_keys" {
  name = "IAM - Disabled Root Access Keys"
  description = "Removing access keys associated with the 'root' user account limits vectors by which the account can be compromised. Additionally, removing the root access keys encourages the creation and use of role based accounts that are least privileged."
  resource_kind = "AWS_ROOT_USER"
  severity = "High"
  rego = <<-EOF
    package sysdig

    import future.keywords.if

    default risky := false

    risky if {
	input.Report.accessKey1Active == true
    }

    risky if {
	input.Report.accessKey2Active == true
    }
  EOF
  remediation_details = <<-EOF
    **From Console**: Perform the following to delete or disable active root user access keys:

    1. Sign in to the AWS Management Console as root and open the IAM console at https://console.aws.amazon.com/iam/.
    2. Click on <Root\_Account\_Name> at the top right and select My Security Credentials from the drop down list.
    3. On the pop out screen Click on Continue to Security Credentials.
    4. Click on Access Keys (Access Key ID and Secret Access Key).
    5. Under the Status column if there are any Keys which are Active.
    5. Click on Make Inactive - (Temporarily disable Key - may be needed again).
    6. Click Delete - (Deleted keys cannot be recovered).
  EOF
}Code language: JavaScript (javascript)
5.- Enable MFA for all IAM users that have a console password 🟨
Multi-factor authentication (MFA) adds an extra layer of protection on top of a username and password. With MFA enabled, when a user signs in to an AWS website, they are prompted for their username and password. In addition, they are prompted for an authentication code from their AWS MFA device.
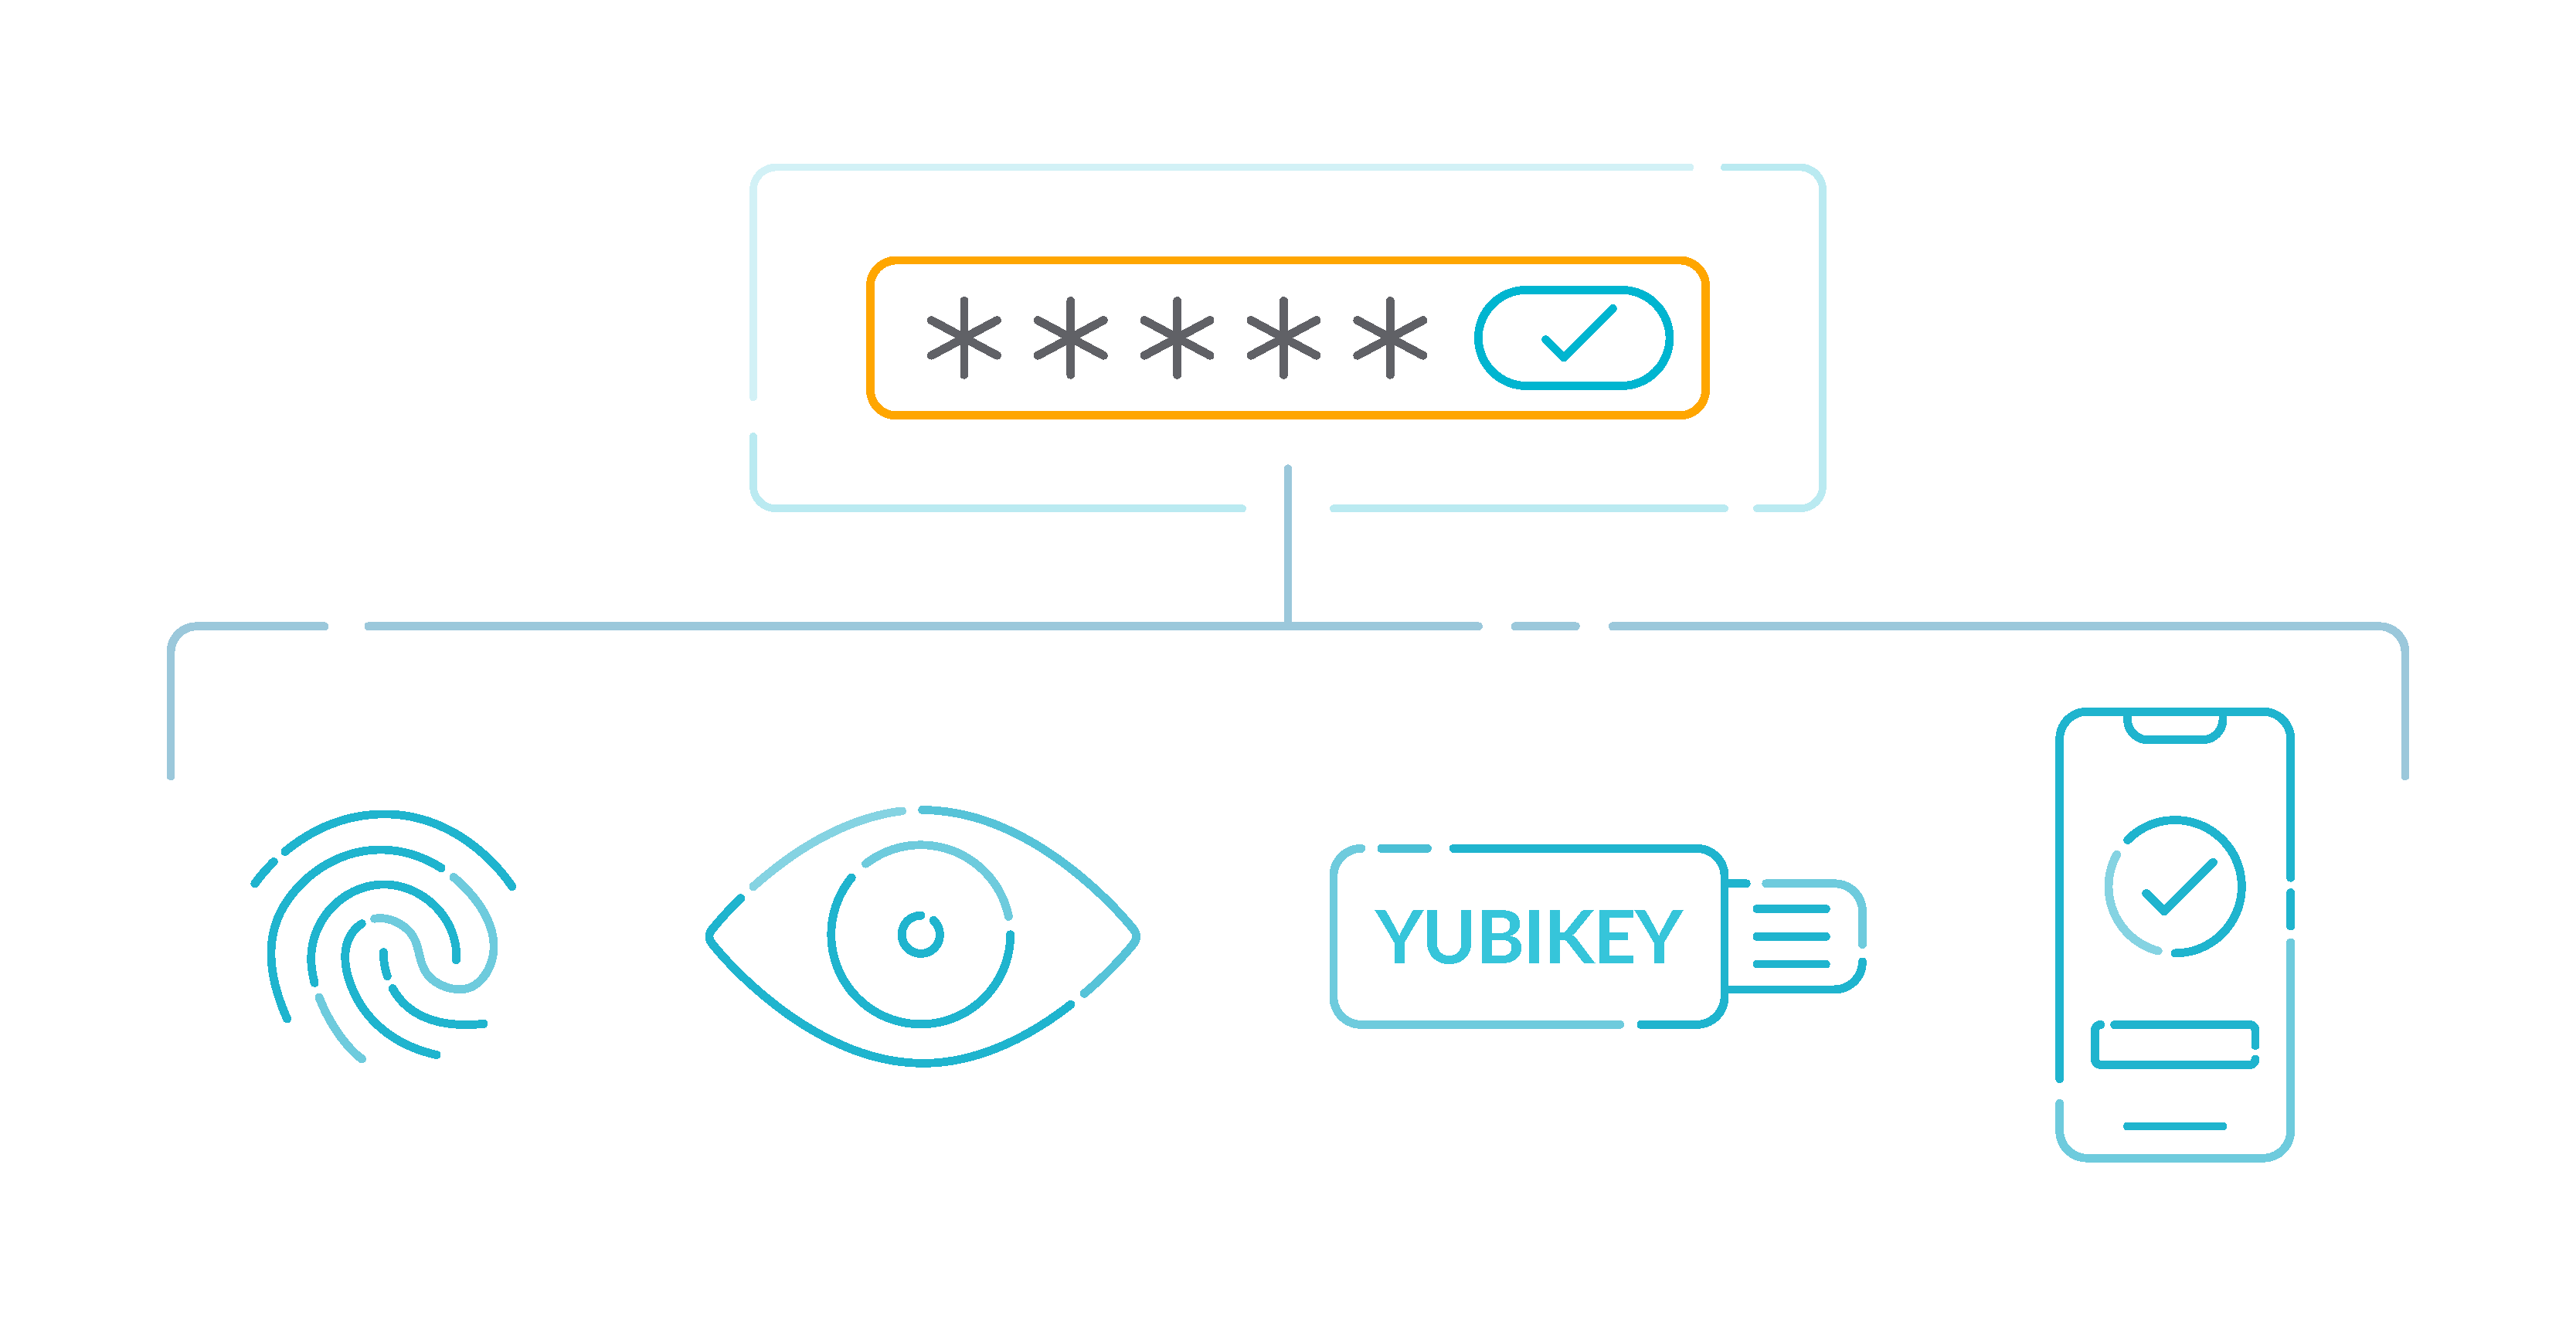
We recommend that you enable MFA for all accounts that have a console password. MFA is designed to provide increased security for console access. The authenticating principal must possess a device that emits a time-sensitive key and must have knowledge of a credential.
If you still want to add another layer of security, we recommend monitoring your logins with MFA to detect spam, let’s continue with more AWS security best practices.
6.- Enable hardware MFA for the root user 🟥
Here is a Custom Control to detect lack of root hardware MFA:
terraform {
  required_providers {
    sysdig = {
      source = "sysdiglabs/sysdig"
      version = ">=0.5"
    }
  }
}

provider "sysdig" {
  sysdig_secure_url="https://secure.sysdig.com"
}

resource "sysdig_secure_posture_control" "defined_root_hardware_mfa" {
  name = "IAM - Defined Root Hardware MFA"
  description = "A hardware MFA has a smaller attack surface than a virtual MFA. For example, a hardware MFA does not suffer the attack surface introduced by the mobile smartphone on which a virtual MFA resides. **Note**: Using hardware MFA for many, many AWS accounts may create a logistical device management issue. If this is the case, consider implementing this Level 2 recommendation selectively to the highest security AWS accounts and the Level 1 recommendation applied to the remaining accounts."
  resource_kind = "AWS_ROOT_USER"
  severity = "Medium"
  rego = <<-EOF
    package sysdig

    import future.keywords.if

    default risky := false

    risky if {
	not input.AccountSummary.AccountMFAEnabled
    }

    risky if {
	not input.AccountSummary.AccountMFAEnabled == 1
    }

    risky if {
	input.AccountSummary.AccountMFAEnabled == 1
	not input.VirtualMfaSerialNumber
    }

    risky if {
	input.AccountSummary.AccountMFAEnabled == 1
	not input.VirtualMfaSerialNumber == ""
    }
  EOF
  remediation_details = <<-EOF
    **From Console**: Perform the following to establish a hardware MFA for the root user account:

    1. Sign in to the AWS Management Console and open the IAM console at https://console.aws.amazon.com/iam/.

    **Note**: To manage MFA devices for the AWS root user account, you must use your root account credentials to sign in to AWS. You cannot manage MFA devices for the root account using other credentials.

    2. Choose Dashboard, and under Security Status, expand Activate MFA on your root account.
    3. Choose Activate MFA.
    4. In the wizard, choose A hardware MFA device and then choose Next Step.
    5. In the Serial Number box, enter the serial number that is found on the back of the MFA device.
    6. In the Authentication Code 1 box, enter the six-digit number displayed by the MFA device. You might need to press the button on the front of the device to display the number.
    7. Wait 30 seconds while the device refreshes the code, and then enter the next six-digit number into the Authentication Code 2 box. You might need to press the button on the front of the device again to display the second number.
    8. Choose Next Step. The MFA device is now associated with the AWS account. The next time you use your AWS account credentials to sign in, you must type a code from the hardware MFA device.

Remediation for this recommendation is not available through AWS CLI.
  EOF
}Code language: JavaScript (javascript)
7.- Ensure those password policies for IAM users have strong configurations 🟨
We recommend that you enforce the creation of strong user passwords. You can set a password policy on your AWS account to specify complexity requirements and mandatory rotation periods for passwords.
When you create or change a password policy, most of the password policy settings are enforced the next time users change their passwords. Some of the settings are enforced immediately.
What constitutes a strong password is a subjective matter, but the following settings will put you on the right path:
RequireUppercaseCharacters: true
RequireLowercaseCharacters: true
RequireSymbols: true
RequireNumbers: true
MinimumPasswordLength: 8Code language: JavaScript (javascript)
8.- Remove unused IAM user credentials 🟨
IAM users can access AWS resources using different types of credentials, such as passwords or access keys. We recommend you remove or deactivate all credentials that were unused for 90 days or more to reduce the window of opportunity for credentials associated with a compromised or abandoned account to be used.
You can use the IAM console to get some of the information that you need to monitor accounts for dated credentials. For example, when you view users in your account, there is a column for Access key age, Password age, and Last activity. If the value in any of these columns is greater than 90 days, make the credentials for those users inactive.
You can also use credential reports to monitor user accounts and identify those with no activity for 90 or more days. You can download credential reports in .csv format from the IAM console.
For more information, check out AWS security best practices for IAM in more detail.
Amazon S3
Amazon Simple Storage Service (Amazon S3) is an object storage service offering industry-leading scalability, data availability, security, and performance. There are few AWS security best practices to adopt when it comes to S3.
9.- Enable S3 Block Public Access setting 🟨
Amazon S3 public access block is designed to provide controls across an entire AWS account or at the individual S3 bucket level to ensure that objects never have public access. Public access is granted to buckets and objects through access control lists (ACLs), bucket policies, or both.
Unless you intend to have your S3 buckets be publicly accessible, you should configure the account level Amazon S3 Block Public Access feature.
Get the names of all S3 buckets available in your AWS account:
aws s3api list-buckets --query 'Buckets[*].Name'Code language: JavaScript (javascript)For each bucket returned, get its S3 Block Public Access feature configuration:
aws s3api get-public-access-block --bucket BUCKET_NAMECode language: JavaScript (javascript)The output for the previous command should be like this:
"PublicAccessBlockConfiguration": {
  "BlockPublicAcls": false,
  "IgnorePublicAcls": false,
  "BlockPublicPolicy": false,
  "RestrictPublicBuckets": false
}Code language: JavaScript (javascript)
If any of these values is false, then your data privacy is at stake. Use this short command to remediate it:
aws s3api put-public-access-block
	--region REGION
	--bucket BUCKET_NAME
	--public-access-block-configuration BlockPublicAcls=true,IgnorePublicAcls=true,BlockPublicPolicy=true,RestrictPublicBuckets=true	Code language: JavaScript (javascript)
10.- Enable server-side encryption on S3 buckets 🟥
For an added layer of security for your sensitive data in S3 buckets, you should configure your buckets with server-side encryption to protect your data at rest.
Amazon S3 encrypts each object with a unique key. As an additional safeguard, Amazon S3 encrypts the key itself with a root key that it rotates regularly. Amazon S3 server-side encryption uses one of the strongest block ciphers available to encrypt your data, 256-bit Advanced Encryption Standard (AES-256).
List all existing S3 buckets available in your AWS account:
aws s3api list-buckets --query 'Buckets[*].Name'Code language: Perl (perl)Now, use the names of the S3 buckets returned at the previous step as identifiers to retrieve their Default Encryption feature status:
aws s3api get-bucket-encryption --bucket BUCKET_NAMECode language: Perl (perl)The command output should return the requested feature configuration details. If the get-bucket-encryption command output returns an error message, the default encryption is not currently enabled, and therefore the selected S3 bucket does not automatically encrypt all objects when stored in Amazon S3.
Repeat this procedure for all your S3 buckets.
11.- Enable S3 Block Public Access setting at the bucket level 🟨.
You can use this Custom Control to detect S3 buckets that are publicly accessible:
terraform {
  required_providers {
    sysdig = {
      source = "sysdiglabs/sysdig"
      version = ">=0.5"
    }
  }
}

provider "sysdig" {
  sysdig_secure_url="https://secure.sysdig.com"
}

resource "sysdig_secure_posture_control" "bucket_public_access_block" {
  name = "S3 - Blocked Public Access (Bucket-wise)"
  description = "Amazon S3 `Block public access (bucket settings)` prevents the accidental or malicious public exposure of data contained within the respective bucket(s). Amazon S3 `Block public access (account settings)` prevents the accidental or malicious public exposure of data contained within all buckets of the respective AWS account. Whether blocking public access to all or some buckets is an organizational decision that should be based on data sensitivity, least privilege, and use case."
  resource_kind = "AWS_S3_BUCKET"
  severity = "High"
  rego = <<-EOF
    package sysdig

    import future.keywords.if

    default risky := false

    risky if {
	not input.PublicAccessBlock[0].BlockPublicAcls
    }

    risky if {
	not input.PublicAccessBlock[0].BlockPublicPolicy
    }

    risky if {
	not input.PublicAccessBlock[0].IgnorePublicAcls
    }

    risky if {
	not input.PublicAccessBlock[0].RestrictPublicBuckets
    }
  EOF
  remediation_details = <<-EOF
    ## Remediation Impact
    When you apply Block Public Access settings to an account, the settings apply to all AWS Regions globally. The settings might not take effect in all Regions immediately or simultaneously, but they eventually propagate to all Regions.

    ## If utilizing Block Public Access (bucket settings)
    **Remediate Using AWS Console**:
    1. Login to AWS Management Console and open the Amazon S3 console using https://console.aws.amazon.com/s3/.
    2. Select the Check box next to the Bucket.
    3. Click on Edit public access settings.
    4. Click Block all public access.
    5. Repeat for all the buckets in your AWS account that contain sensitive data.
  EOF
}

Code language: Perl (perl)
AWS CloudTrail
After IAM, within the AWS security best practices, CloudTrail is the most important service to consider when detecting threats.
AWS CloudTrail is an AWS service that helps you enable governance, compliance, and operational and risk auditing of your AWS account. Actions taken by a user, role, or AWS service are recorded as events in CloudTrail.
Events include actions taken in the AWS Management Console, AWS Command Line Interface, and AWS SDKs and APIs. Discover the differences between CloudTrail vs CloudWatch
The following section will help you configure CloudTrail to monitor your infrastructure across all your regions.
12.- Enable and configure CloudTrail with at least one multi-Region trail 🟥
CloudTrail provides a history of AWS API calls for an account, including API calls made from the AWS Management Console, AWS SDKs, and command line tools. The history also includes API calls from higher-level AWS services, such as AWS CloudFormation.
The AWS API call history produced by CloudTrail enables security analysis, resource change tracking, and compliance auditing. Multi-Region trails also provide the following benefits.
- A multi-Region trail helps to detect unexpected activity occurring in otherwise unused Regions.
- A multi-Region trail ensures that global service event logging is enabled for a trail by default. Global service event logging records events generated by AWS global services.
- For a multi-Region trail, management events for all read and write operations ensure that CloudTrail records management operations on all of an AWS account’s resources.
By default, CloudTrail trails that are created using the AWS Management Console are multi-Region trails.
List all trails available in the selected AWS region:
aws cloudtrail describe-trailsCode language: Perl (perl)The output exposes each AWS CloudTrail trail along with its configuration details. If IsMultiRegionTrail config parameter value is false, the selected trail is not currently enabled for all AWS regions:
{
    "trailList": [
        {
            "IncludeGlobalServiceEvents": true,
            "Name": "ExampleTrail",
            "TrailARN": "arn:aws:cloudtrail:us-east-1:123456789012:trail/ExampleTrail",
            "LogFileValidationEnabled": false,
            "IsMultiRegionTrail": false,
            "S3BucketName": "ExampleLogging",
            "HomeRegion": "us-east-1"
        }
    ]
}Code language: Perl (perl)
Verify that all of your trails and make sure at least one is multi-Region.
13.- Enable encryption at rest with CloudTrail 🟨
You can check that the logs are encrypted with the following Custom control:
terraform {
  required_providers {
    sysdig = {
      source = "sysdiglabs/sysdig"
      version = ">=0.5"
    }
  }
}

provider "sysdig" {
  sysdig_secure_url="https://secure.sysdig.com"
}

resource "sysdig_secure_posture_control" "enabled_trail_log_file_encryption" {
  name = "Logging - Enabled Trail Log File Encryption"
  description = "Configuring CloudTrail to use SSE-KMS provides additional confidentiality controls on log data as a given user must have S3 read permission on the corresponding log bucket and must be granted decrypt permission by the CMK policy."
  resource_kind = "AWS_CLOUD_TRAIL"
  severity = "Medium"
  rego = <<-EOF
    package sysdig

    import future.keywords.if

    default risky := false

    risky if {
	not is_valid
    }

    is_valid if {
	input.KmsKeyId
	input.KmsKeyId != null
	input.KmsKeyId != ""
    }
  EOF
  remediation_details = <<-EOF
    ## Remediation Impact
    Customer created keys incur an additional cost. See https://aws.amazon.com/kms/pricing/ for more information.

    ## Remediate Using AWS Console
    Perform the following to configure CloudTrail to use SSE-KMS:

    1. Sign in to the AWS Management Console and open the CloudTrail console at https://console.aws.amazon.com/cloudtrail.
    2. In the left navigation pane, choose Trails .
    3. Click on a Trail.
    4. Under the S3 section click on the edit button (pencil icon).
    5. Click Advanced.
    6. Select an existing CMK from the KMS key Id drop-down menu.

    **Note**: Ensure the CMK is located in the same region as the S3 bucket.

    **Note**: You will need to apply a KMS Key policy on the selected CMK in order for CloudTrail as a service to encrypt and decrypt log files using the CMK provided. Steps are provided here for editing the selected CMK Key policy.

    7. Click Save.
    8. You will see a notification message stating that you need to have decrypt permissions on the specified KMS key to decrypt log files.
    9. Click Yes.

    ## Remediate Using Command Line
    Perform the following to configure CloudTrail to use SSE-KMS:

    ```
    aws cloudtrail update-trail --name <trail_name> --kms-id <cloudtrail_kms_key>
    aws kms put-key-policy --key-id <cloudtrail_kms_key> --policy <cloudtrail_kms_key_policy>
    ```
  EOF
}Code language: Perl (perl)
14.- Enable CloudTrail log file validation 🟨
CloudTrail log file validation creates a digitally signed digest file that contains a hash of each log that CloudTrail writes to Amazon S3. You can use these digest files to determine whether a log file was changed, deleted, or unchanged after CloudTrail delivered the log.
It is recommended that you enable file validation on all trails. Log file validation provides additional integrity checks of CloudTrail logs.
To check this in the AWS Console proceed as follows:
- Sign in to the AWS Management Console at https://console.aws.amazon.com/cloudtrail/.
- In the left navigation panel, select Trails.
- Under the Name column, select the trail name that you need to examine.
- Under S3 section, check for Enable log file validation status:
- Enable log file validation status. If the feature status is set to No, then the selected trail does not have log file integrity validation enabled. If this is the case, fix it:
- Click the pencil icon next to the S3 section to edit the trail bucket configuration.
- Under S3 bucket* click Advanced and search for the Enable log file validation configuration status.
- Select Yes to enable log file validation, and then click Save.
Learn more about security best practices in AWS Cloudtrail.
AWS Config
AWS Config provides a detailed view of the resources associated with your AWS account, including how they are configured, how they are related to one another, and how the configurations and their relationships have changed over time.
15.- Verify AWS Config is enabled 🟥
The AWS Config service performs configuration management of supported AWS resources in your account and delivers log files to you. The recorded information includes the configuration item (AWS resource), relationships between configuration items, and any configuration changes between resources.
It is recommended that you enable AWS Config in all Regions. The AWS configuration item history that AWS Config captures enables security analysis, resource change tracking, and compliance auditing.
Get the status of all configuration recorders and delivery channels created by the Config service in the selected region:
aws configservice --region REGION get-statusCode language: Perl (perl)The output from the previous command shows the status of all AWS Config delivery channels and configuration recorders available. If AWS Config is not enabled, the list for both configuration recorders and delivery channels are shown empty:
Configuration Recorders:
Delivery Channels:Code language: Perl (perl)
Or, if the service was previously enabled but is now disabled, the status should be set to OFF:
Configuration Recorders:
name: default
recorder: OFF
Delivery Channels:
name: default
last stream delivery status: NOT_APPLICABLE
last history delivery status: SUCCESS
last snapshot delivery status: SUCCESSCode language: Perl (perl)
To remediate this, after you enable AWS Config, configure it to record all resources.
- Open the AWS Config console at https://console.aws.amazon.com/config/.
- Select the Region to configure AWS Config in.
- If you haven’t used AWS Config before, see Getting Started in the AWS Config Developer Guide.
- Navigate to the Settings page from the menu, and do the following:
- Choose Edit.
- Under Resource types to record, select Record all resources supported in this region and Include global resources (e.g., AWS IAM resources).
- Under Data retention period, choose the default retention period for AWS Config data, or specify a custom retention period.
- Under AWS Config role, either choose Create AWS Config service-linked role or choose Choose a role from your account and then select the role to use.
- Under Amazon S3 bucket, specify the bucket to use or create a bucket and optionally include a prefix.
- Under Amazon SNS topic, select an Amazon SNS topic from your account or create one. For more information about Amazon SNS, see the Amazon Simple Notification Service Getting Started Guide.
- Choose Save.
To go deeper, follow the AWS security best practices for AWS Config.
Amazon EC2
Amazon Elastic Compute Cloud (Amazon EC2) is a web service that provides resizable computing capacity that you use to build and host your software systems. Therefore, EC2 is one of the core services of AWS and it is necessary to know the best security practices and how to secure EC2.
16.- Ensure attached EBS volumes are encrypted at rest 🟥
It is to check whether the EBS volumes that are in an attached state are encrypted. To pass this check, EBS volumes must be in use and encrypted. If the EBS volume is not attached, then it is not subject to this check.
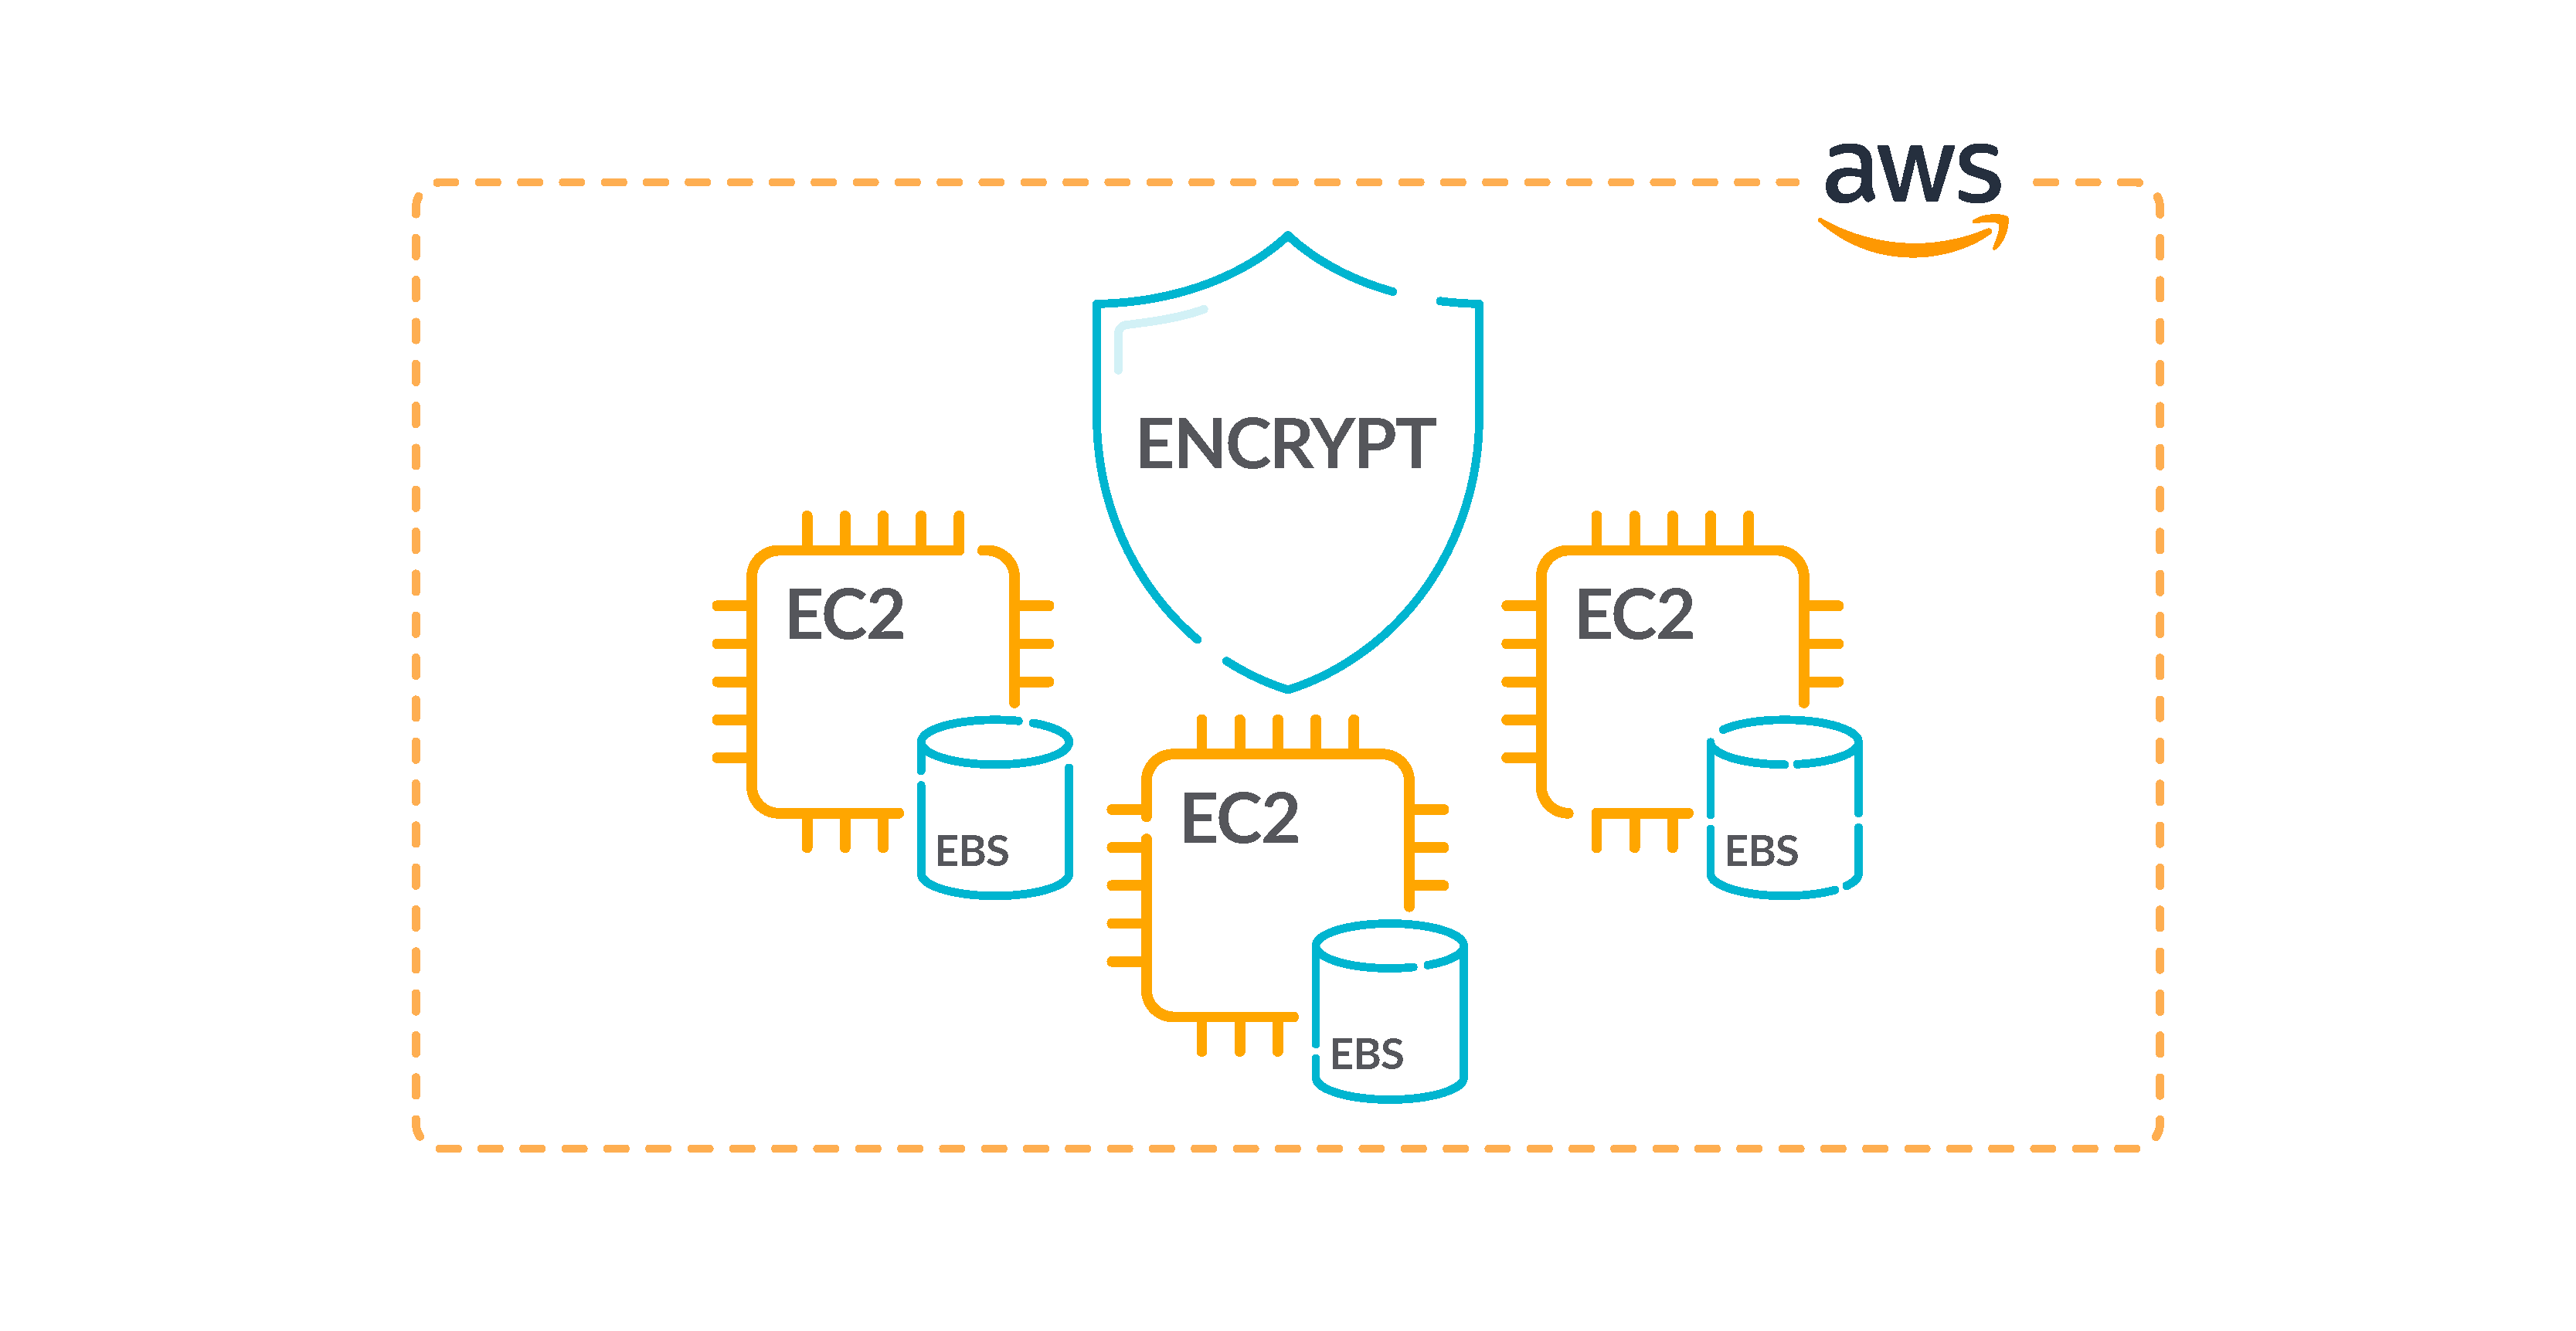
For an added layer of security to your sensitive data in EBS volumes, you should enable EBS encryption at rest. Amazon EBS encryption offers a straightforward encryption solution for your EBS resources that doesn’t require you to build, maintain, and secure your own key management infrastructure. It uses KMS keys when creating encrypted volumes and snapshots.
Run the describe-volumes command to determine if your EC2 Elastic Block Store volume is encrypted:
aws ec2 describe-volumes
	--filters Name=attachment.instance-id, Values=INSTANCE_IDCode language: Perl (perl)
The command output should reveal the instance EBS volume encryption status (true for enabled, false for disabled).
There is no direct way to encrypt an existing unencrypted volume or snapshot. You can only encrypt a new volume or snapshot when you create it.
If you enable encryption by default, Amazon EBS encrypts the resulting new volume or snapshot by using your default key for Amazon EBS encryption. Even if you have not enabled encryption by default, you can enable encryption when you create an individual volume or snapshot. In both cases, you can override the default key for Amazon EBS encryption and choose a symmetric customer managed key.
17.- Enable VPC flow logging in all VPCs 🟩
terraform {
  required_providers {
    sysdig = {
      source = "sysdiglabs/sysdig"
      version = ">=0.5"
    }
  }
}

provider "sysdig" {
  sysdig_secure_url="https://secure.sysdig.com"
}

resource "sysdig_secure_posture_control" "enabled_vpc_flow_logs" {
  name = "Logging - Enabled VPCs Flow Logs"
  description = "VPC Flow Logs provide visibility into network traffic that traverses the VPC and can be used to detect anomalous traffic or insight during security workflows."
  resource_kind = "AWS_CLOUD_TRAIL"
  severity = "Low"
  rego = <<-EOF
    package sysdig

    import future.keywords.if
    import future.keywords.in

    default risky := false

    risky if {
	not is_valid
    }

    is_valid if {
	some f in input.FlowLogs
	f.FlowLogStatus == "ACTIVE"
    }
  EOF
  remediation_details = <<-EOF
    ## Remediation Impact
    By default, CloudWatch Logs will store Logs indefinitely unless a specific retention period is defined for the log group. When choosing the number of days to retain, keep in mind the average number of days it takes an organization to realize they have been breached is 210 days (at the time of this writing). Since additional time is required to research a breach, a minimum 365 day retention policy allows time for detection and research. You may also wish to archive the logs to a cheaper storage service rather than simply deleting them. See the following AWS resource to manage CloudWatch Logs retention periods:

    https://docs.aws.amazon.com/AmazonCloudWatch/latest/logs/WhatIsCloudWatchLogs.html

    ## Remediate Using AWS Console
    Perform the following to determine if VPC Flow logs is enabled:

    1. Sign into the management console.
    2. Select Services then VPC.
    3. In the left navigation pane, select Your VPCs.
    4. Select a VPC.
    5. In the right pane, select the Flow Logs tab.
    6. If no Flow Log exists, click Create Flow Log.
    7. For Filter, select Reject.
    8. Enter in a Role and Destination Log Group.
    9. Click Create Log Flow.
    10. Click on CloudWatch Logs Group.

    **Note**: Setting the filter to Reject will dramatically reduce the logging data accumulation for this recommendation and provide sufficient information for the purposes of breach detection, research and remediation. However, during periods of least privilege security group engineering, setting this the filter to All can be very helpful in discovering existing traffic flows required for proper operation of an already running environment.
  EOF
}

Code language: Perl (perl)
18.- Confirm the VPC default security group does not allow inbound and outbound traffic 🟩
The rules for the default security group allow all outbound and inbound traffic from network interfaces (and their associated instances) that are assigned to the same security group.
We do not recommend using the default security group. Because the default security group cannot be deleted, you should change the default security group rules setting to restrict inbound and outbound traffic. This prevents unintended traffic if the default security group is accidentally configured for resources, such as EC2 instances.
Get the description of the default security group within the selected region:
aws ec2 describe-security-groups
	--region REGION
	--filters Name=group-name,Values='default'
	--output table
	--query 'SecurityGroups[*].IpPermissions[*].IpRanges'Code language: Perl (perl)
If this command does not return any output, then the default security group does not allow public inbound traffic. Otherwise, it should return the inbound traffic source IPs defined, as in the following example:
------------------------
|DescribeSecurityGroups|
+----------------------+
| CidrIp |
+----------------------+
| 0.0.0.0/0 |
| ::/0 |
| 1.2.3.4/32 |
| 1.2.3.5/32 |
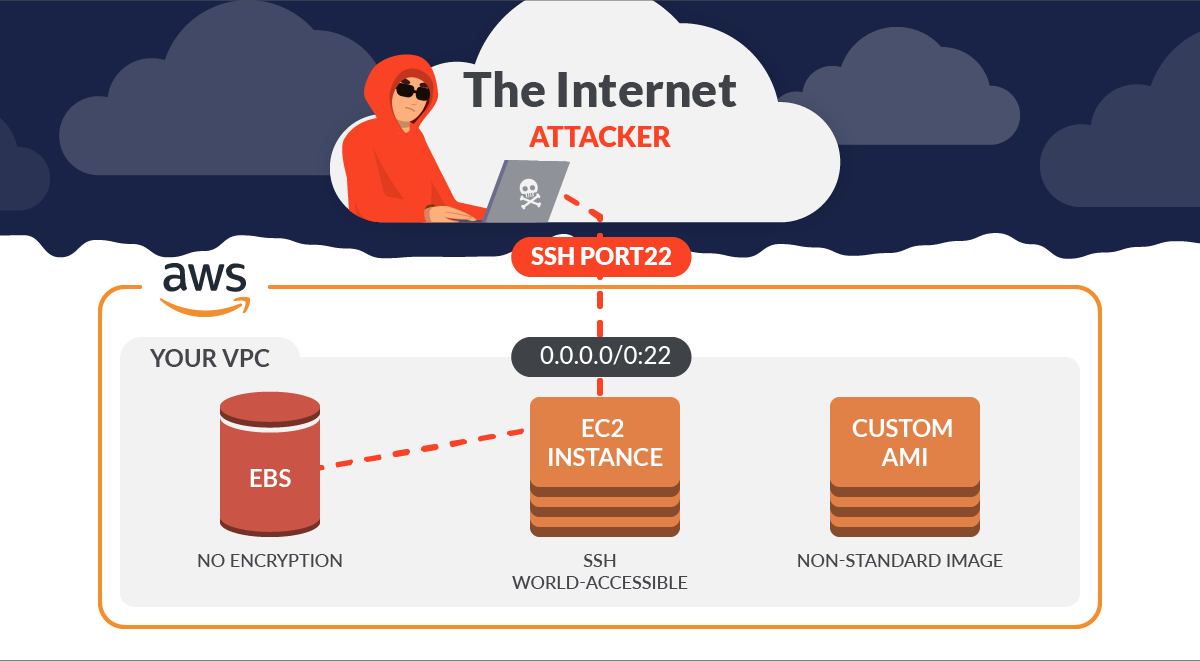
+----------------------+Code language: Perl (perl)If the IPs returned are 0.0.0.0/0 or ::/0, then the selected default security group is allowing public inbound traffic. We’ve explained previously what the real threats are when securing SSH on EC2.
To remediate this issue, create new security groups and assign those security groups to your resources. To prevent the default security groups from being used, remove their inbound and outbound rules.
19.- Enable EBS default encryption 🟥
When encryption is enabled for your account, Amazon EBS volumes and snapshot copies are encrypted at rest. This adds an additional layer of protection for your data. For more information, see Encryption by default in the Amazon EC2 User Guide for Linux Instances.
Note that following instance types do not support encryption: R1, C1, and M1.
Run the get-ebs-encryption-by-default command to know whether EBS encryption by default is enabled for your AWS cloud account in the selected region:
aws ec2 get-ebs-encryption-by-default
	--region REGION
	--query 'EbsEncryptionByDefault'Code language: Perl (perl)
If the command returns false, the encryption of data at rest by default for new EBS volumes is not enabled in the selected AWS region. Fix it with the following command:
aws ec2 enable-ebs-encryption-by-default
	--region REGIONCode language: Perl (perl)
AWS Database Migration Service (DMS)
AWS Database Migration Service (AWS DMS) is a cloud service that makes it easy to migrate relational databases, data warehouses, NoSQL databases, and other types of data stores. You can use AWS DMS to migrate your data into the AWS Cloud or between combinations of cloud and on-premises setups.
20.- Verify AWS Database Migration Service replication instances are not public 🟥
Ensure that your Amazon Database Migration Service (DMS) is not publicly accessible from the Internet in order to avoid exposing private data and minimize security risks. A DMS replication instance should have a private IP address and the Publicly Accessible feature disabled when both the source and the target databases are in the same network that is connected to the instance’s VPC through a VPN, VPC peering connection, or using an AWS Direct Connect dedicated connection.
- Sign in to AWS Management Console at https://console.aws.amazon.com/dms/.
- In the left navigation panel, choose Replication instances.
- Select the DMS replication instance that you want to examine to open the panel with the resource configuration details.
- Select the Overview tab from the dashboard bottom panel and check the Publicly accessible configuration attribute value. If the attribute value is set to Yes, the selected Amazon DMS replication instance is accessible outside the Virtual Private Cloud (VPC) and can be exposed to security risks. To fix it, do the following:
- Click the Create replication instance button from the dashboard top menu to initiate the launch process.
- On Create replication instance page, perform the following:
- Uncheck Publicly accessible checkbox to disable the public access to the new replication instance. If this setting is disabled, Amazon DMS will not assign a public IP address to the instance at creation and you will not be able to connect to the source/target databases outside the VPC.
- Provide a unique name for the new replication instance within the Name box, then configure the rest of the instance settings using the configuration information copied at step No. 5.
- Click Create replication instance to launch your new Amazon DMS instance.
- Update your database migration plan by developing a new migration task to include the newly created AWS DMS replication instance.
- To stop adding charges for the old replication instance:
- Select the old DMS instance, then click the Delete button from the dashboard top menu.
- Within the Delete replication instance dialog box, review the instance details then click Delete to terminate the selected DMS resource.
- Repeat step Nos. 3 and 4 for each AWS DMS replication instance provisioned in the selected region.
- Change the region from the console navigation bar and repeat the process for all the other regions.
Learn more about AWS security best practices for AWS Database Migration Service.
Amazon Elastic Block Store (EBS)
Amazon Elastic Block Store (Amazon EBS) provides block level storage volumes for use with EC2 instances. EBS volumes behave like raw, unformatted block devices. You can mount these volumes as devices on your instances. EBS volumes that are attached to an instance are exposed as storage volumes that persist independently from the life of the instance. You can create a file system on top of these volumes, or use them in any way you would use a block device (such as a hard drive).
You can dynamically change the configuration of a volume attached to an instance.
21.- Ensure Amazon EBS snapshots are not public, or to be restored by anyone 🟥
EBS snapshots are used to back up the data on your EBS volumes to Amazon S3 at a specific point in time. You can use the snapshots to restore previous states of EBS volumes. It is rarely acceptable to share a snapshot with the public. Typically, the decision to share a snapshot publicly was made in error or without a complete understanding of the implications. This check helps ensure that all such sharing was fully planned and intentional.
Get the list of all EBS volume snapshots:
aws ec2 describe-snapshots
	--region REGION
	--owner-ids ACCOUNT_ID
	--filters Name=status,Values=completed
	--output table
	--query 'Snapshots[*].SnapshotId'Code language: Perl (perl)
For each snapshot, check its createVolumePermission attribute:
aws ec2 describe-snapshot-attribute
	--region REGION
	--snapshot-id SNAPSHOT_ID
	--attribute createVolumePermission
	--query 'CreateVolumePermissions[]'Code language: Perl (perl)
The output from the previous command returns information about the permissions for creating EBS volumes from the selected snapshot:
{
    "Group": "all"
}Code language: Perl (perl)
If the command output is "Group": "all", the snapshot is accessible to all AWS accounts and users. If this is the case, take your time to run this command to fix it:
aws ec2 modify-snapshot-attribute
	--region REGION
	--snapshot-id SNAPSHOT_ID
	--attribute createVolumePermission
	--operation-type remove
	--group-names allCode language: Perl (perl)
Amazon OpenSearch Service
Amazon OpenSearch Service is a managed service that makes it easy to deploy, operate, and scale OpenSearch clusters in the AWS Cloud. Amazon OpenSearch Service is the successor to Amazon Elasticsearch Service and supports OpenSearch and legacy Elasticsearch OSS (up to 7.10, the final open source version of the software). When you create a cluster, you have the option of which search engine to use.
22.- Ensure Elasticsearch domains have encryption at rest enabled 🟥
For an added layer of security for your sensitive data in OpenSearch, you should configure your OpenSearch to be encrypted at rest. Elasticsearch domains offer encryption of data at rest. The feature uses AWS KMS to store and manage your encryption keys. To perform the encryption, it uses the Advanced Encryption Standard algorithm with 256-bit keys (AES-256).
List all Amazon OpenSearch domains currently available:
aws es list-domain-names --region REGIONCode language: Perl (perl)Now determine if data-at-rest encryption feature is enabled with:
aws es describe-elasticsearch-domain
	--region REGION
	--domain-name DOMAIN_NAME
	--query 'DomainStatus.EncryptionAtRestOptions'Code language: Perl (perl)
If the Enabled flag is false, the data-at-rest encryption is not enabled for the selected Amazon ElasticSearch domain. Fix it with:
aws es create-elasticsearch-domain
	--region REGION
	--domain-name DOMAIN_NAME
	--elasticsearch-version 5.5
	--elasticsearch-cluster-config InstanceType=m4.large.elasticsearch,InstanceCount=2
	--ebs-options EBSEnabled=true,VolumeType=standard,VolumeSize=200
	--access-policies file://source-domain-access-policy.json
	--vpc-options SubnetIds=SUBNET_ID,SecurityGroupIds=SECURITY_GROUP_ID
	--encryption-at-rest-options Enabled=true,KmsKeyId=KMS_KEY_IDCode language: Perl (perl)
Once the new cluster is provisioned, upload the existing data (exported from the original cluster) to the newly created cluster.
After all the data is uploaded, it is safe to remove the unencrypted OpenSearch domain to stop incurring charges for the resource:
aws es delete-elasticsearch-domain
	--region REGION
	--domain-name DOMAIN_NAMECode language: Perl (perl)
Amazon SageMaker
Amazon SageMaker is a fully-managed machine learning service. With Amazon SageMaker, data scientists and developers can quickly build and train machine learning models, and then deploy them into a production-ready hosted environment.
23.- Verify SageMaker notebook instances do not have direct internet access 🟨
If you configure your SageMaker instance without a VPC, then, by default, direct internet access is enabled on your instance. You should configure your instance with a VPC and change the default setting to Disable — Access the internet through a VPC.
To train or host models from a notebook, you need internet access. To enable internet access, make sure that your VPC has a NAT gateway and your security group allows outbound connections. To learn more about how to connect a notebook instance to resources in a VPC, see “Connect a notebook instance to resources in a VPC” in the Amazon SageMaker Developer Guide.
You should also ensure that access to your SageMaker configuration is limited to only authorized users. Restrict users’ IAM permissions to modify SageMaker settings and resources.
- Sign in to the AWS Management Console at https://console.aws.amazon.com/sagemaker/.
- In the navigation panel, under Notebook, choose Notebook instances.
- Select the SageMaker notebook instance that you want to examine and click on the instance name (link).
- On the selected instance configuration page, within the Network section, check for any VPC subnet IDs and security group IDs. If these network configuration details are not available, instead the following status is displayed: “No custom VPC settings applied.” The notebook instance is not running inside a VPC network, therefore you can follow the steps described in this conformity rule to deploy the instance within a VPC. Otherwise, if the notebook instance is running inside a VPC, check the Direct internet access configuration attribute value. If the attribute value is set to Enabled, the selected Amazon SageMaker notebook instance is publicly accessible.
If the notebook has direct internet access enabled, fix it by recreating it with this CLI command:
aws sagemaker create-notebook-instance
	--region REGION
	--notebook-instance-name NOTEBOOK_INSTANCE_NAME
	--instance-type INSTANCE_TYPE
	--role-arn ROLE_ARN
	--kms-key-id KMS_KEY_ID
	--subnet-id SUBNET_ID
	--security-group-ids SECURITY_GROUP_ID
	--direct-internet-access DisabledCode language: Perl (perl)
AWS Lambda
With AWS Lambda, you can run code without provisioning or managing servers. You pay only for the compute time that you consume — there’s no charge when your code isn’t running. You can run code for virtually any type of application or backend service — all with zero administration.
Just upload your code and Lambda takes care of everything required to run and scale your code with high availability. You can set up your code to automatically trigger from other AWS services or call it directly from any web or mobile app.
It is important to mention the problems that could occur if we do not secure or audit the code we execute in our lambda functions, as you could be the initial access for attackers.
24.- Use supported runtimes for Lambda functions 🟨
This AWS security best practice recommends checking that the Lambda function settings for runtimes match the expected values set for the supported runtimes for each language. This control checks function settings for the following runtimes: nodejs16.x, nodejs14.x, nodejs12.x, python3.9, python3.8, python3.7, ruby2.7, java11, java8, java8.al2, go1.x, dotnetcore3.1, and dotnet6.
The AWS Config rule ignores functions that have a package type of image.
Lambda runtimes are built around a combination of operating system, programming language, and software libraries that are subject to maintenance and security updates. When a runtime component is no longer supported for security updates, Lambda deprecates the runtime. Even though you cannot create functions that use the deprecated runtime, the function is still available to process invocation events. Make sure that your Lambda functions are current and do not use out-of-date runtime environments.
Get the names of all Amazon Lambda functions available in the selected AWS cloud region:
aws lambda list-functions
  --region REGION
  --output table
  --query 'Functions[*].FunctionName'Code language: Perl (perl)
Now examine the runtime information available for each functions:
aws lambda get-function-configuration
  --region REGION
  --function-name FUNCTION_NAME
  --query 'Runtime'Code language: Perl (perl)
Compare the value returned with the updated list of Amazon Lambda runtimes supported by AWS, as well as the end of support plan listed in the AWS documentation.
If the runtime is unsupported, fix it to use the latest runtime version. For example:
aws lambda update-function-configuration
  --region REGION
  --function-name FUNCTION_NAME
  --runtime "nodejs16.x"Code language: Perl (perl)
AWS Key Management Service (AWS KMS)
AWS Key Management Service (AWS KMS) is an encryption and key management service scaled for the cloud. AWS KMS keys and functionality are used by other AWS services, and you can use them to protect data in your own applications that use AWS.
25.- Do not unintentionally delete AWS KMS keys 🟨
KMS keys cannot be recovered once deleted. Data encrypted under a KMS key is also permanently unrecoverable if the KMS key is deleted. If meaningful data has been encrypted under a KMS key scheduled for deletion, consider decrypting the data or re-encrypting the data under a new KMS key unless you are intentionally performing a cryptographic erasure.
When a KMS key is scheduled for deletion, a mandatory waiting period is enforced to allow time to reverse the deletion if it was scheduled in error. The default waiting period is 30 days, but it can be reduced to as short as seven days when the KMS key is scheduled for deletion. During the waiting period, the scheduled deletion can be canceled and the KMS key will not be deleted.
List all Customer Master keys available in the selected AWS region:
aws kms list-keys --region REGIONCode language: Perl (perl)Run the describe-key command for each CMK to identify any keys scheduled for deletion:
aws kms describe-key --key-id KEY_IDCode language: Perl (perl)The output for this command shows the selected key metadata. If the KeyState value is set to PendingDeletion, the key is scheduled for deletion. But if this is not what you actually want (the most common case), unschedule the deletion with:
aws kms cancel-key-deletion --key-id KEY_IDCode language: Perl (perl)Amazon GuardDuty
Amazon GuardDuty is a continuous security monitoring service. Amazon GuardDuty can help to identify unexpected and potentially unauthorized or malicious activity in your AWS environment.
26.- Enable GuardDuty 🟨
It is highly recommended that you enable GuardDuty in all supported AWS Regions. Doing so allows GuardDuty to generate findings about unauthorized or unusual activity, even in Regions that you do not actively use. This also allows GuardDuty to monitor CloudTrail events for global AWS services, such as IAM.
List the IDs of all the existing Amazon GuardDuty detectors. A detector is an object that represents the AWS GuardDuty service. A detector must be created in order for GuardDuty to become operational:
aws guardduty list-detectors
	--region REGION
	--query 'DetectorIds'Code language: Perl (perl)
If the list-detectors command output returns an empty array, then there are no GuardDuty detectors available. In this instance, the Amazon GuardDuty service is not enabled within your AWS account. If this is the case, create a detector with the following command:
aws guardduty create-detector
	--region REGION
	--enableCode language: Perl (perl)
Once the detector is enabled, it will start to pull and analyze independent streams of data from AWS CloudTrail, VPC flow logs, and DNS logs in order to generate findings.
AWS compliance standards & benchmarks
Securing your AWS infrastructure is an ongoing commitment that demands time and diligence. A smart approach is to follow compliance standards relevant to your industry, as they outline comprehensive requirements designed to secure cloud environments effectively.
Given the continuous nature of both security and compliance, it’s beneficial to run regular policy checks using standards like the CIS Amazon Web Services Foundations Benchmark, AWS Foundational Security Best Practices, the AWS Well-Architected Framework, and the CIS Amazon Elastic Kubernetes Service (EKS) Benchmark. These audits will review your environment and identify any non-compliance with AWS security best practices, helping you stay aligned with evolving security needs.
Conclusion
Moving entirely to the cloud unlocks a wealth of opportunities, but it also introduces a broad range of attack vectors. Every AWS service you adopt comes with unique security risks that require careful attention and proactive management.
Fortunately, cloud-native security tools like Sysdig Secure can support you in this process. They provide guidance on best practices, help you meet compliance standards, and ensure alignment with AWS security best practices, empowering you to manage cloud risks confidently and effectively.
If you want to know how to configure and manage all these services, Sysdig can help you improve your Cloud Security Posture Management (CSPM). Dig deeper with the following resources:
- Improving AWS security services with Sysdig Secure
- How to Secure Amazon EC2 with Sysdig
- How to Secure AWS Route 53 with Sysdig
- Hunting AWS RDS security events with Sysdig
- Hunting malware with Amazon GuardDuty and Sysdig
Register for our Free 30-day trial and see for yourself!