


Falco Feeds extends the power of Falco by giving open source-focused companies access to expert-written rules that are continuously updated as new threats are discovered.

We have all heard about data breaches in companies like Facebook, GoDaddy, and Pocket. It's important that access to information is done properly, in a limited and controlled fashion, to avoid such breaches.
In this article, we'll cover how to enhance AWS S3 security and how to enable CloudTrail audit events for this service. We'll also explain how to perform AWS Threat Detection with Cloudtrail so you can detect suspicious activity and react as soon as possible.
Why you need to secure Amazon S3 resources
One of the main benefits of moving storage to the cloud is that people can access and use that data via the Internet. Technology offers the perfect environment for data collaboration and monetization, because data sharing is considerably more difficult in non-cloud environments.
However, you need to be careful setting up the cloud services, as a misconfiguration may leave your data on the cloud unprotected. For example, checking the wrong box could change the access controls of your S3 resources unknowingly, making that data publicly accessible.
22 Dec security researchers detected a change in AWS IAM role where AWSSupportServiceRolePolicy just got s3:GetObject permission, that means AWS Support could access to your private S3. This was reverted in a few hours.
Detect its use (and abuse) with Sysdig Secure out-of-the-box threat detection rules!
That's why you need to continuously secure your data, and set up the proper tools, to keep incidents from becoming big security issues.
How to secure an Amazon S3 Bucket via access control
By default, all Amazon S3 resources like buckets, objects, and related subresources are private. That means that only the resource owner, the AWS account that created it, can access the resource.
However, there are cases where you may want to make your data public, like static files of a website. For that, Amazon S3 offers access policy options that resource owners can use to change access.
Access policy options are broadly categorized as:
- Resource-based policies: Access policies you attach to your resources (buckets and objects) are referred to as resource-based policies. For example, bucket policies and access control lists (ACLs) are resource-based policies.
- User policies: You can also attach access policies to users in your account.
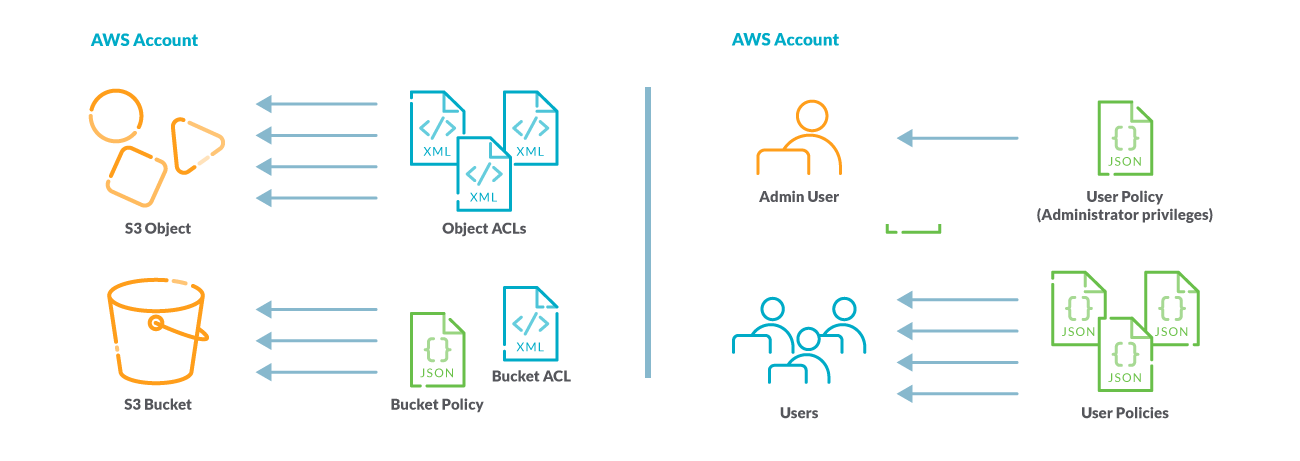
You may choose to use resource-based policies, user policies, or a combination of these two to manage permissions over your Amazon S3 resources.
Unfortunately, some bucket access control lists (ACL) combinations make your resources very easily accessible publicly. Misconfigured ACLs are one of the biggest reasons why S3 data leaks are so widespread, which is why AWS recommends against using them.
Managing the access to Amazon S3 resources is the cornerstone of a strong cloud data storage security governance.
How To Record AWS CloudTrail Events
AWS CloudTrail logs can be leveraged to perform cloud security monitoring across AWS accounts. By enabling AWS S3 object-level logging, we can capture information on all requests made to an AWS S3 resource, such as ListObjects, PutObject, GetObject, DeleteObject, and DeleteObjects. These events are called data events.
By default, CloudTrail trails don't log data events, but you can configure trails to log data events for S3 buckets that you specify, or to log data events for all the Amazon S3 buckets in your AWS account. Once enabled, every action taken over your infrastructure resources results in an event in AWS CloudTrail.
These audit logs are the first step for cloud security monitoring involving our AWS resources, and implement Amazon S3 security.
Now, let's see how to enable S3 CloudTrail events.
The following steps take on the assumption that you already have deployed CloudTrail and are monitoring the audit events. We recommend you try our AWS Workshop, where we offer tailored step-by-step instructions on how to use CloudTrail for cloud security.
The first step would be to create an S3 resource in your AWS account, if you haven't already. Feel free to create a bucket, or upload a test file to your bucket.
The second step would be to enable data events for S3 resources in CloudTrail.
For that, edit your CloudTrail trail.
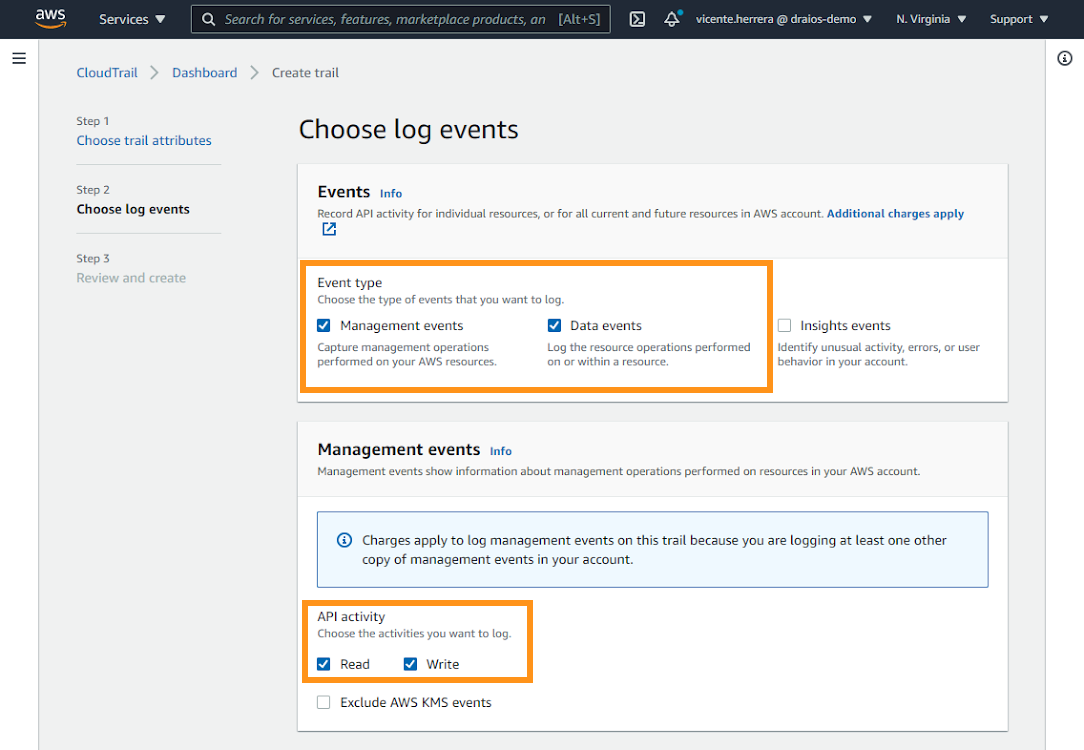
From there, mark the Data events checkbox and select S3 as the event source.
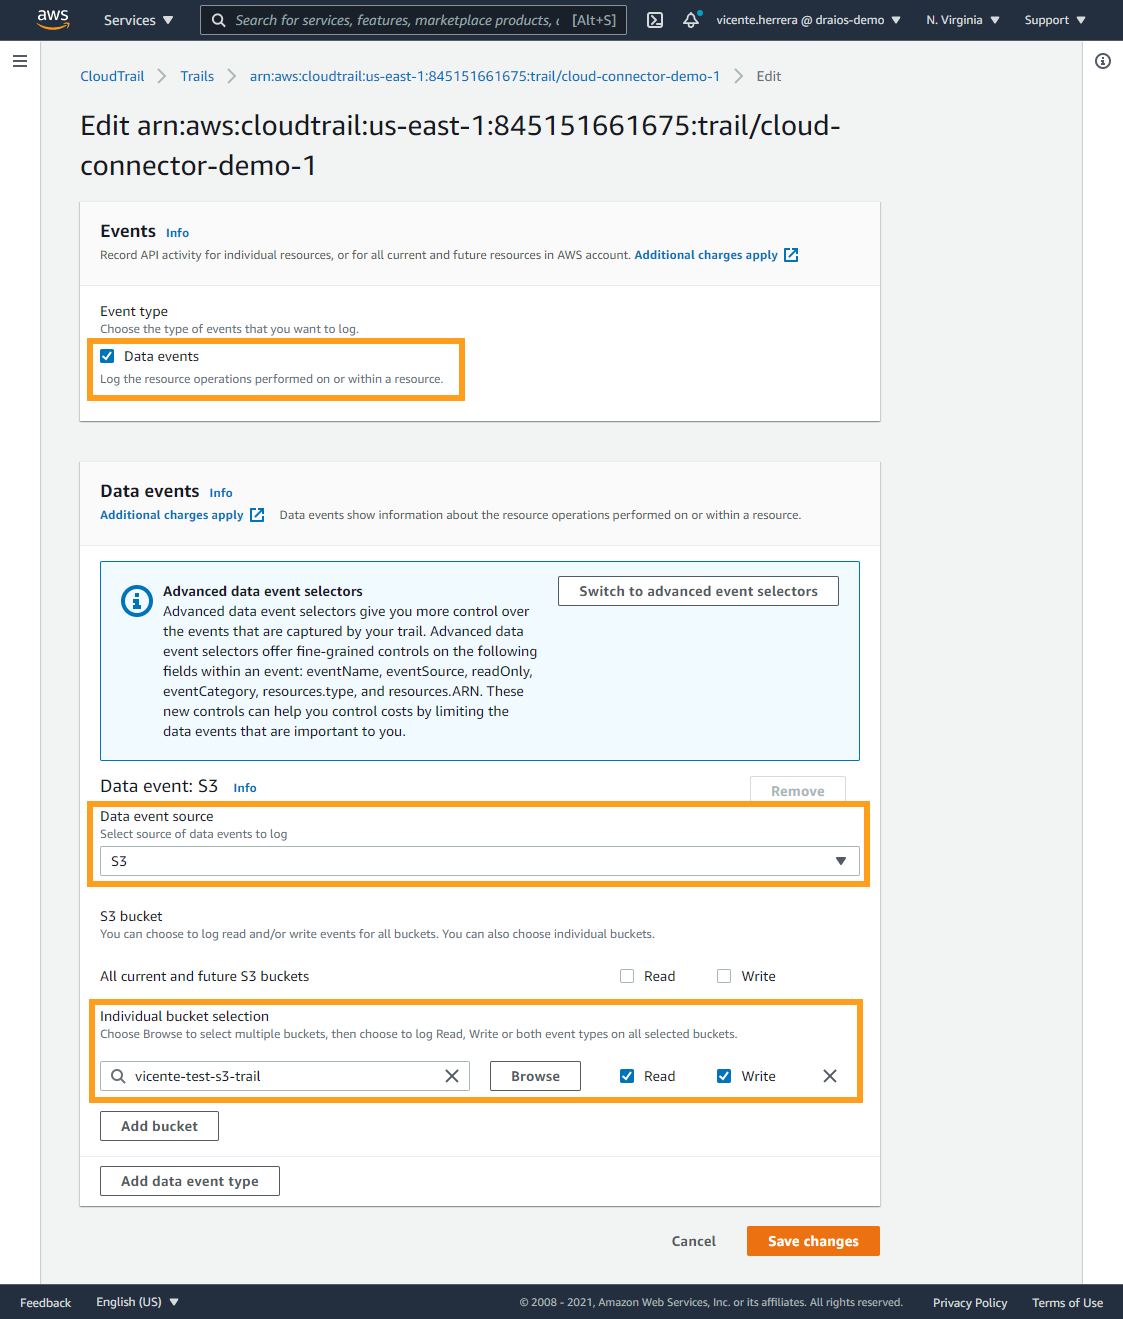
At the bottom, you can specify what buckets to audit – whether to audit all buckets, or just those you want to control their access. You can also specify differentiated read and/or write access for each respective bucket.
Also, make sure your trail has enabled Management events and Data events, as well as Read and Write API activity.
Remember that when creating or editing a trail, it may take up to 10 minutes for new events to appear. But don't worry; events during that period are buffered and not lost.
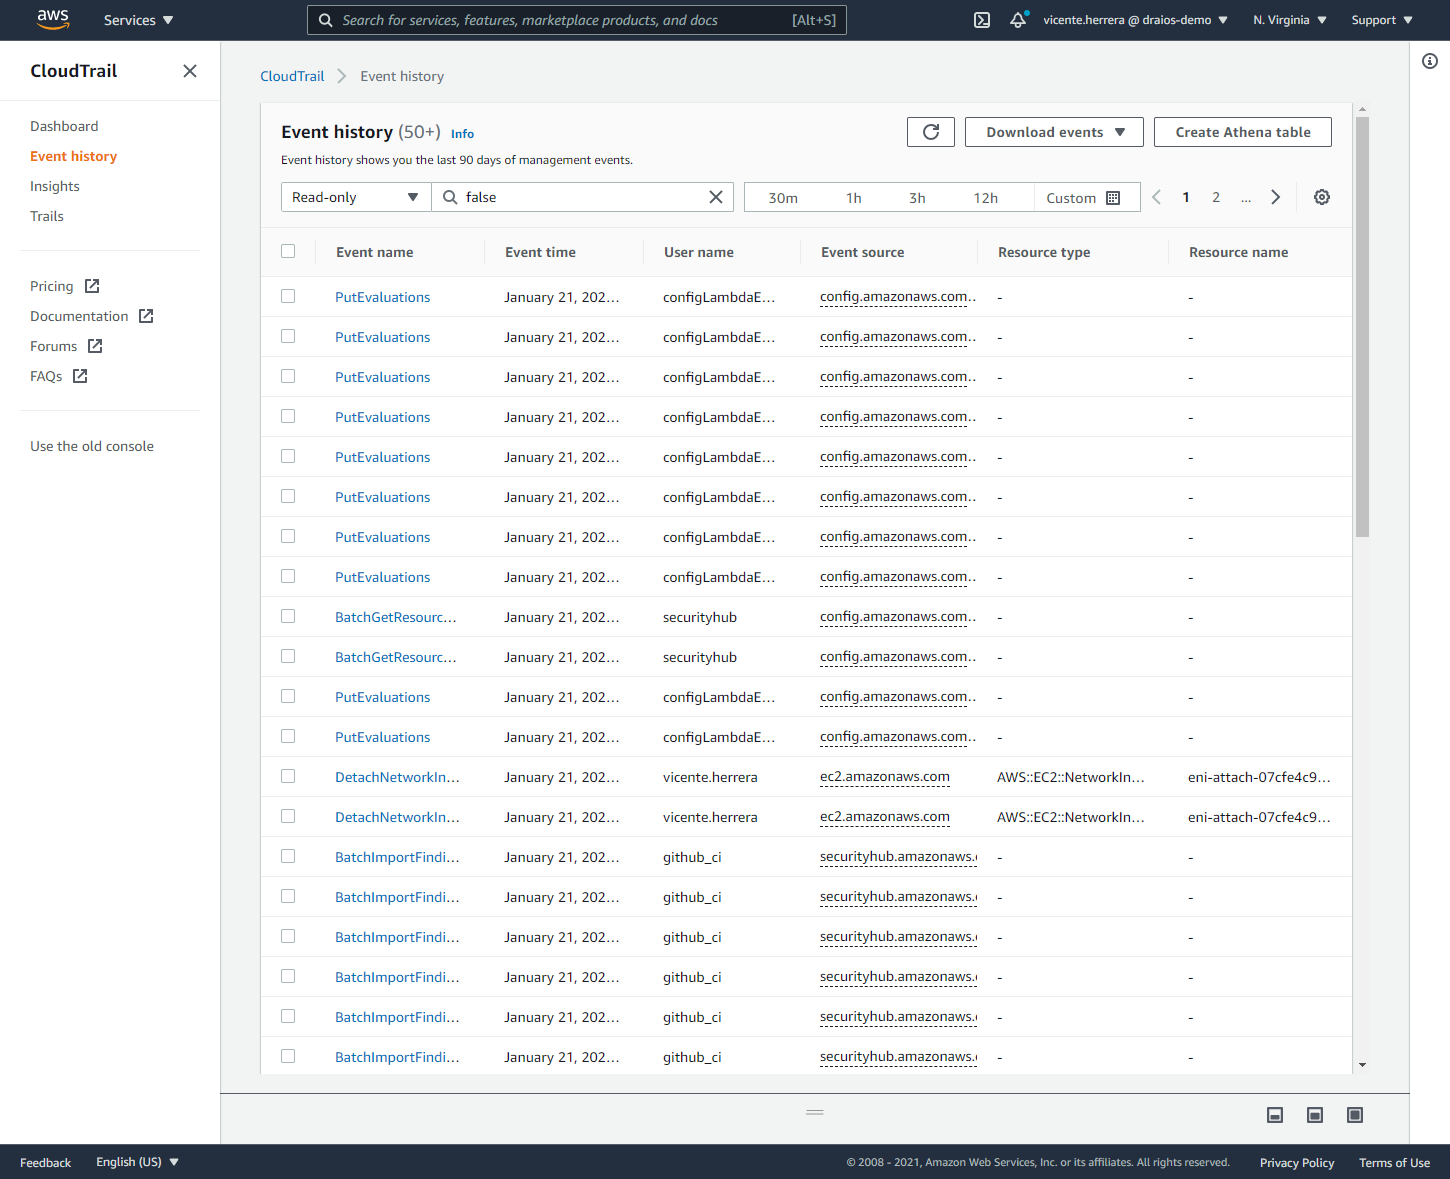
Now, we are set. When an authenticated user accesses the data in your bucket, CloudTrail will capture the event.
What do AWS CloudTrail events look like?
To validate the pipeline is working, you can simply list objects in the target bucket from AWS Web Console and wait for the event to appear.
Another quick example would be adding a new file to a S3 bucket. In that case, the consequent CloudTrail event would look like this in JSON format:
Note how:
eventSourcetells us the event comes from S3.eventNameconfirms someone added a new file.bucketNameindicates in which bucket the file was added.keycontains the file name and path.
AWS cloud security monitoring with Sysdig
As your infrastructure grows, the amount of events and operational trails can become so huge that analyzing them is not manageable anymore.
This is a consequence of CloudTrail being so efficient in recording all the events happening in our AWS account. And this might become a problem as we may fail to react to a threat in a short time, resulting in major consequences..
Solving this challenge is precisely the goal of Sysdig Cloud Connector.
The Connector is capable of analyzing every CloudTrail entry in real time and then evaluating those events against a flexible set of security rules, providing AWS threat detection.
The installation process for Sysdig Cloud Connector is fairly simple, thanks to the power of CloudFormation templates.
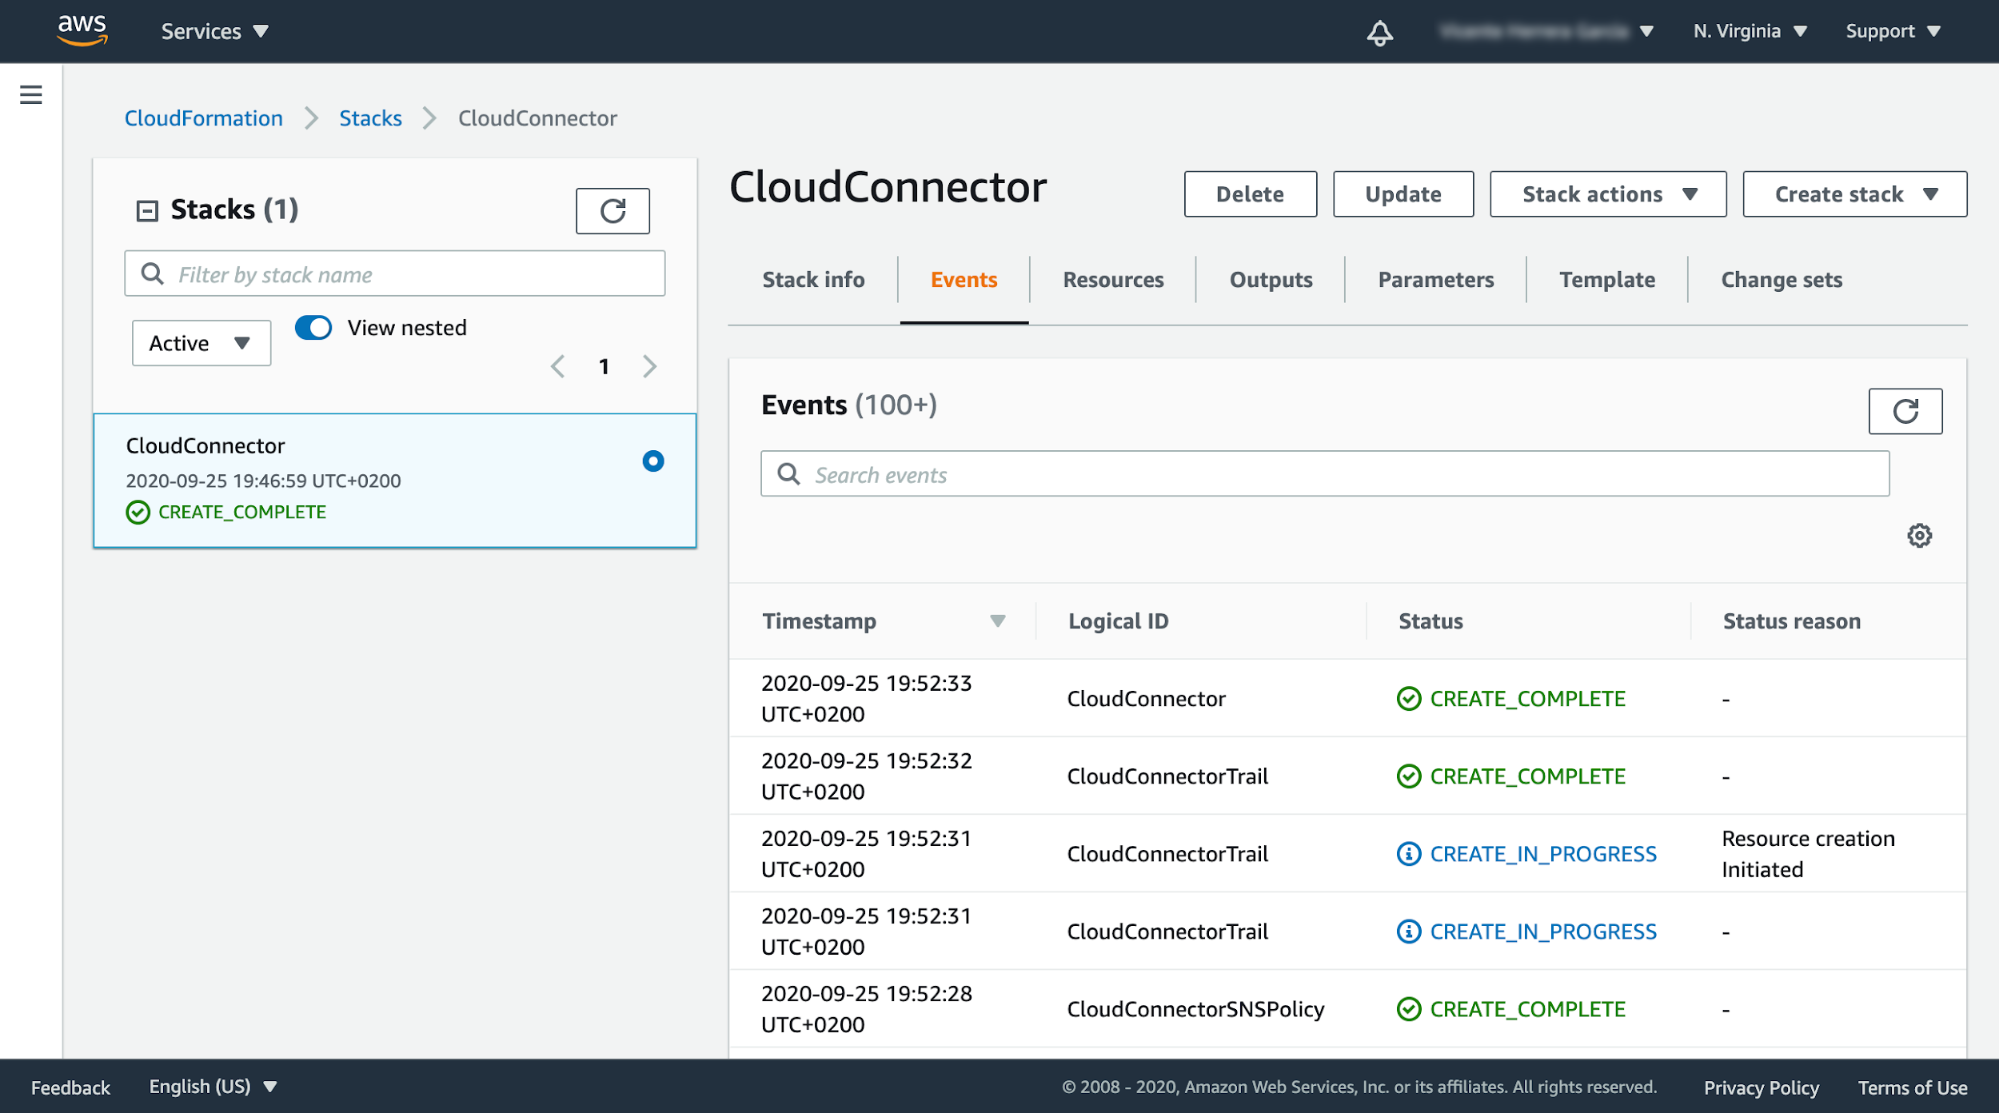
Evaluating AWS CloudTrail audit events with Falco rules and Sysdig
After enabling CloudTrail for Amazon S3 and installing the Sysdig Cloud Connector in our account, we have all we need to start detecting abnormal behavior.
Now, let's dig into how to detect problematic CloudTrail events, like AWS S3 operations, with Falco rules.
Earlier, we showed what a CloudTrail event for a new S3 file looks like:
The following Falco rule would detect such an event:
Using jevt.value and a query in jsonpath format, we can reference parts of the audit event.
We use this in the condition part of the rule:
This filters events that were processed without an error and related to the S3 service.
The same is true for %jevt.value, which we use in the output part of the rule:
This output is used to provide context information, given the case that this rule ends up generating a security event.
Deploy the custom rule to Sysdig Cloud Connector
The Sysdig Cloud Connector uses an S3 bucket to store the active Falco rules.
To deploy a custom rule, you can sync a local folder with the S3 bucket. It would be a best practice if your local folder is a git repository, so you can keep track of the changes on the rules.
We'll take a simpler route here:
First, create a rules folder.
Copy your rule to the rules folder.
From the parent folder, the one containing rules, execute the following commands:
This will sync your rules folder with your S3 bucket.
Keep in mind that for this to work, you'll need to set up the AWS CLI in your machine and your token must have enough privileges.
After restarting Cloud Connector, you can check that new rule is added with:
Wait for a minute, and then keep executing this command until a new log appears where the custom rule shows as loaded:
We can now operate over the test S3 bucket and see relevant events on the CloudWatch alert logs, or inside the AWS Security Hub findings.
We can check the latest 5 alerts from the command line using:
Wrapping Up
Cloud security is the highest priority for AWS, and that includes Amazon S3 security. However, it is also a shared responsibility between AWS and you, your company, and your DevOps teams. If your organization is not careful when securing S3 resources, and AWS environment in general, it's possible they may end up having a data breach.
In this article, we shared tips to strengthen your S3 access control, prevent misconfigurations, and protect your sensitive data. We also showed how analyzing AWS CloudTrail can help detect threats and anomalies in your AWS cloud accounts.
If you do not have a Sysdig account, you can register today for a trial. Deploy Sysdig Cloud Connector in less than 10 minutes by following instructions in this article, and start having a secured AWS account today.
You can also find Sysdig on the AWS Marketplace.